
Halloween Headboard Sign DIY
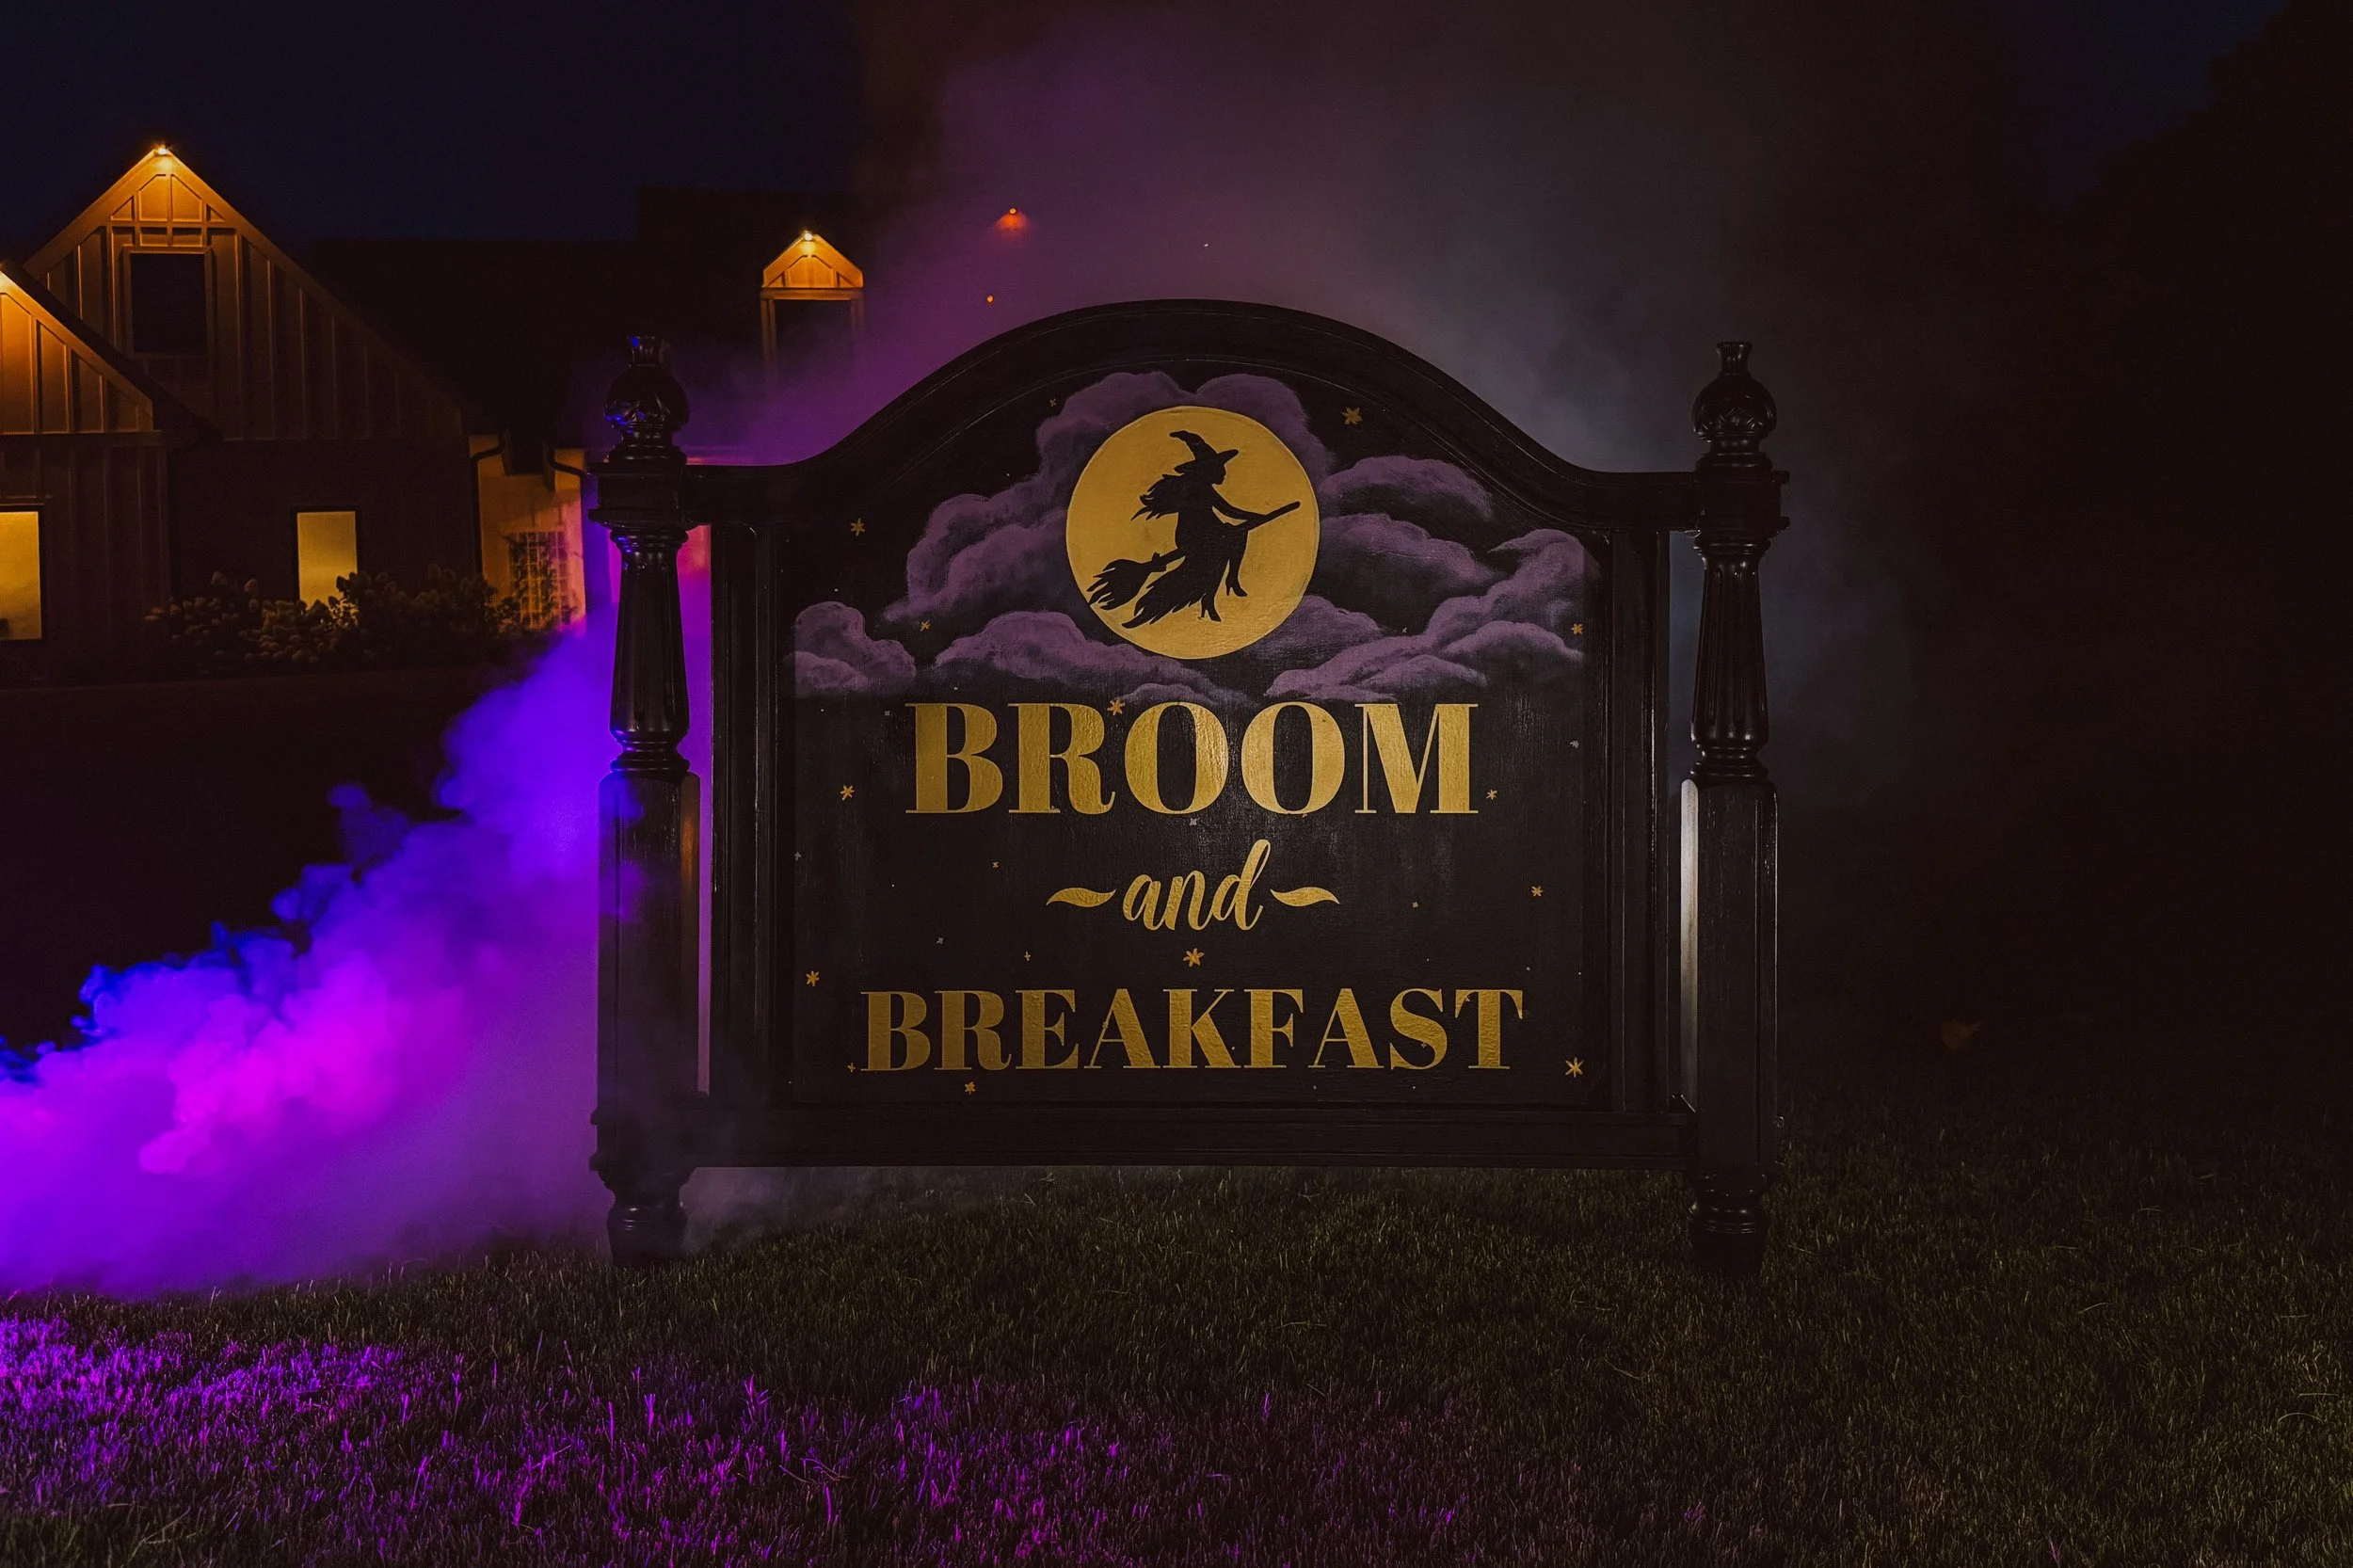
This project started when I found an old headboard on Facebook Marketplace. It was the perfect shape for what I imagined: a spooky little “Broom & Breakfast” sign for Halloween, the kind of thing you’d see outside a haunted inn in Salem.
Here’s how I turned a used headboard into a custom Halloween decoration that’s now one of my favorite DIYs ever.
What You’ll Need
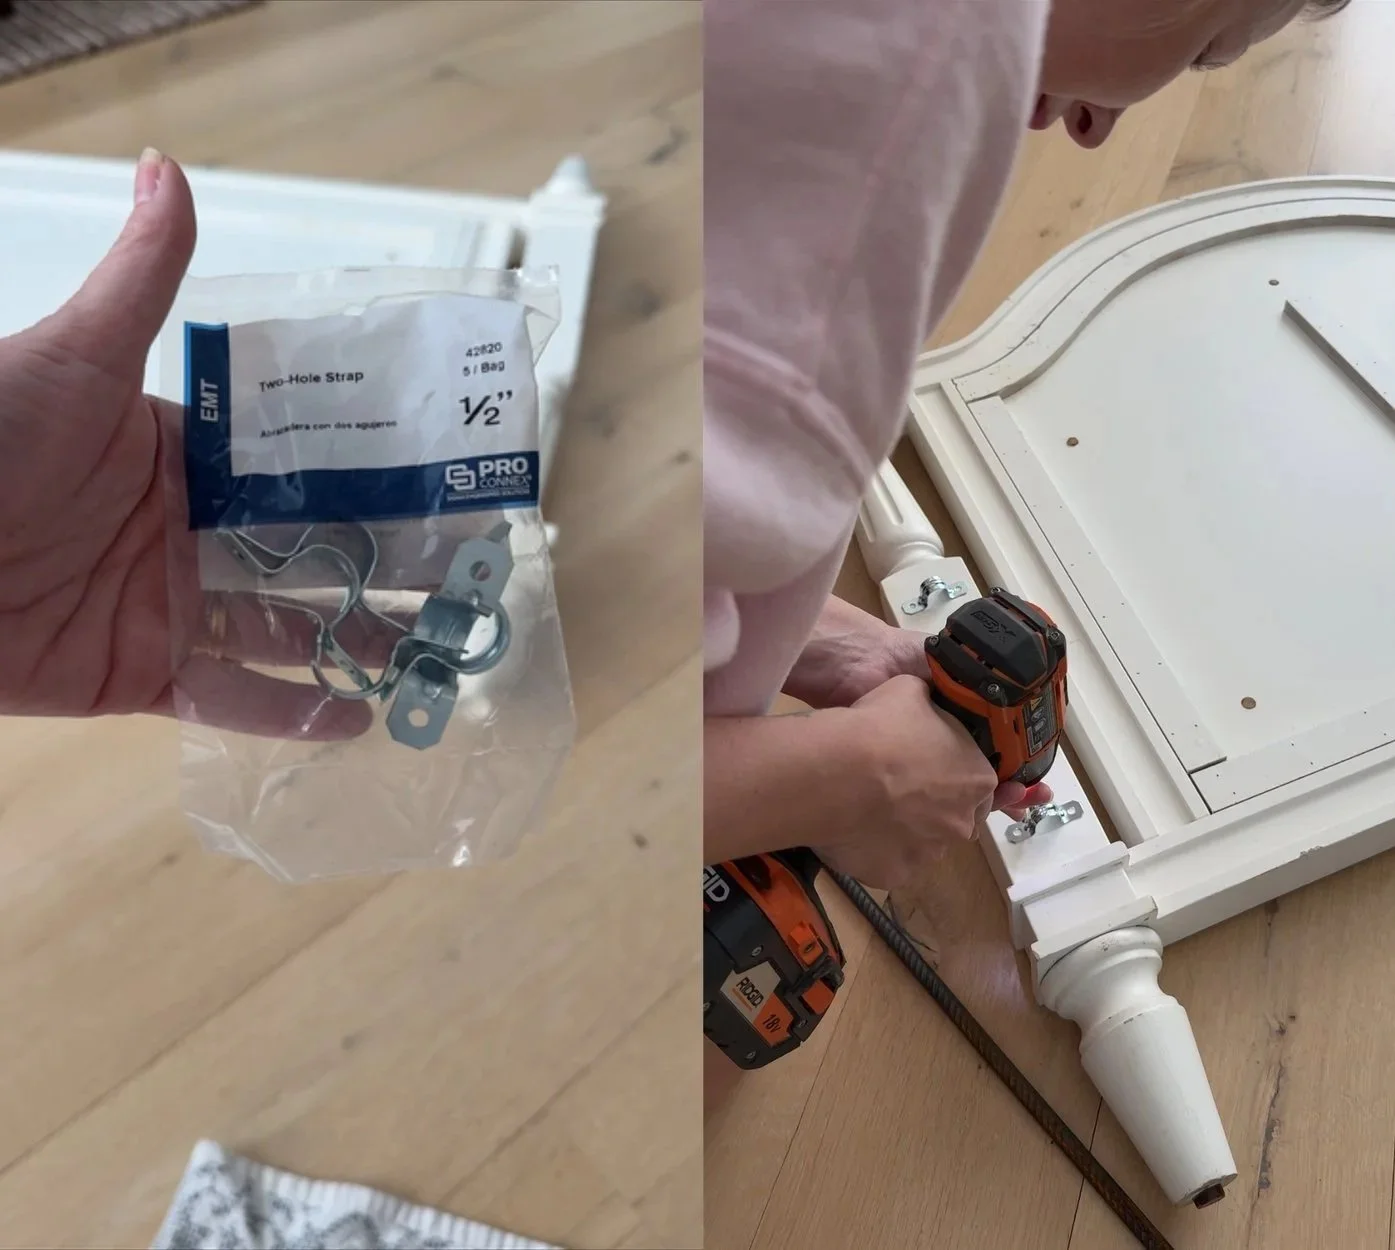
Step 1: Add Pipe Brackets
Before I started painting, I screwed on four pipe brackets to the back of the headboard. We will use these to make it stand in the yard later.
Step 2: Prime It
First things first, prime your headboard. I didn't and I regret it! Alwaysss prime!
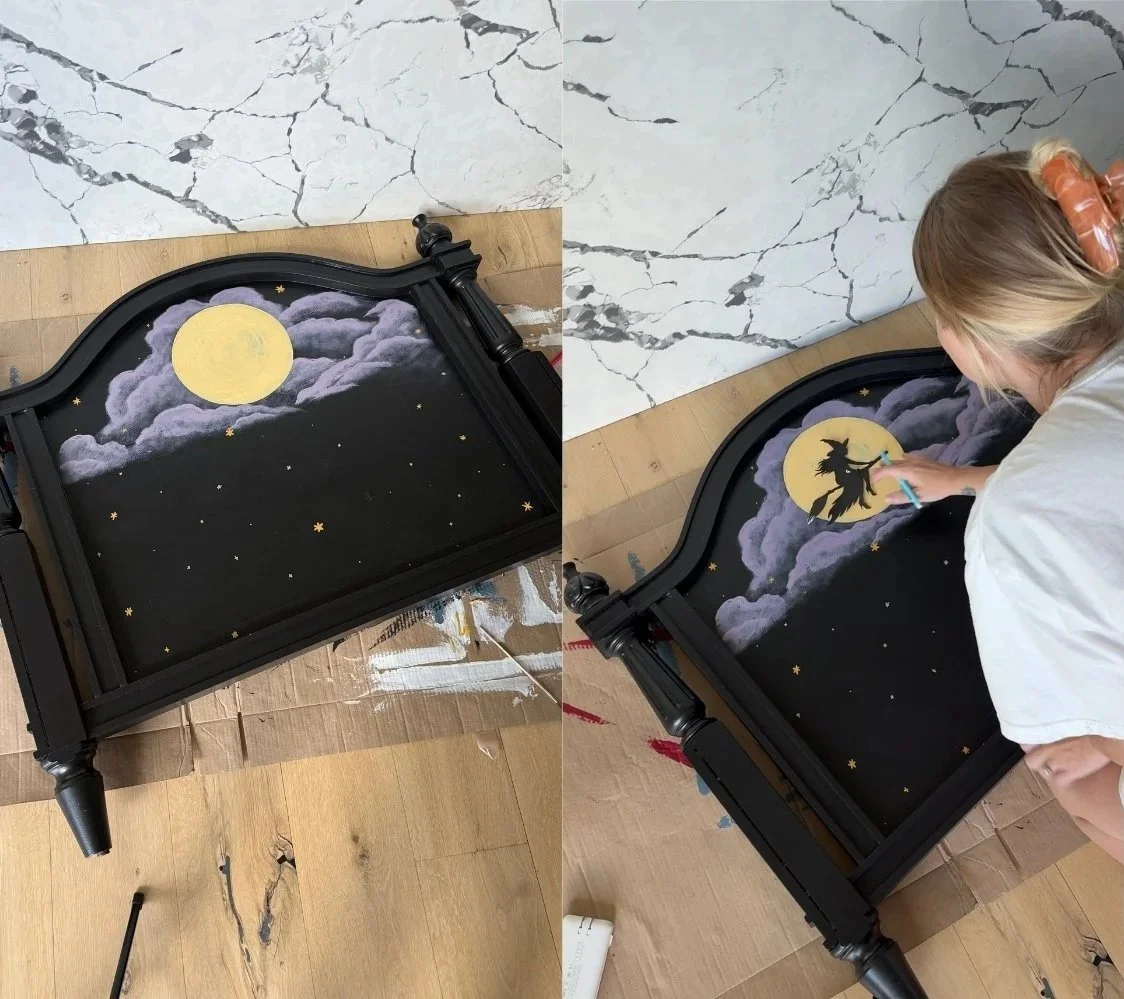
Step 3: Paint It Black
Next, I painted the entire thing black. I wanted a moody, witchy vibe and two coats did the trick for me

Step 4: Hand Paint the Clouds and Stars
To make the sign feel more dimensional, I hand-painted soft purple clouds around the moon and the witch. This part was super fun. No rules, just a youtube tutorial and blending until it looked right. I also added yellow stars around the entire front.
Step 5: Add the Moon and the Witch
Once the base coat was dry, I painted in the round yellow moon. Then I printed out a photo of a witch, cut it out, and used it to trace the outline. Then I filled it in with black paint.
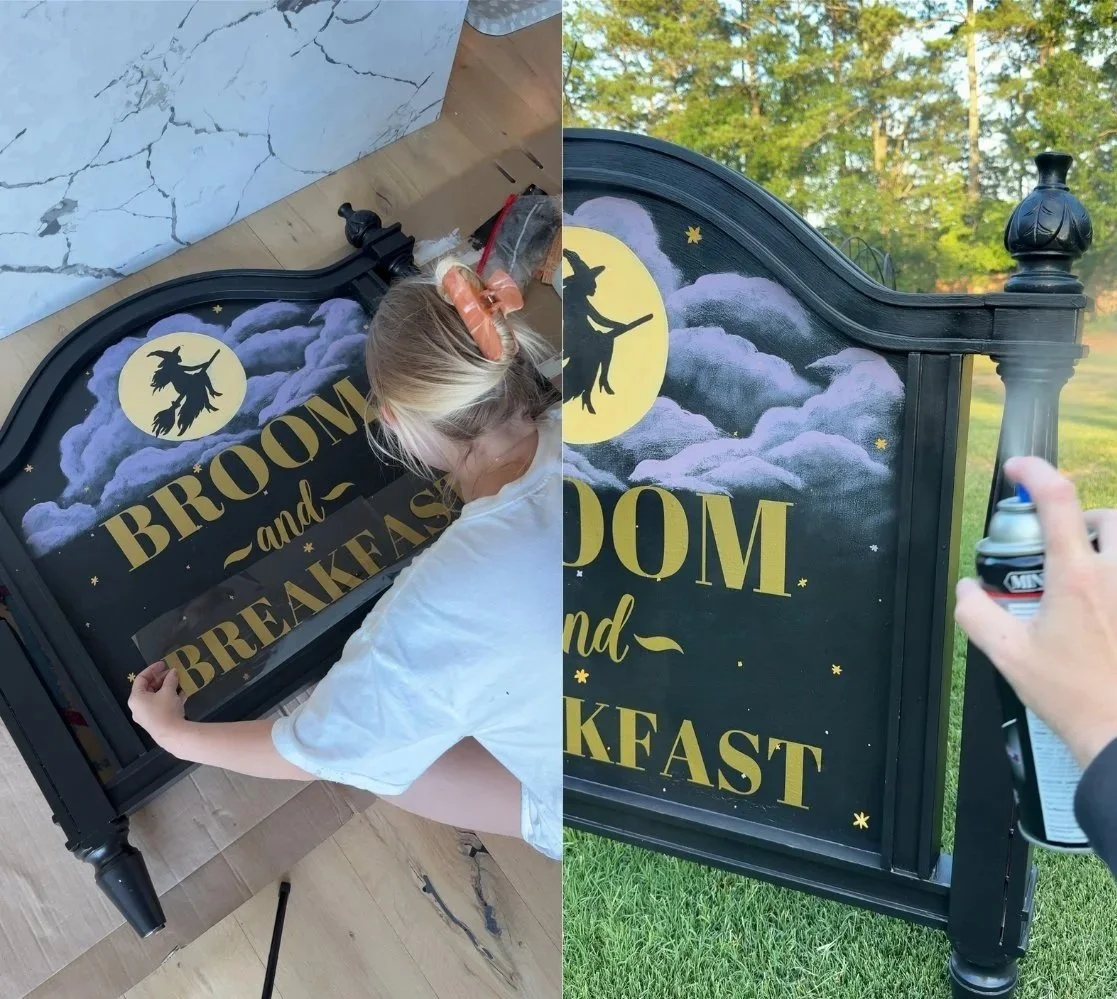
Step 6: Add the Lettering
I used my Silhouette vinyl machine to cut out the “Broom & Breakfast” letters. You could use pre-made vinyl letters or stencils too. Once the letters were positioned where I wanted them, I carefully applied them to the headboard.
Step 7: Seal It
Since this piece will live outdoors, I sealed it with multiple coats of polycrylic. Don’t skip this step because it protects your hard work from the elements and keeps the finish looking crisp.
Step 8: Make It Sturdy
To make sure the sign could stand up in the yard, I slid rebar through the pipe brackets and hammered them into the ground. It’s super sturdy and stands perfectly without tipping.
The Final Result
What started as a random Marketplace find is now a statement Halloween piece that looks like it belongs outside a spooky old inn. It’s playful, a little eerie, and totally unique.
If you’re thinking about making one yourself, do it. You can customize the design, color, or theme for any holiday or season.

If you like this, you might be interested in my Halloween String Light DIY!

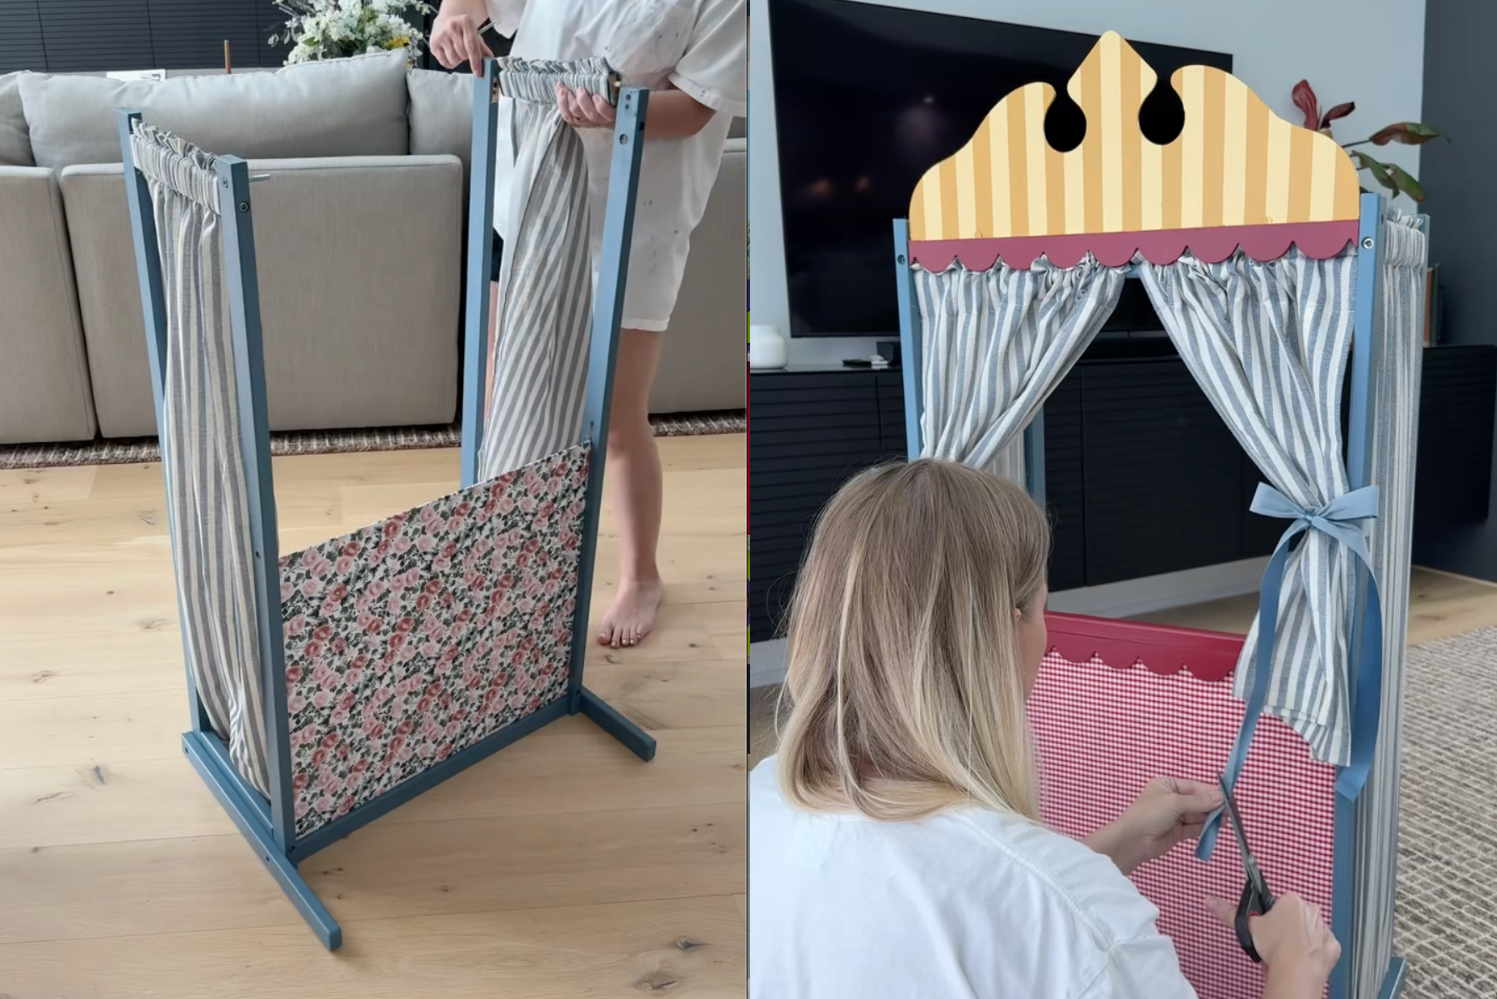
Puppet Show Theater DIY Makeover
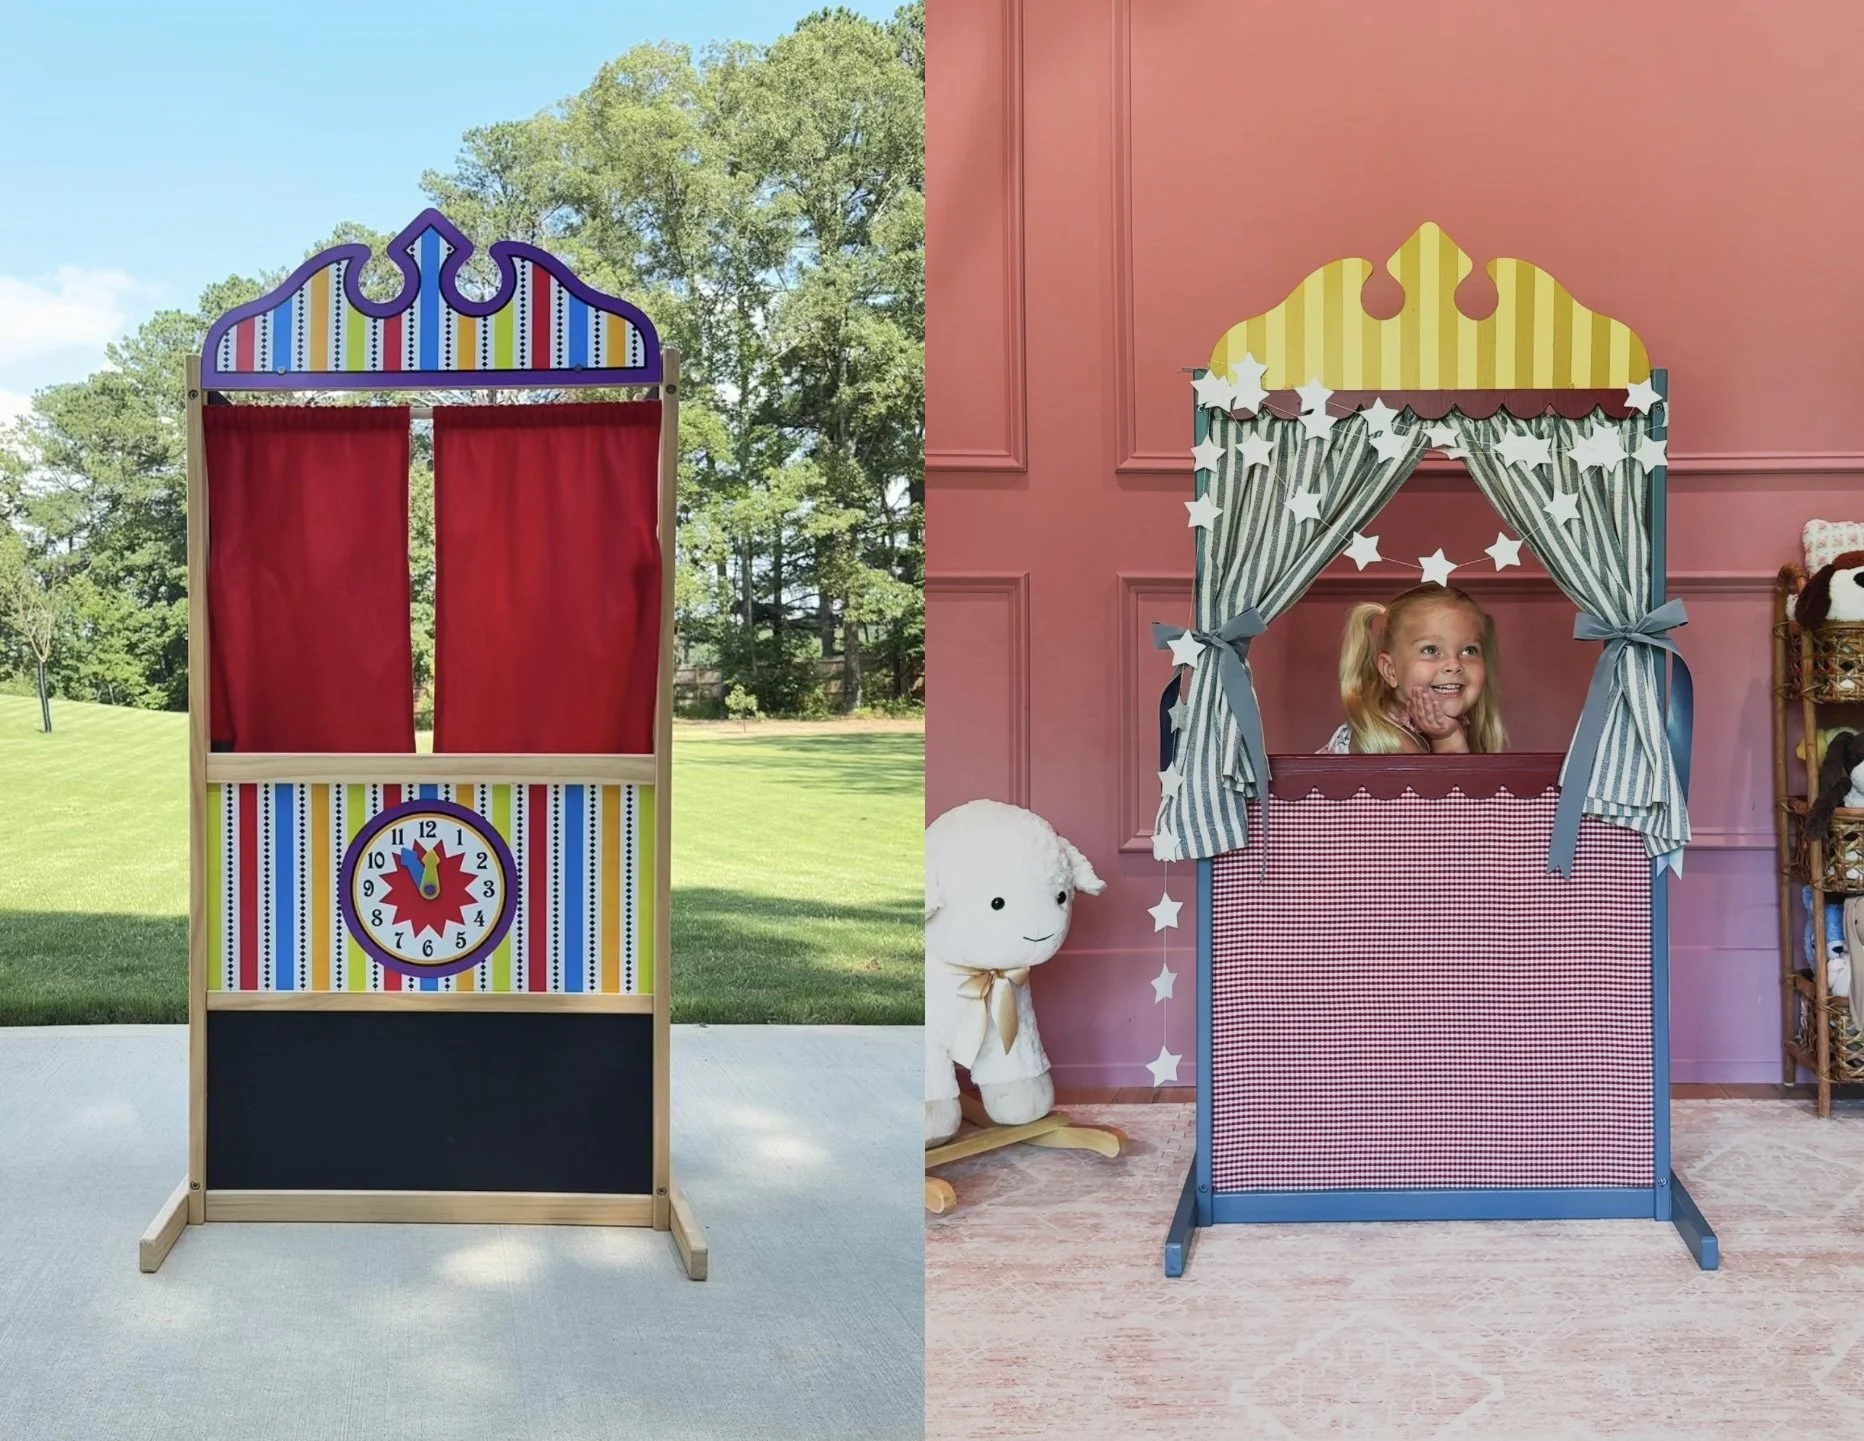
I found the cutest little puppet theater on Facebook Marketplace, but I wanted to give it a refresh. While I love color, I am not into the super bright primary color schemes that kids’ toys often come in. I wanted something a little more whimsical, playful, and girly, so I gave this toy a makeover
What You’ll Need
Scallop trim (I found mine at Hobby Lobby)
Fabric (I used red gingham for one side and a floral print on the other)
Curtains (two sizes of blue and white striped panels - 45” and 24”)
Primer (I recommend BIN primer)
Paint colors:
Paintbrushes or rollers
Ribbon (for tying back the curtains) *bought mine at a garage sale
Painter’s tape (optional, if you want crisp stripes)
Step 1: Disassemble the Toy
The theater was really easy to take apart. I made sure to mark each piece so I could remember exactly where everything needed to go when it was time to reassemble.
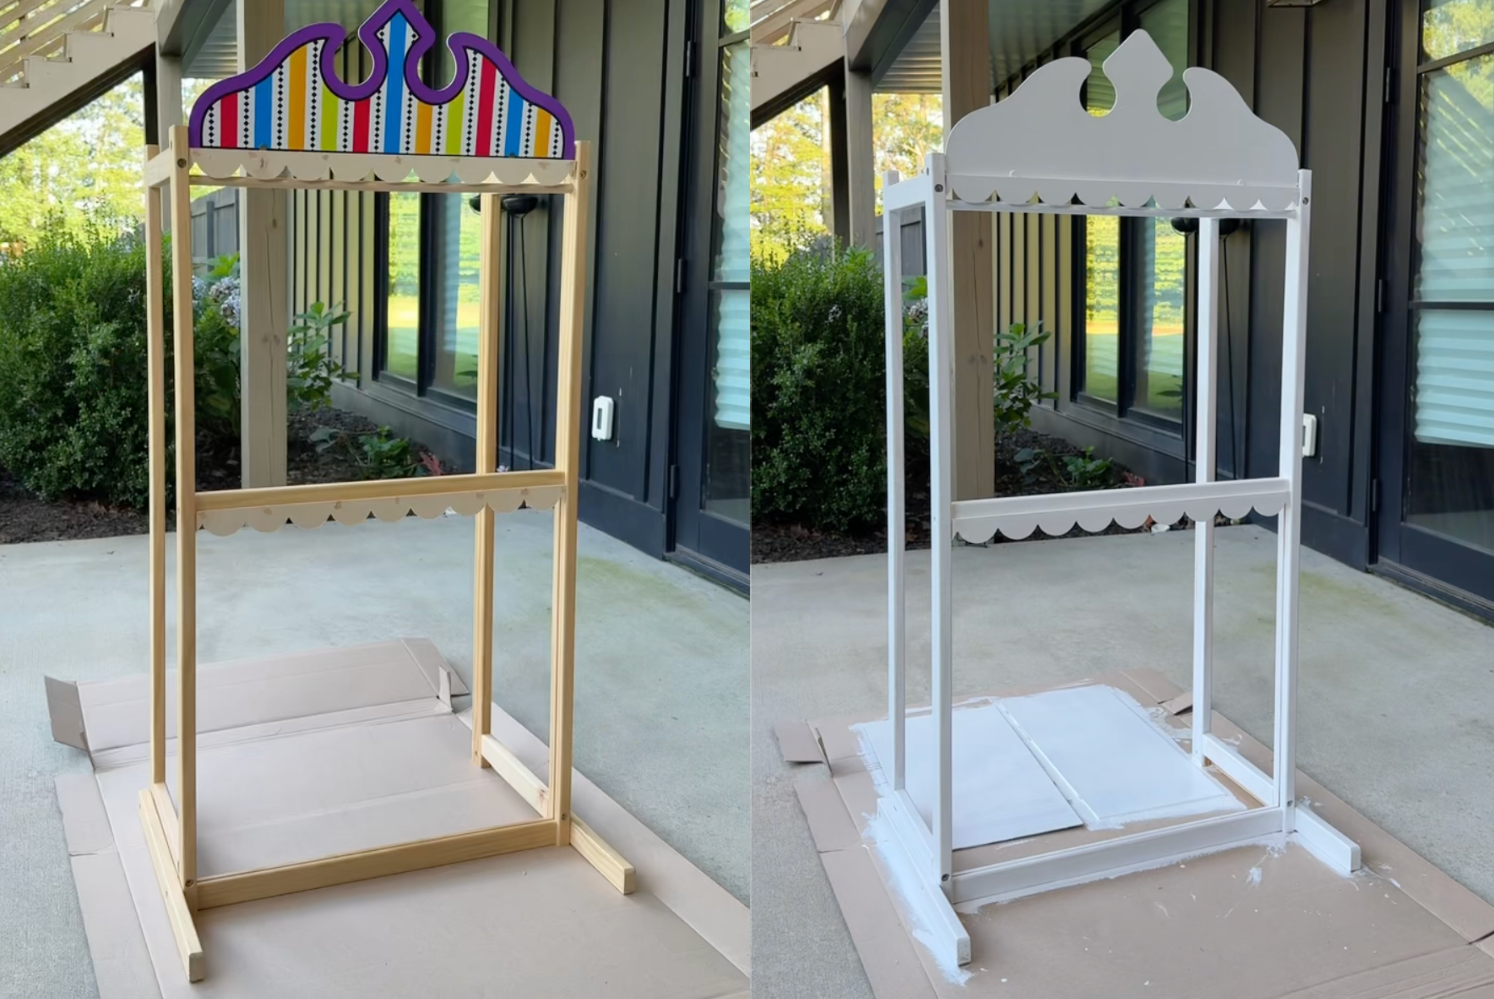
Step 2: Add Scallop Trim
To give the theater a little extra character, I added scallop trim that I found at Hobby Lobby. I attached it to the top and middle sections with a brad nailer.

Step 3: Prep for Paint
I loosely reassembled the toy so I could prime it, but you could also keep it fully disassembled if that is easier. Be sure to remove the clock board and chalkboard pieces and set them aside to use later. I used BIN primer to get everything ready for paint.
Step 4: Remove and Rework the Boards
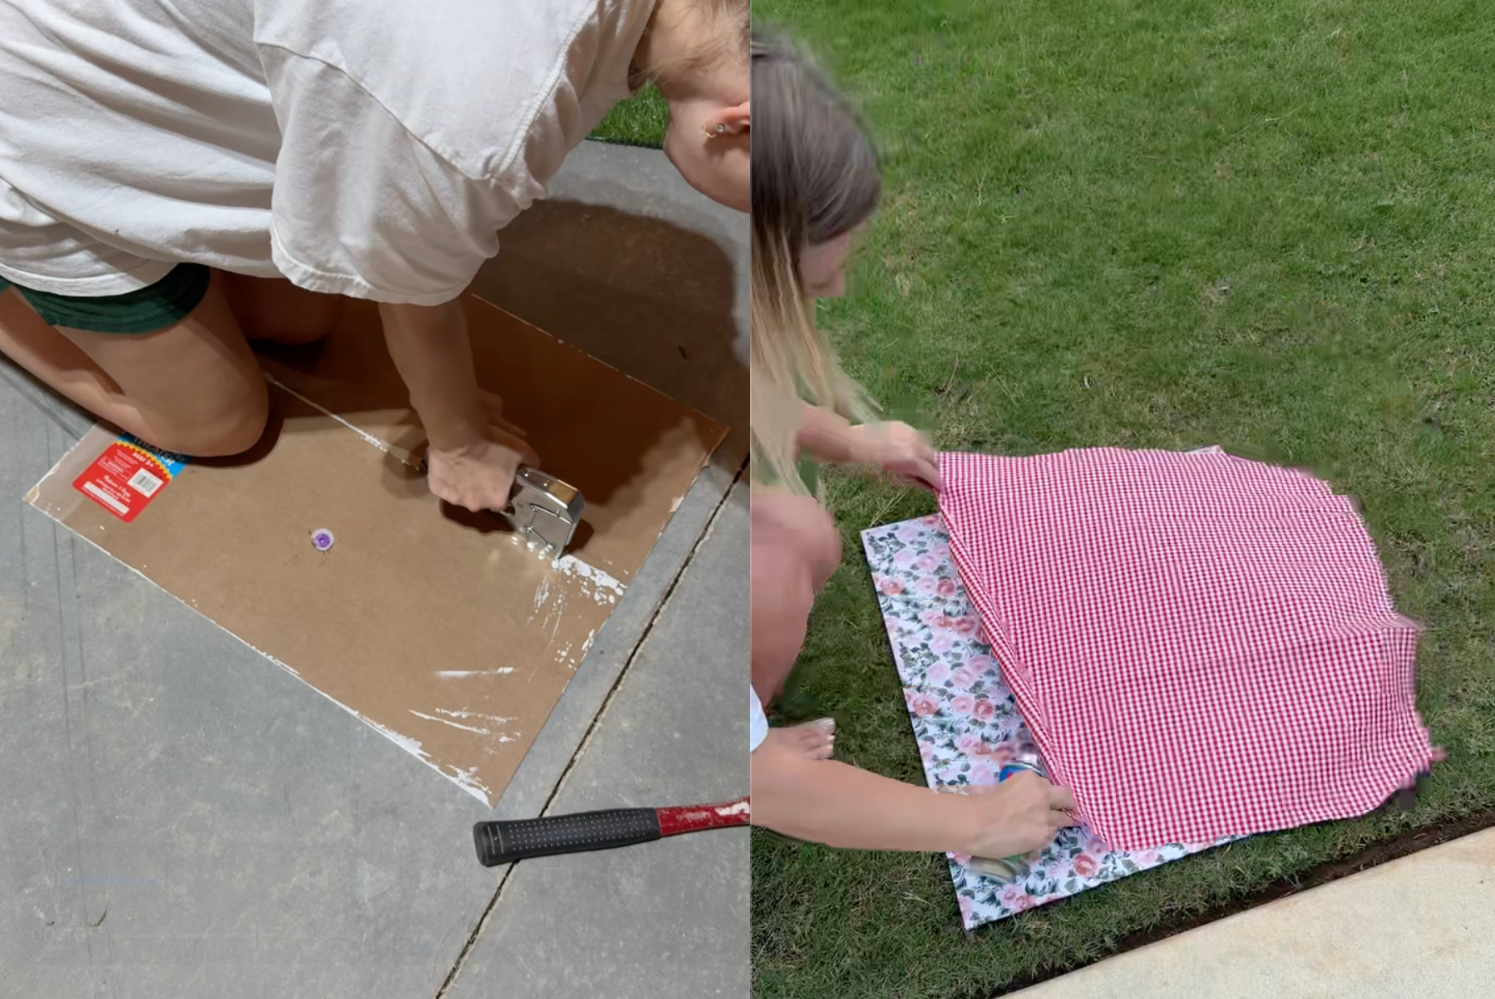
The little clock came off easily with pliers. I then used a staple gun to attach the clock board and chalkboard together, creating one larger panel. To cover it, I wrapped both sides in fabric and secured it with a staple gun. At first, I tried a floral print but decided it was not quite right. Using spray adhesive, I added a red gingham fabric panel to one side instead. Now the board is reversible, which is a fun surprise.
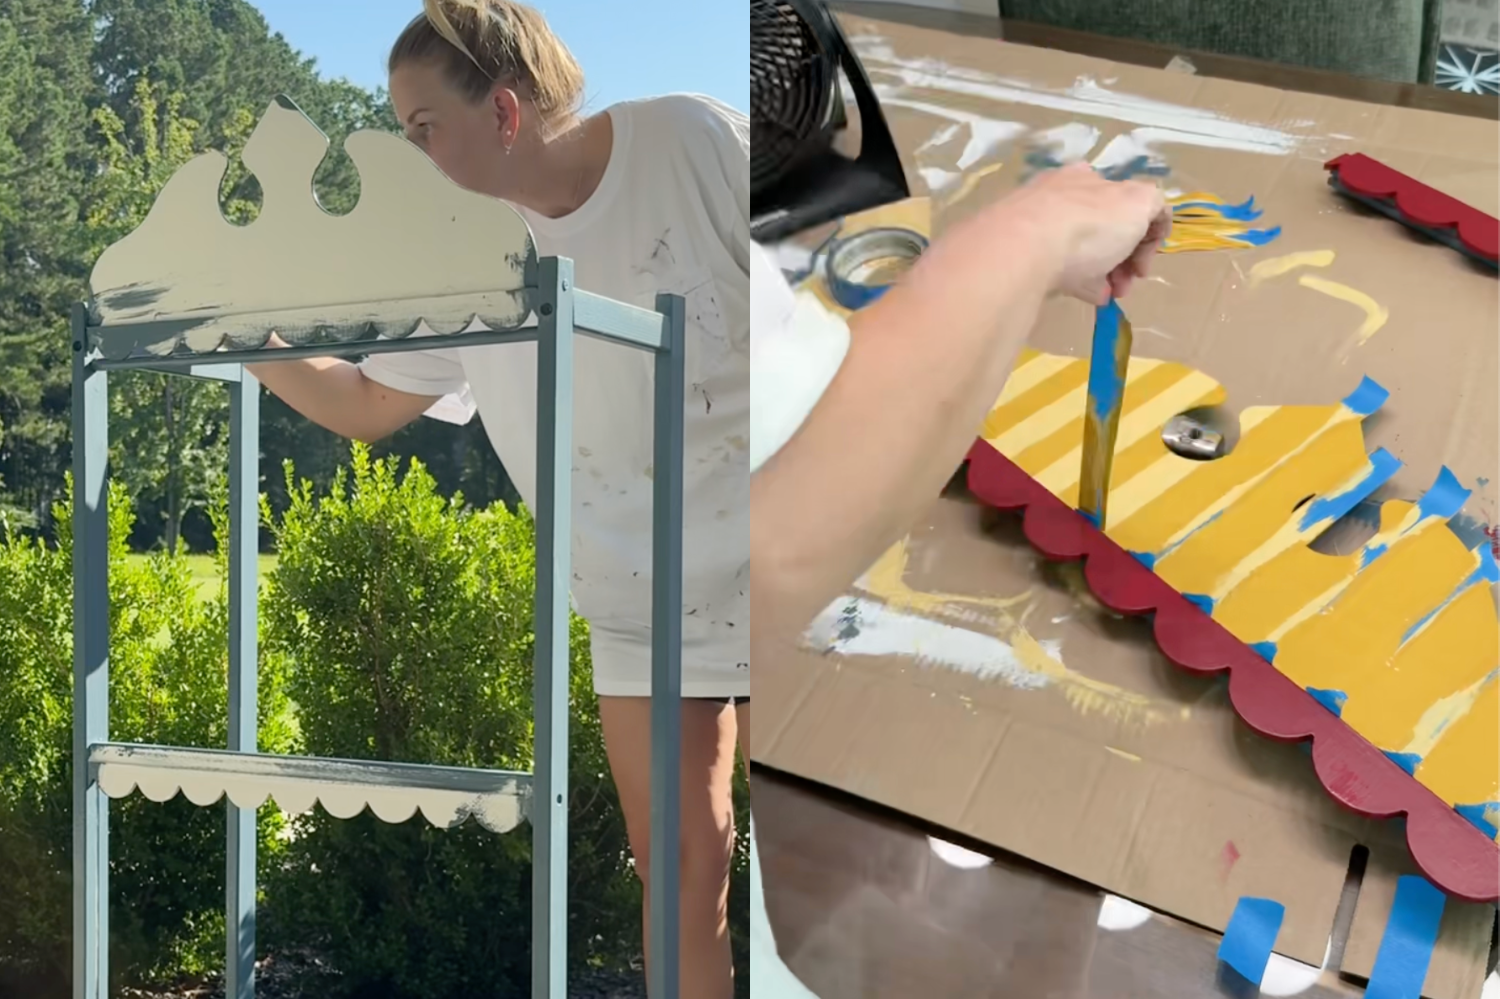
Step 5: Paint the Base and Trim
I painted the base in Smokey Blue by Sherwin Williams, the scallops in a bold red called Wild Currant by Sherwin Williams, and the top in two-toned yellow stripes using Golden Rule and Colonial Yellow. The new colors instantly transformed the toy into something more cheerful and charming.
Step 6: Add Curtains
Instead of sewing, I used two different sizes of blue and white striped curtains (45" for the sides and 24" for the front). For the sides, I hung them normally at the top and then stapled them to the inside bottom, which gave them a pretty pleated look. For the front, I hung the 24" curtains at the top and tied them back with ribbon that I bought at a garage sale for that classic theater feel.
Step 7: Reassemble
Once everything was painted, covered, and ready, I reassembled the theater.
And just like that, the makeover was complete. The puppet theater is still colorful, but in a softer, more whimsical way. It feels playful and girly, and it has become such a fun little piece for playtime.

If you like this, you might be interested in my IKEA play kitchen makeover!

DIY Halloween String Lights with Plastic Jack-o’-Lantern Pails
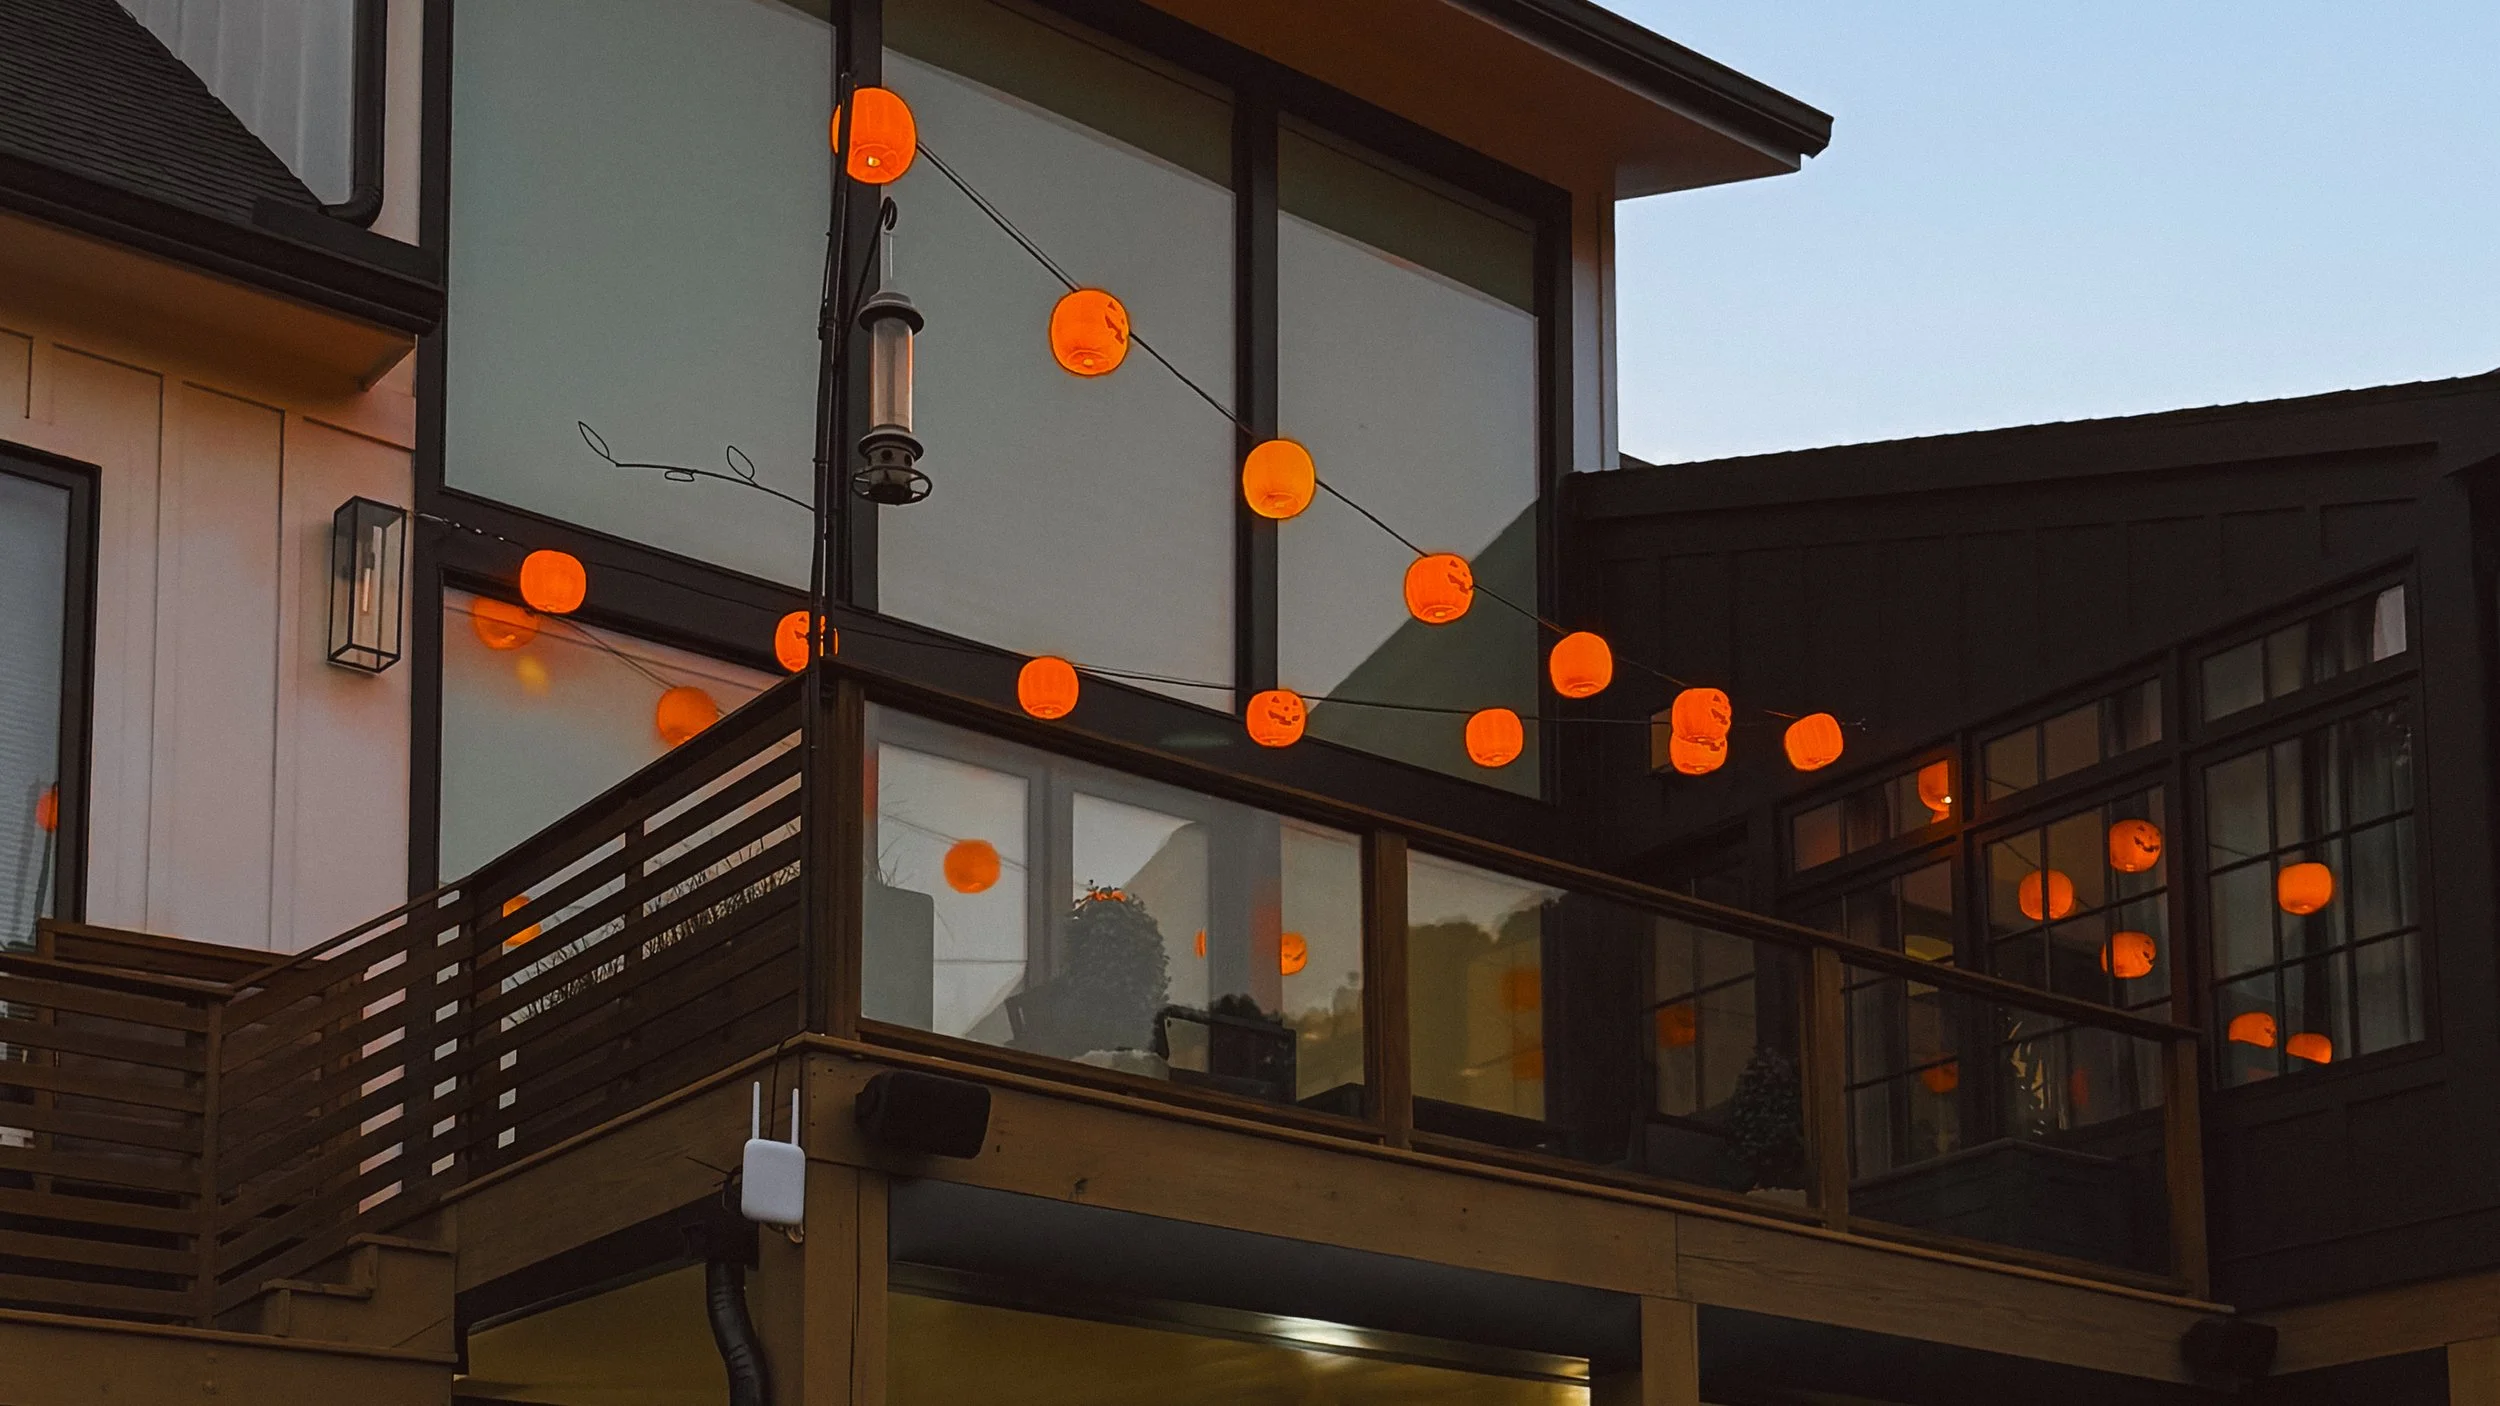
If you’re looking for a budget-friendly way to add some spooky charm to your outdoor Halloween setup, this DIY is for you. With just a few tools and those classic plastic Jack-o’-Lantern trick-or-treat pails, you can turn an ordinary set of string lights into a glowing row of pumpkin lanterns.
What You’ll Need
A box (for easy cleanup)
Step-by-Step Instructions
Step 1: Peel off any stickers from the bottom of the Jack-o’-Lanterns.
Step 2: Use your cutting pliers to carefully snip off the plastic handles. This will leave two small holes on the sides of each pumpkin that you’ll use later.
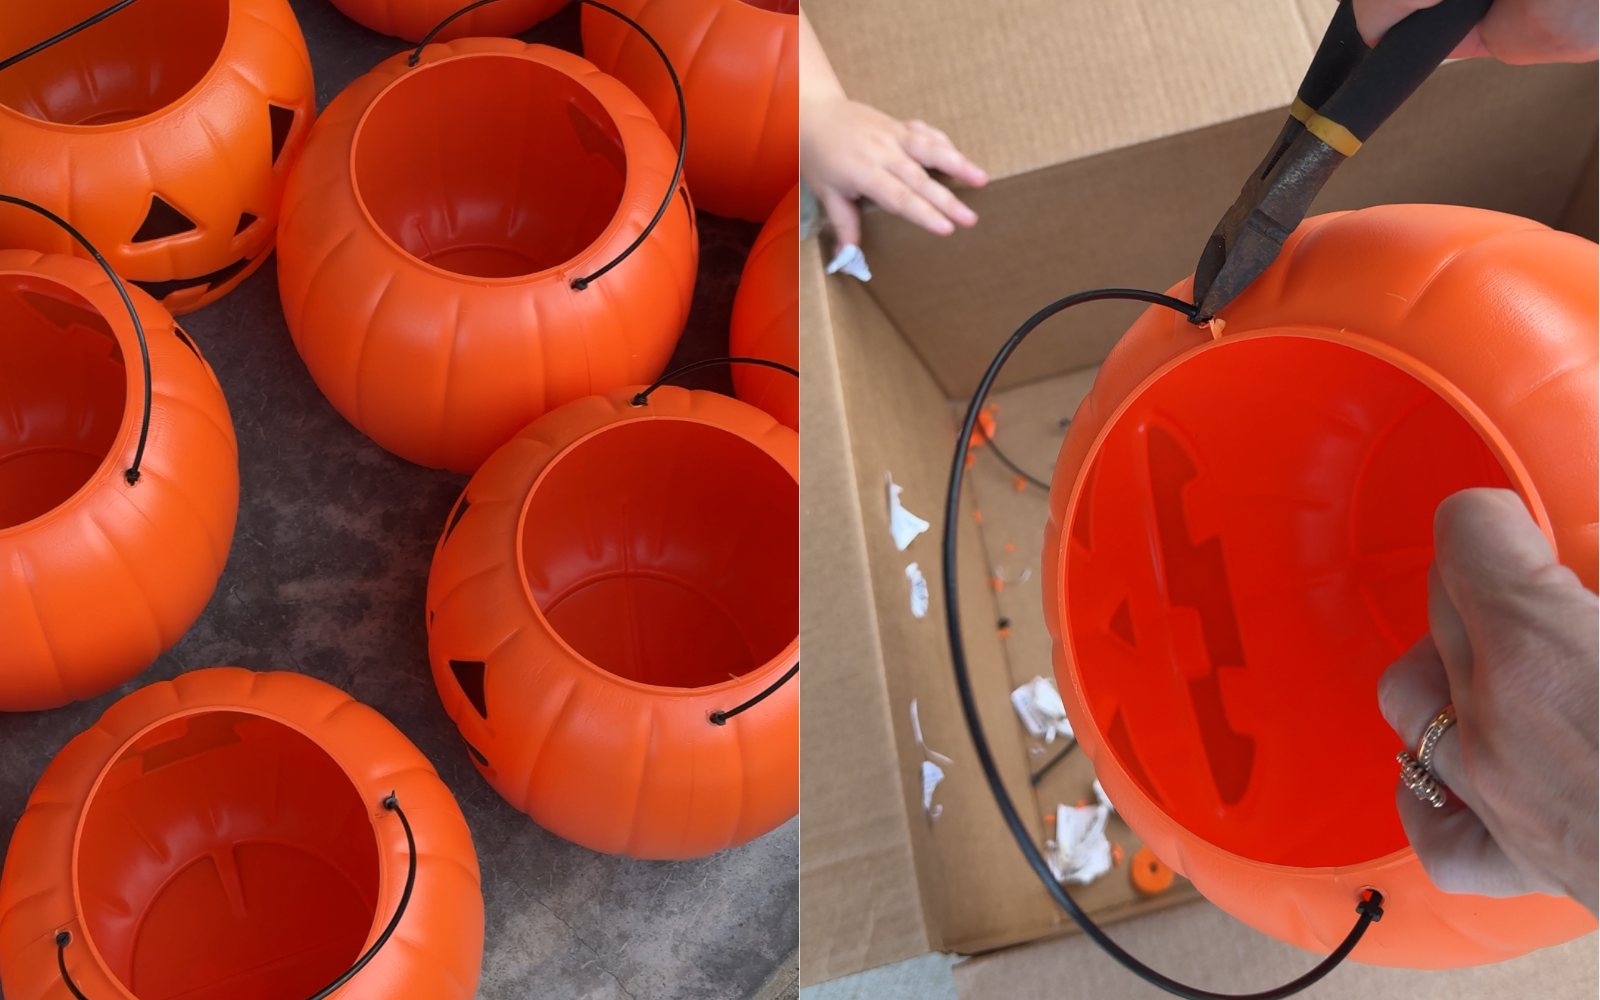
Step 3: Drill Drainage Holes. Using a 1 1/8" spade drill bit, drill a hole in the bottom center of each pail. This allows rainwater to pass through if your lights are outdoors.
💡 Pro Tip: Place the pumpkins over a box while drilling, removing stickers and cutting off handles so all the pieces and plastic shavings fall inside. It makes for an easy clean up!

Step 4: Feed a zip tie through each handle hole of each pumpkin. These will secure the pumpkins to your string lights.
Step 5: Attach to the Lights. Place each Jack-o’-Lantern over a bulb on your string lights. Once it’s centered, tighten the zip ties around the wire so the pumpkin stays in place. I alternated the faces so I could see them from both my living room and back yard.
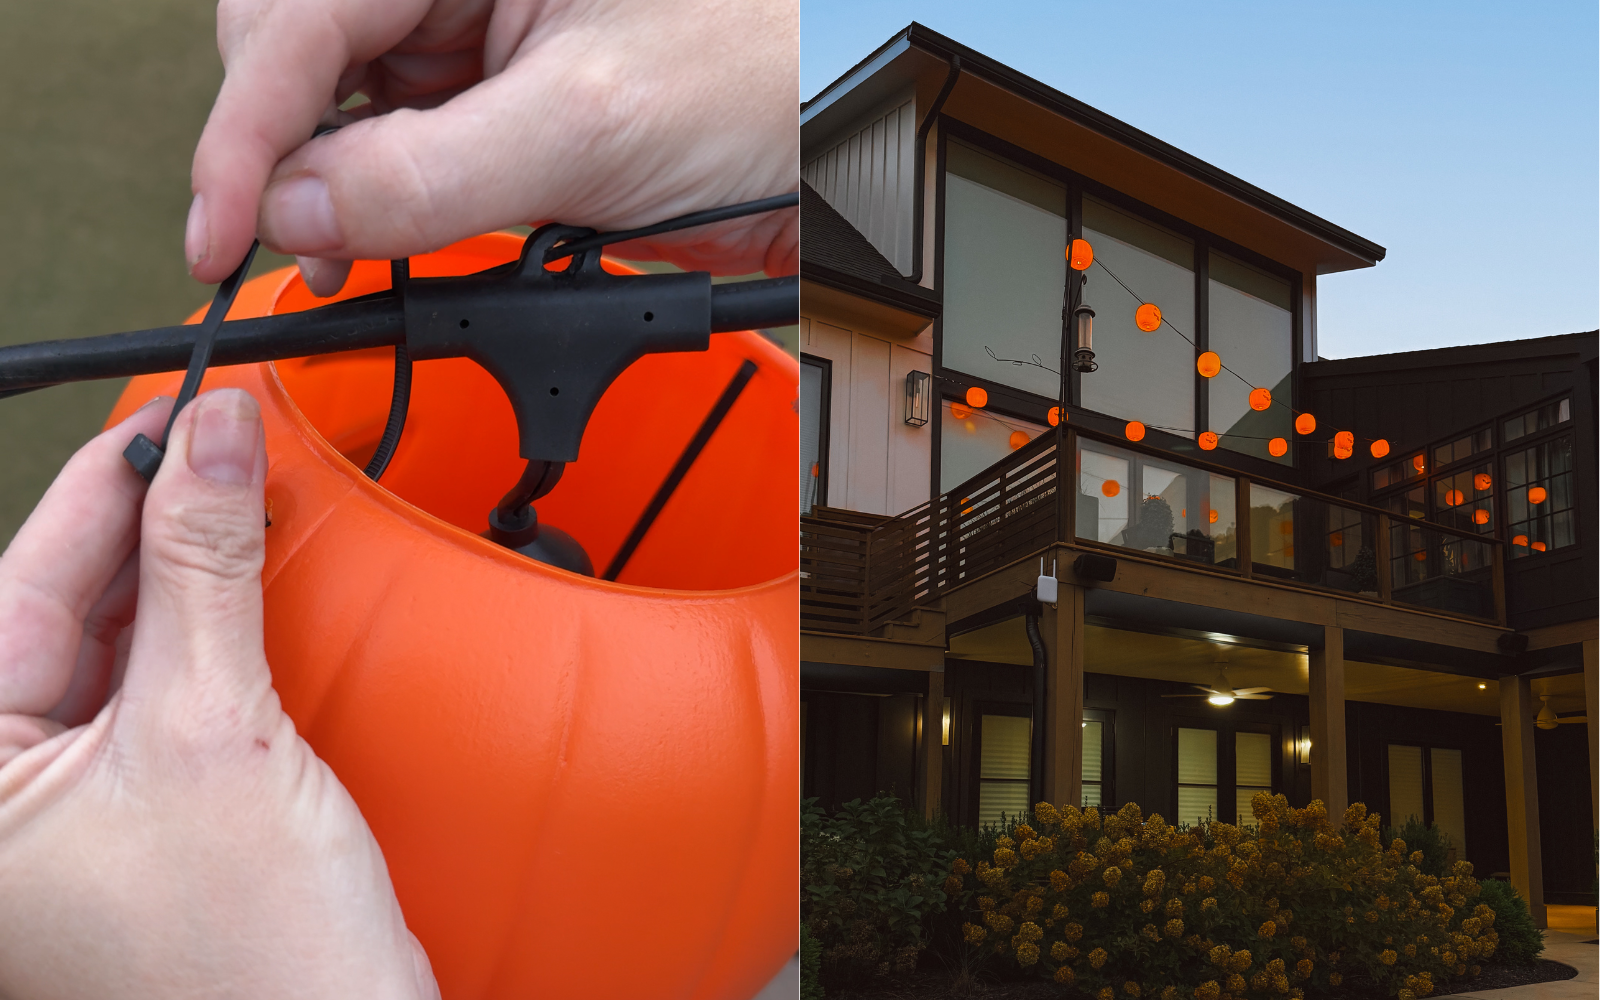
Step 6: Snip Off the Extra. Use your cutting pliers to trim off the excess zip tie for a clean finish.
And that’s it! You’ve got yourself a glowing line of cheerful (or spooky!) Jack-o’-Lantern lights perfect for Halloween.
If you liked this, you might enjoy reading about my DIY floral ice cubes!
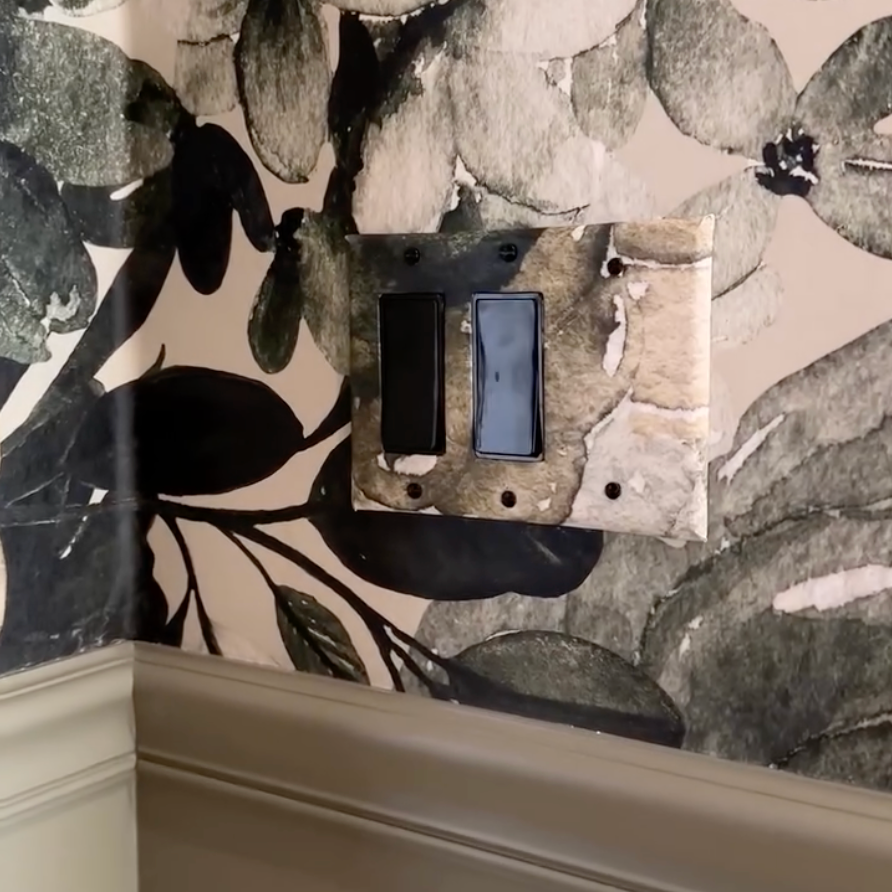
Using Wallpaper To Hide Your Light Switch Covers

Okay, this might be one of my favorite little DIYs I’ve done. In my office, I’ve got this gorgeous wallpaper going on, but the light switch cover was totally killing the vibe. It wasn’t cute or special, and it stuck out so much against the pattern.
So I covered it with leftover wallpaper. And now? It basically disappears into the wall, and I love it.
What You’ll Need:
Light switch cover
How to Do It:
Remove the light switch cover from the wall using a screwdriver.
Spray paint the screws if you want them to match the wallpaper better. Just do a quick coat and let them dry while you work on the rest.


3. Cut out a piece of wallpaper that’s a little larger than the switch plate.
4. Spray a very light layer of adhesive on the front of the cover.
5. Lay the cover onto the wallpaper, pressing it down gently but firmly.
6. Cut slits at the corners of the wallpaper so it can wrap neatly around the edges.
7. Fold the excess paper around to the back, smoothing it down as you go.
8. Snip away any extra flaps or overlapping corners so everything lays flat.


9. Use your knife to cut an “X” shape through the wallpaper over the actual light switch openings, and then fold those little flaps to the back too. You might need some extra adhesive to help them stick down.
10. Poke holes for the screws with the tip of your knife or scissors.
11. Screw it back onto the wall using your (now matching!) screws.


IF YOU ENJOYED THIS POST, YOU MIGHT BE INTERESTED IN the wallpaper i used in my home!
FOLLOW ME ON MY SOCIALS!

How To Make An End Cap For Chair Rail

Let’s talk trim. If you’re adding chair rail or any kind of molding to your walls, you’ll probably run into the question: how do I end it cleanly? Sometimes the molding wraps around a corner or continues into another space, but other times, you just need it to stop.
That’s where an end cap comes in.
It’s basically a little return piece that finishes the edge of your trim so it doesn’t look like it just… stopped mid-thought. And good news: it’s actually really easy to do with just a few cuts and a little patience.
I made a handy video explaining exactly how to do it, below!
In case you're curious, my hallway trim is actually two pieces layered together. The back board is 4.5” tall and 1/2” deep, and the rounded piece on top is 2.5” tall and 1” deep. The layered look adds a little extra dimension.
One more thing: always wear your safety goggles, even for quick cuts. It only takes a second and makes all the difference.
An end cap might seem like a small detail, but it really pulls the whole project together. It gives your trim a clean, finished edge and makes everything feel more polished and purposeful.
If you give it a go, let me know—I’d love to see how it turns out in your space!
Links At A Glance
Paint Color - Reddened Earth by HGTV Home by Sherwin Williams
Trim - Ace Hardware
IF YOU ENJOYED THIS POST, YOU MIGHT BE INTERESTED IN My blog about How to do crown moulding!
FOLLOW ME ON MY SOCIALS!

How to Make Floral Ice Cubes for Your Next Party

If you’re hosting anything, from a backyard hangout to a baby shower, you have to try floral ice cubes. Trust me, this is one of those DIYs that looks super fancy but is actually incredibly easy. They take almost no time to make, but they instantly make your setup feel thoughtful, festive, and way more elevated.
I used them in a clear drink tub and they totally stole the show. People were way more excited about the ice than I expected (like, full-on compliments about ice cubes). It’s such a simple touch, but it adds this fun, creative vibe that makes everything feel a little extra special without any real effort.


Here’s how I made them:
I used a mix of dried flowers, real flowers, and even a few fake ones I had lying around. Don’t overthink it! Just grab whatever looks pretty! I stuffed each section of the ice cube tray with petals and blooms, and didn’t worry about making them perfect. For the roses, I found a little trick: if you twist them quickly between your palms, the petals come off super easily. It’s oddly satisfying and made the whole process go faster.
Once your tray is packed with floral goodness, just fill it to the top with water and freeze overnight. No need to get fancy with layers or stages, you just pop it in the freezer and forget it.
One thing to keep in mind: if you’re planning to use these cubes in drinks (like cocktails or lemonade), make sure you’re using edible flowers. Not all flowers are safe to consume, so it’s worth double-checking. But if they’re just for chilling wine bottles or decorating a drink tub, feel free to use any combination of dried, real, or faux.


In the morning, you’ll have the prettiest ice cubes ever, like little frozen flower arrangements. I dumped mine into a clear drink tub with sparkling waters and wine bottles, and they instantly made everything feel so much more fun and festive. You could also pop them into pitchers, a punch bowl, or even individual glasses if you’re going all out. However you use them, they’re guaranteed to make people stop and say, “Wait…did you make these?!”
It’s such a small detail, but it really pulls everything together and makes your setup feel intentional. One of those easy little wins that looks high-effort but takes barely any time at all.
Give it a try and let me know how yours turn out, I’d love to see!
Links At A Glance
IF YOU ENJOYED THIS POST, YOU MIGHT BE INTERESTED IN how to make a hot chocolate bar!
FOLLOW ME ON MY SOCIALS!

DIY Personalized Cupcake Toppers

Let’s talk about one of my favorite little party details: personalized cupcake toppers. They’re the kind of thing that makes a dessert table feel extra special, and the best part is you can totally make them yourself. No fancy tools required, just a little crafting and some patience.
I made these for my daughter’s 1st birthday party and had so much fun putting them together. Here's how you can do the same:
What You'll Need:
Photos with the face big enough to actually show up once it’s cut out


How To Make Them
Pick your photos
Start by choosing clear, front-facing photos where the person's face is large enough to show up well once cut out. I used Canva to zoom in and fit two to three faces per page. You want the faces to be big enough to stand out on top of a cupcake, so don’t be afraid to crop in close.Print and cut
I printed mine on photo paper using my home photo printer, but you can absolutely get them printed anywhere you normally develop photos. Once they’re printed, just cut around each face. They end up looking so cute and personal.Attach to skewers
Flip the face cutouts over and tape a skewer or toothpick to the back. That’s it. No fancy supplies or tools needed. You can also add a second face on the back if you want them double-sided, but I usually keep it simple.Stick them in and enjoy
Once they’re ready, just pop them into your cupcakes. These always get a good laugh and make the whole party feel a little more personal and fun. They're perfect for birthdays, graduations, bachelorette parties, pretty much any celebration where faces on cupcakes would make people smile.


That’s all it takes. It’s a super quick and budget-friendly DIY that adds such a personal touch. I love how easy it is to switch up the style depending on the occasion: birthdays, showers, holidays, or even just for fun.
Let me know if you make some. I’d love to see how yours turn out!


IF YOU ENJOYED THIS POST, YOU MIGHT BE INTERESTED IN my daughter’s music themed 1st birthday party!
FOLLOW ME ON MY SOCIALS!

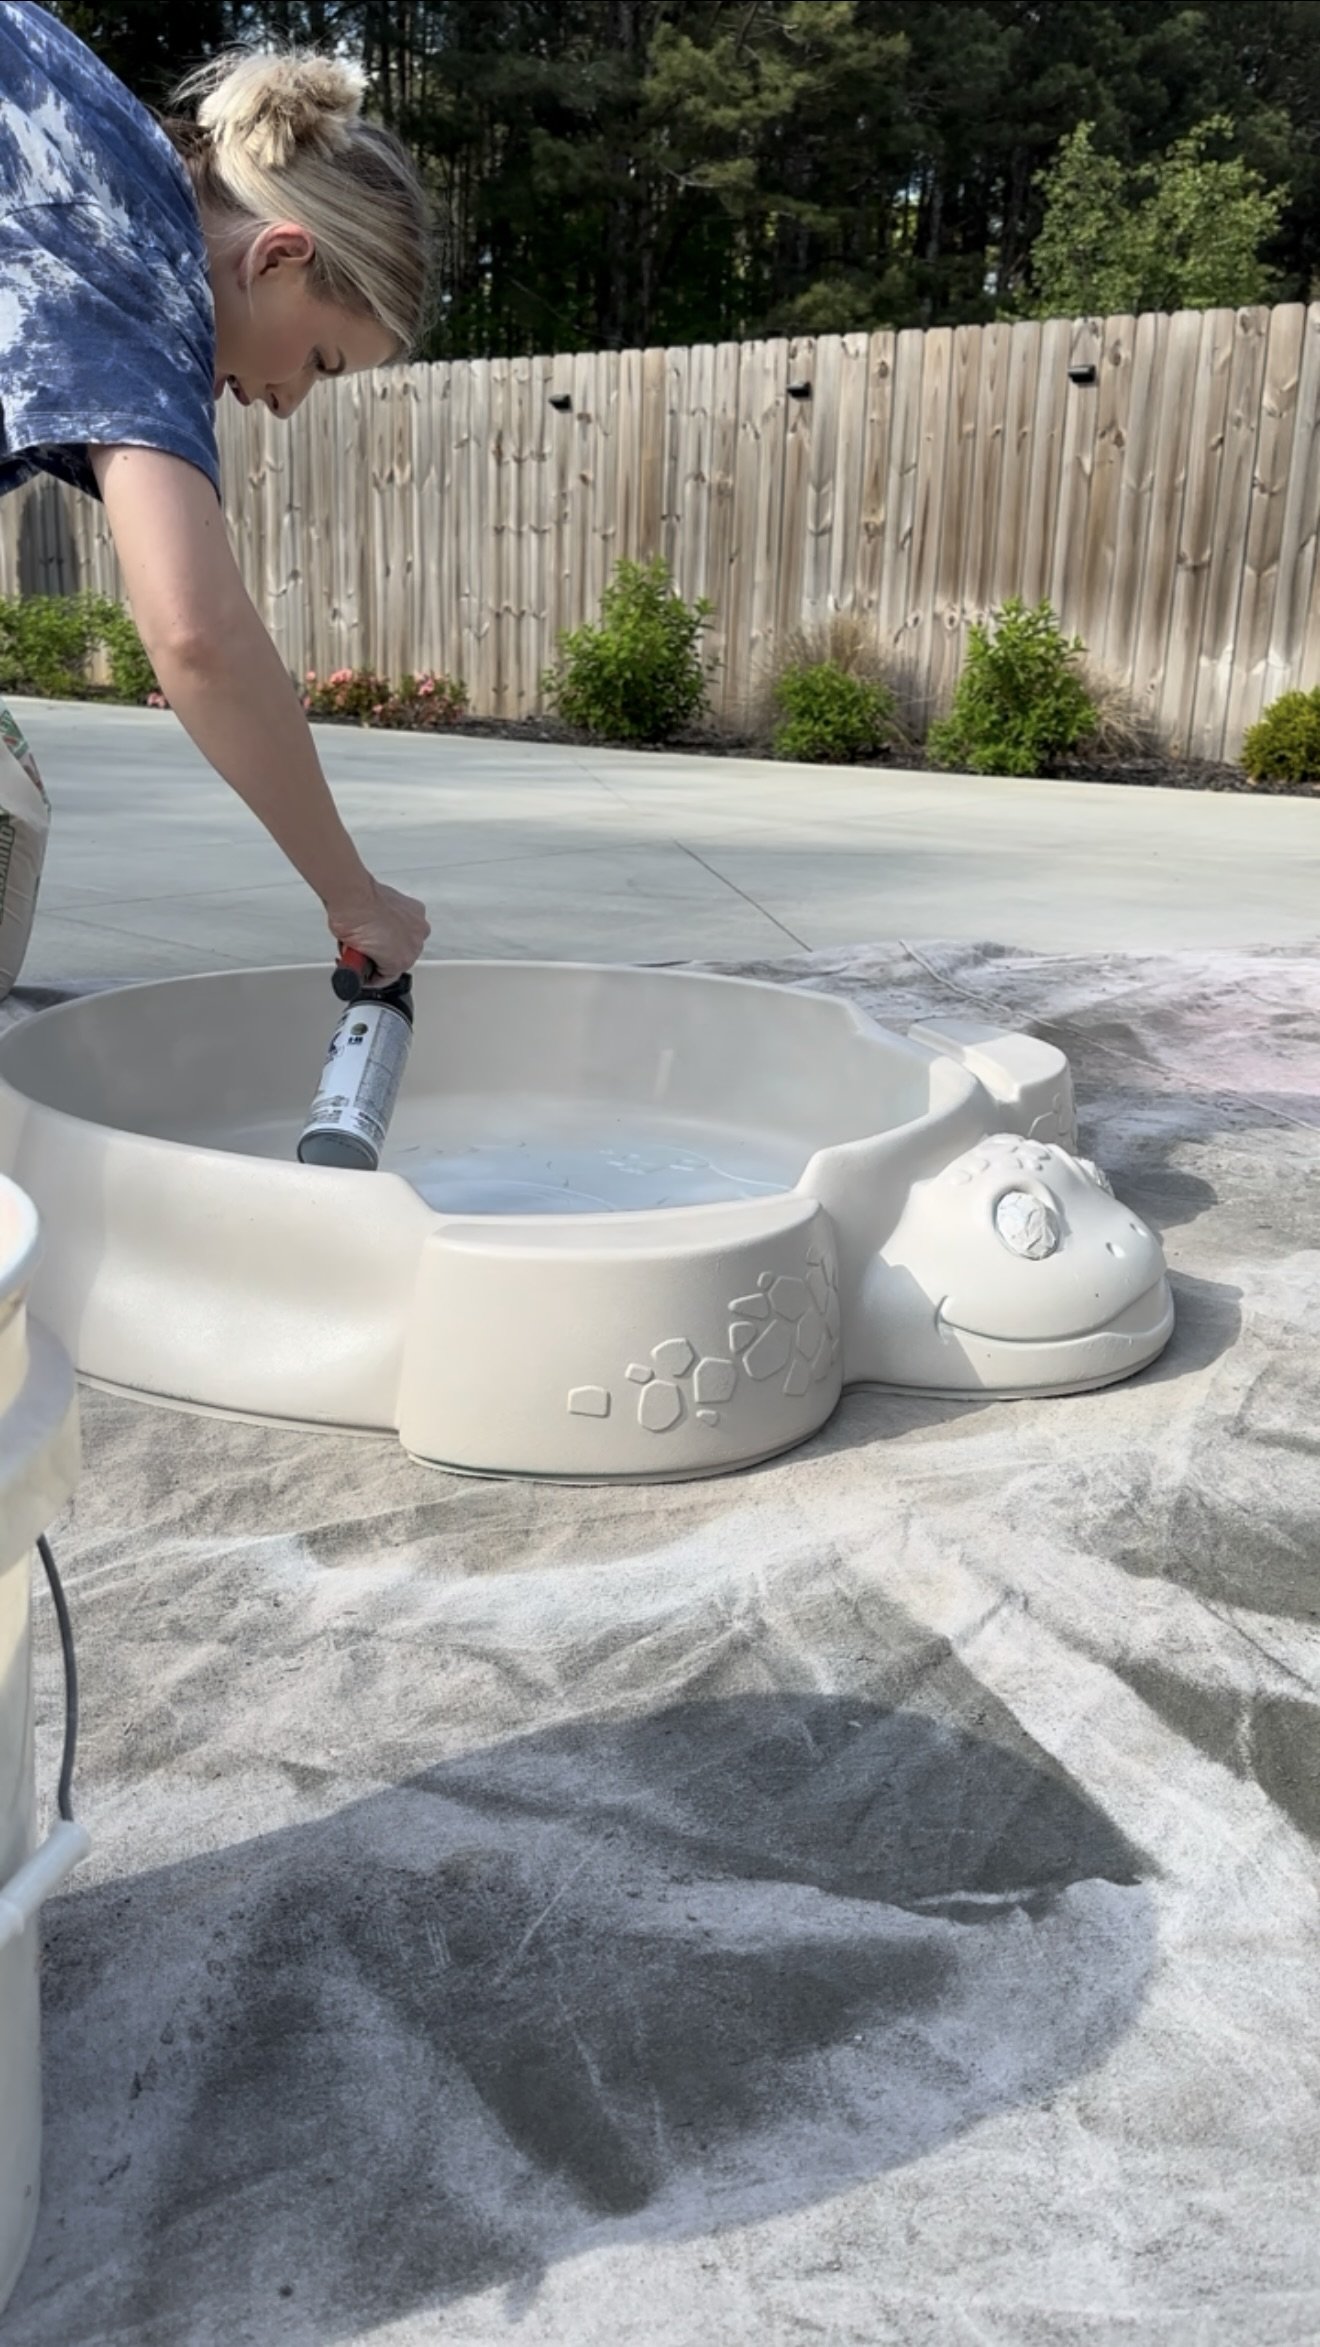
DIY Turtle Sandbox Makeover: From Thrifted to Adorable


How to Give a Faded Sandbox Turtle a Fresh New Look
I found this classic turtle sandbox at Goodwill for $5, and I knew right away it had potential. Sure, it was faded, scratched, and looked like it had lived a full life, but the shape was iconic, and I love a good transformation project. A few hours and a couple cans of spray paint later, this little guy got a whole new lease on life.
What You’ll Need:
Scrub brush and soap (for cleaning)
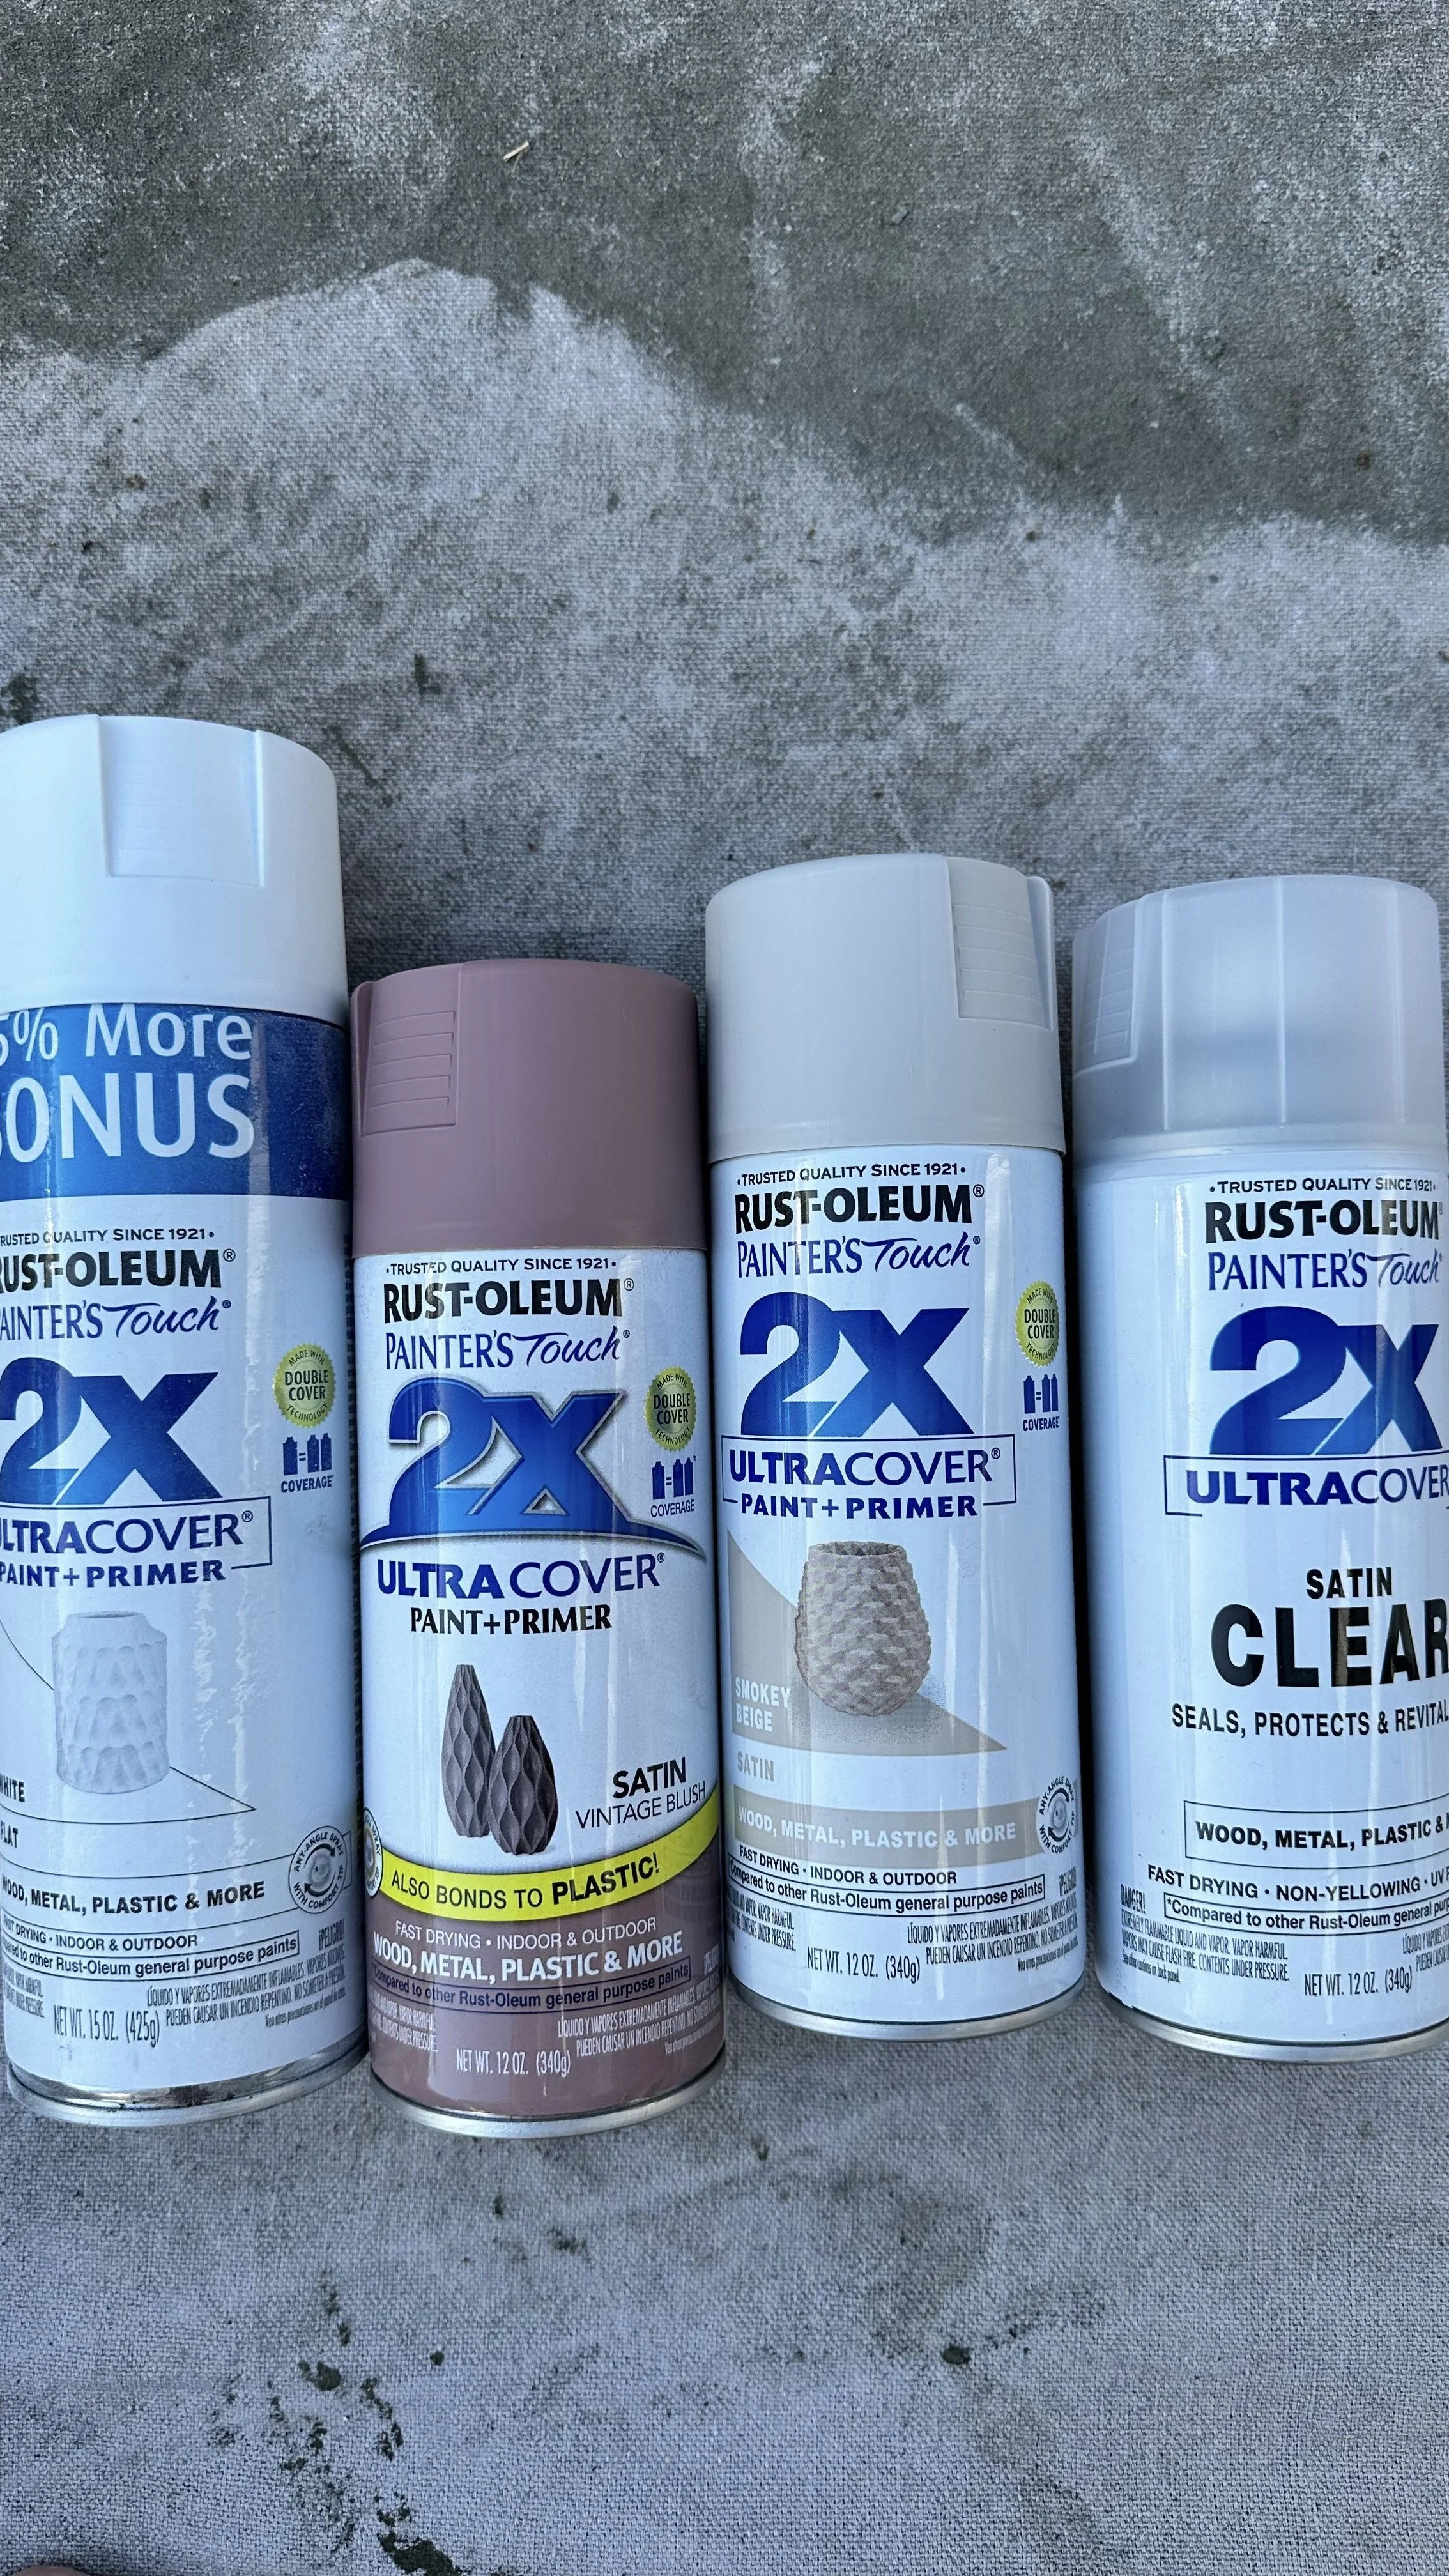
Spray paint made for plastic (I used two coordinating colors: one for the body and one for the lid)
Contrasting paint for the shell details (I used some craft paint I already had)
Small paint brush for the shell details
Clear outdoor spray sealant (non-yellowing)
Painter’s tape (for detailing—especially the eyes!)
A comfort grip spray can handle (optional, but makes a huge difference for even coverage and avoiding finger fatigue)
A bag or two of sand (for the fun part)

How to Do It:
1. Clean it really well.
Start by giving the turtle a thorough scrub with warm soapy water. Mine was definitely showing its age, so I made sure to get into all the little nooks and rinse it really well. Once it was completely dry, I wiped it down again just to be sure there wasn’t any leftover grime or residue.
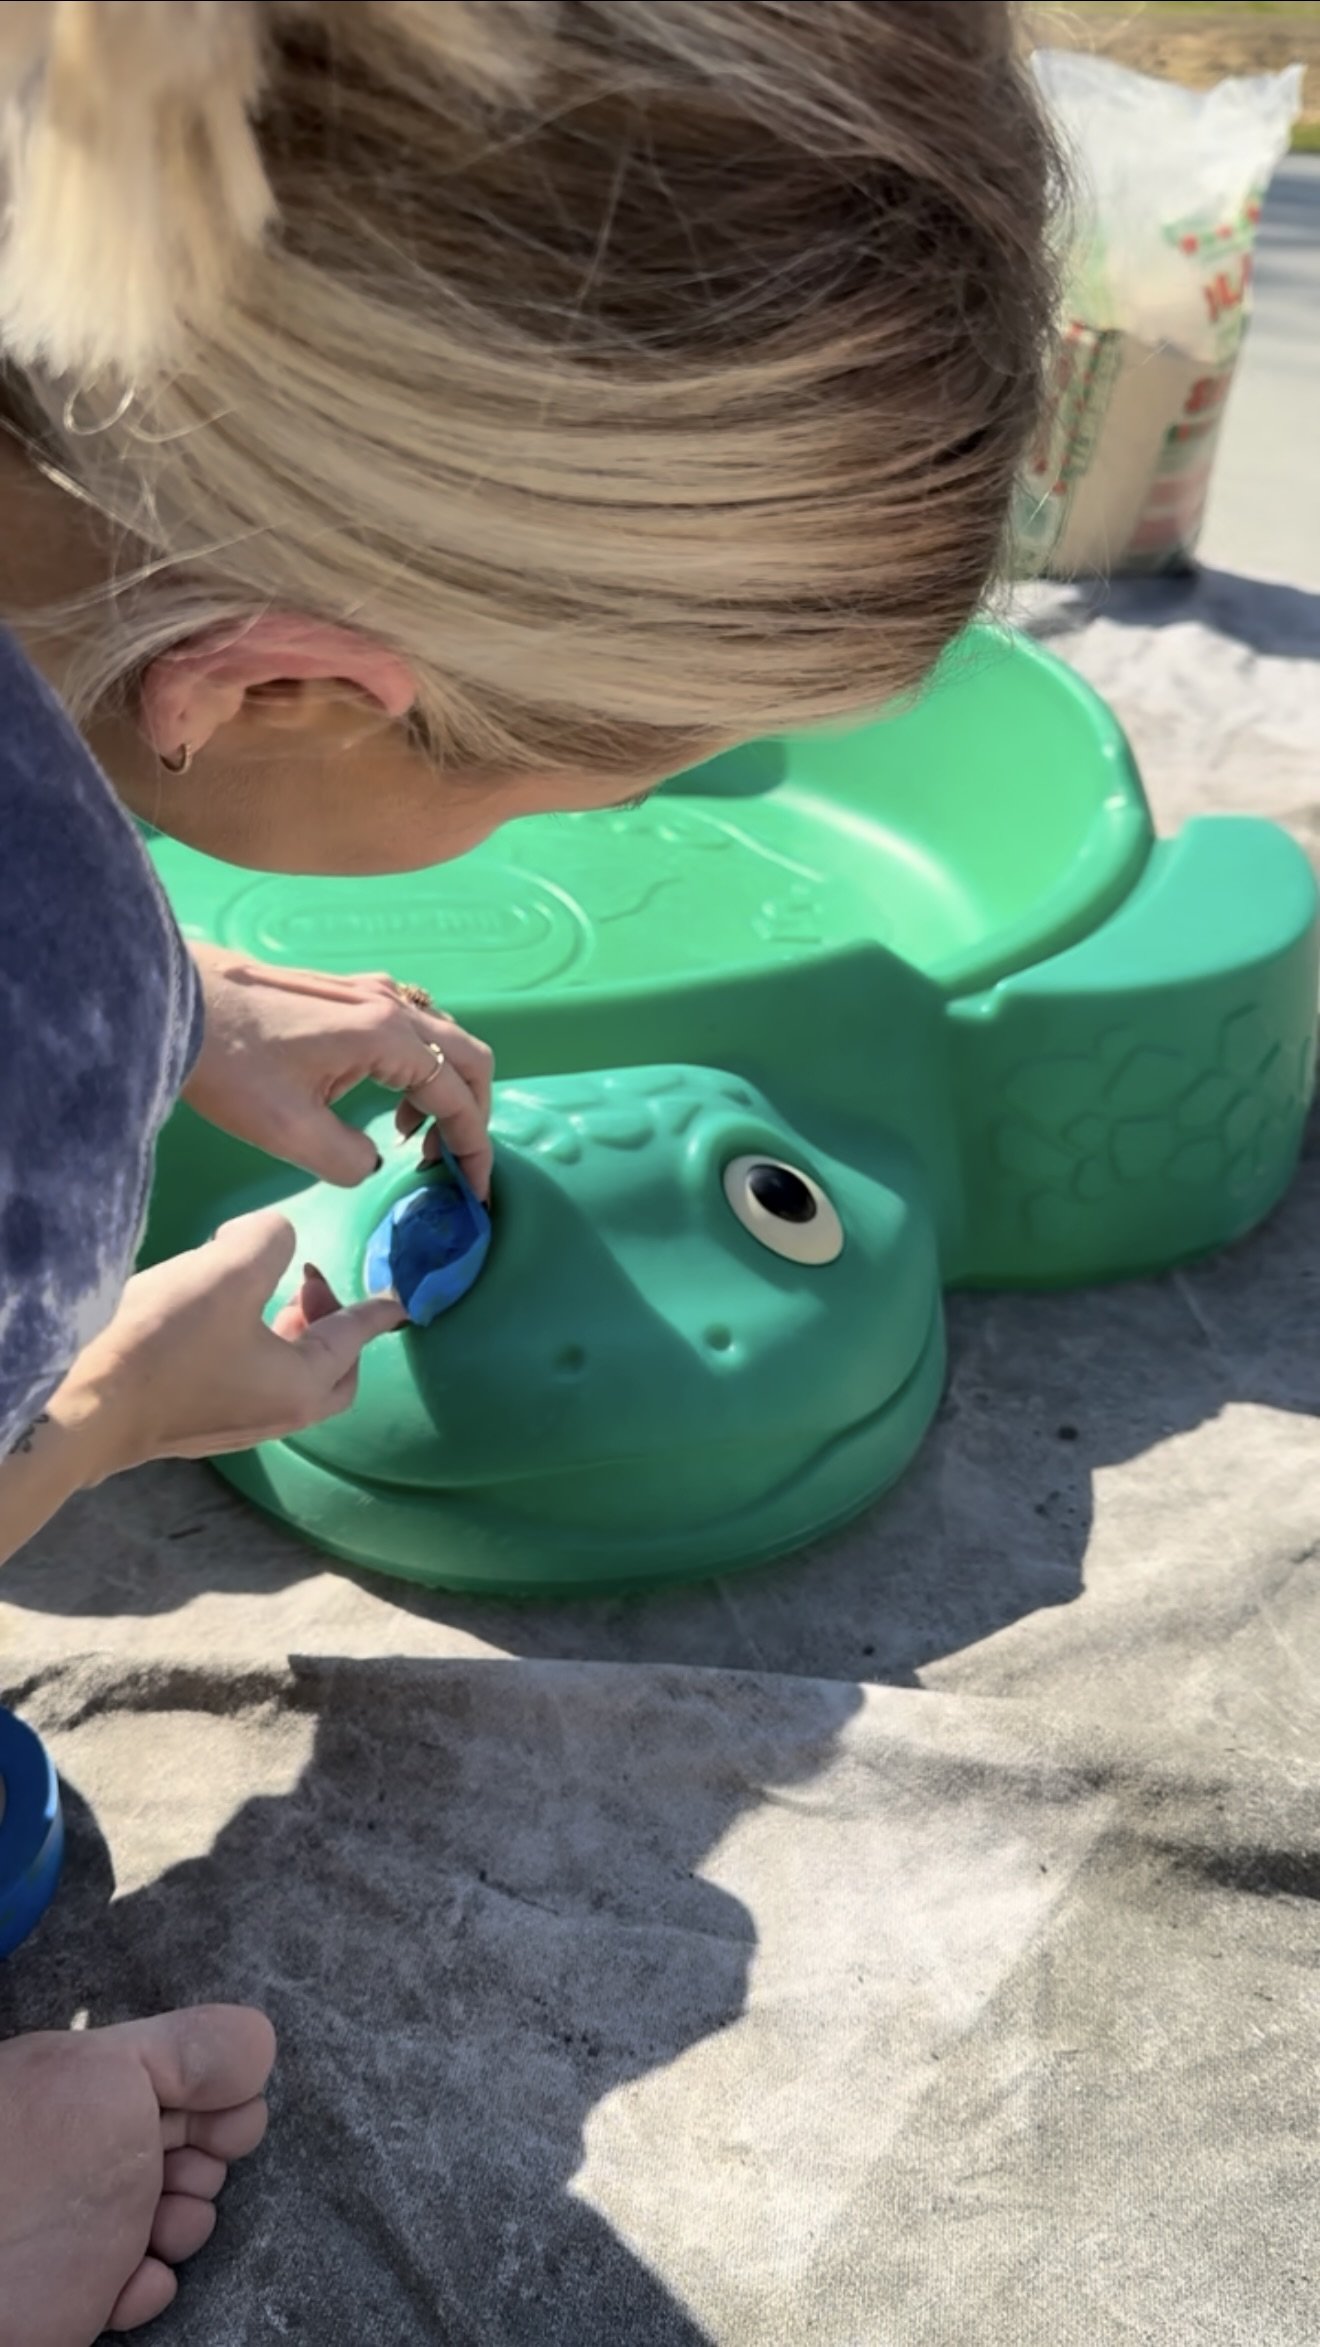
2. Protect the eyes.
Before painting, I used painter’s tape to cover the turtle’s little eyes. It’s a tiny detail, but keeping them paint-free helped preserve that classic, recognizable expression, and made the final result feel more polished.
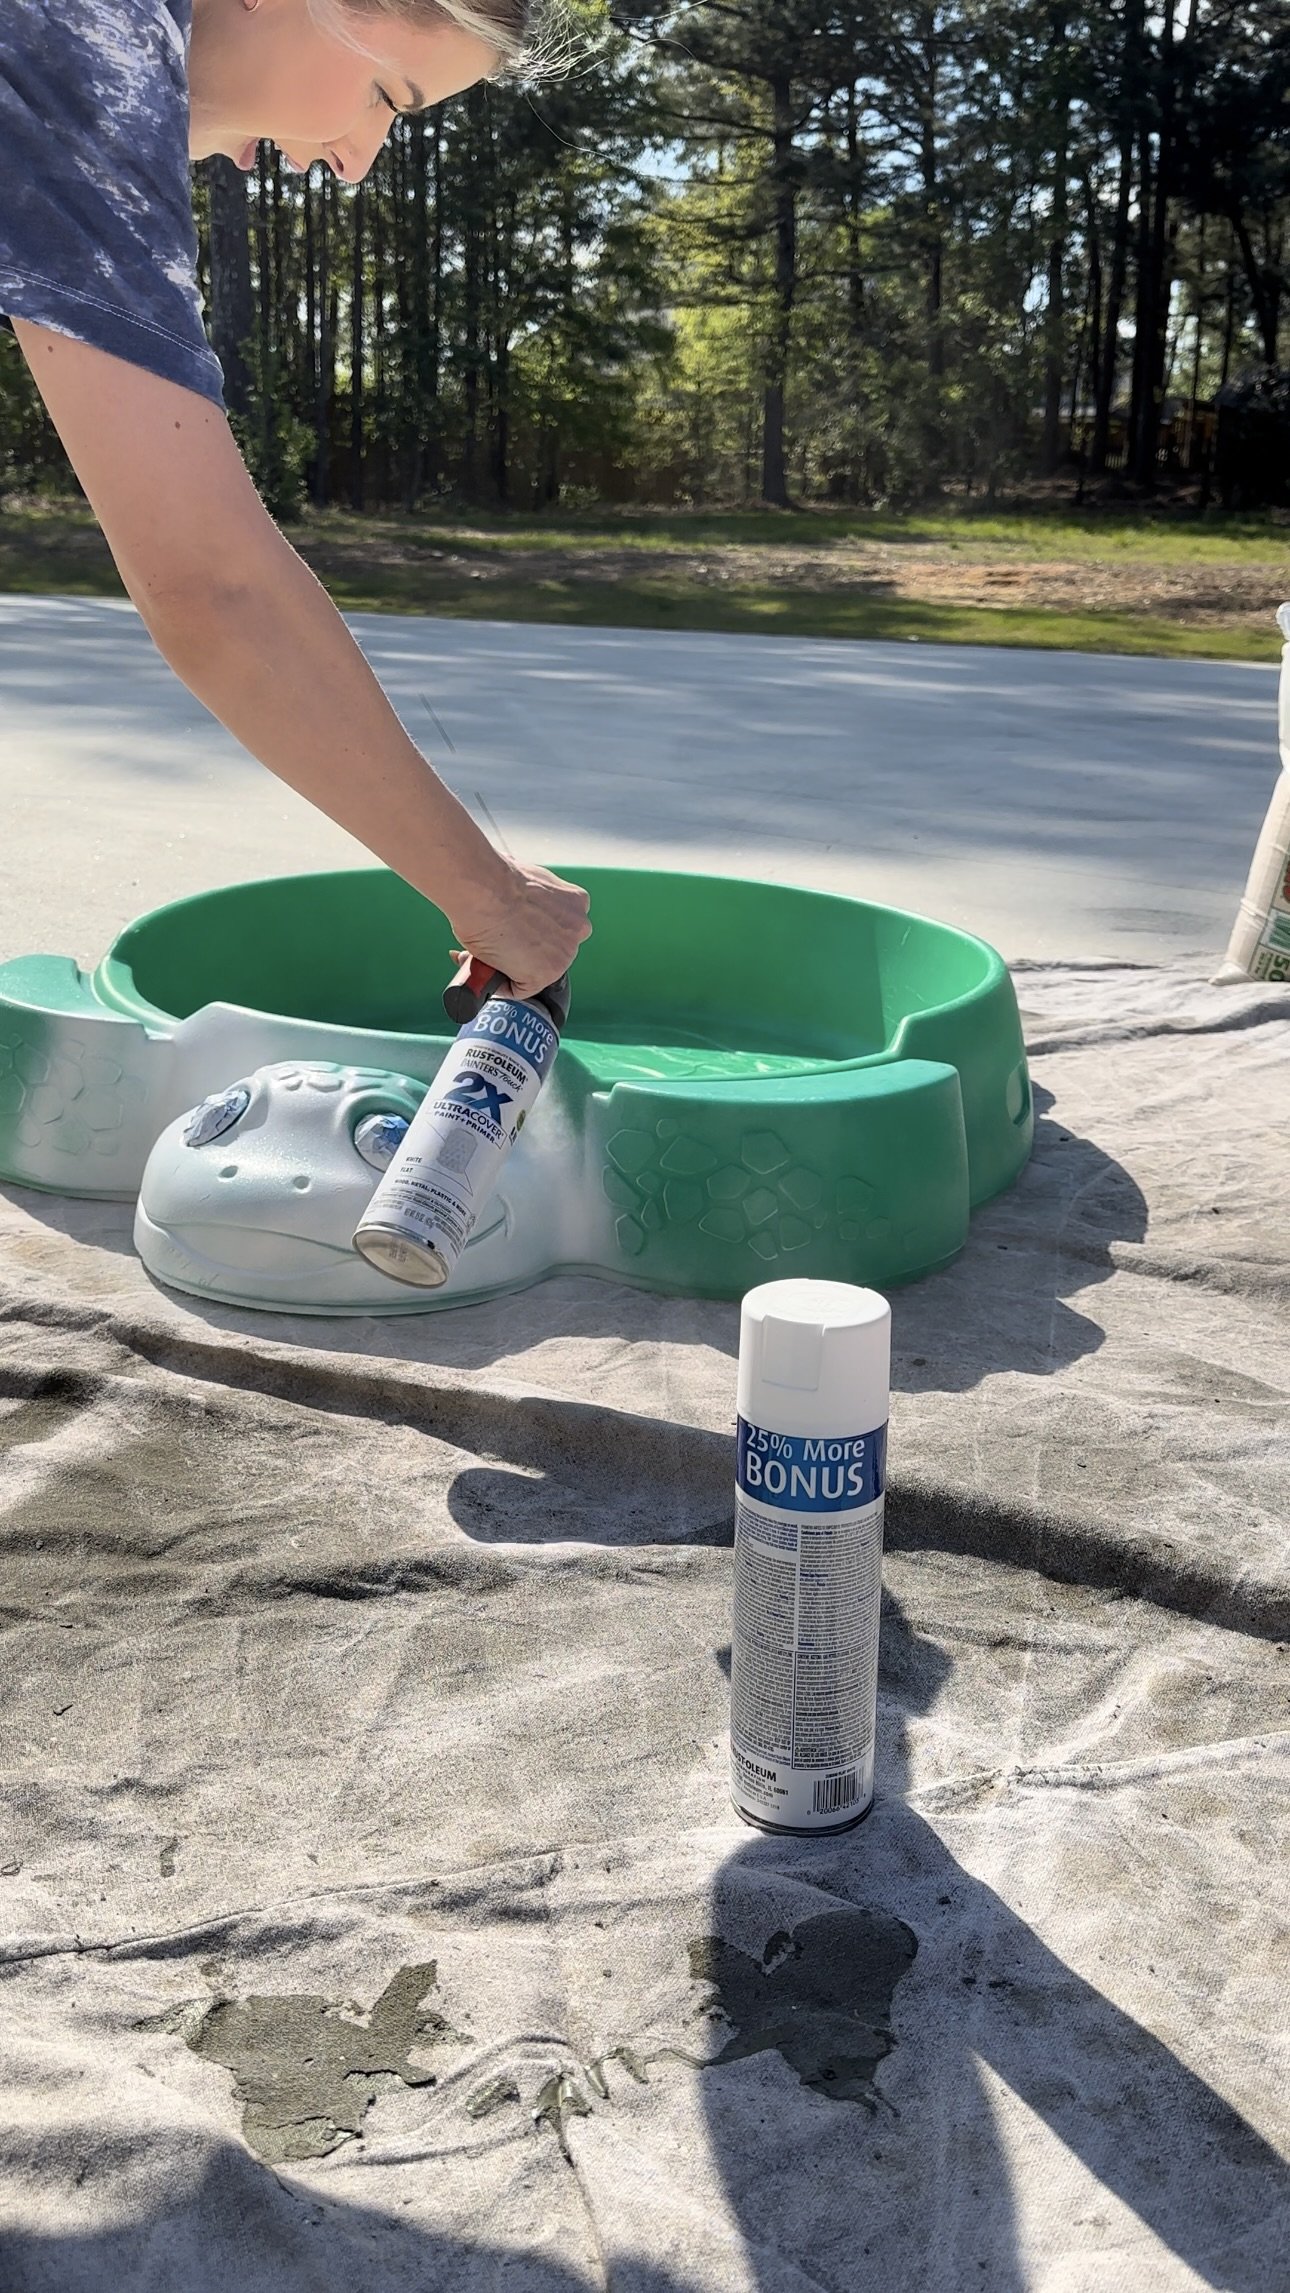
3. Prime it.
This step is easy to skip, but so worth it. I used a spray primer that’s safe for plastic to help the paint stick better and last longer. A light, even coat is all you need—just be sure to let it dry fully before moving on to color.
4. Spray the base and the lid.
Once the primer was dry, I sprayed the turtle’s body with a soft neutral beige and the lid with a warm blush pink. I stuck to light coats and let each one dry before adding the next. The contrast between the two colors gave it a fun but modern look that felt totally fresh.
5. Add shell detail.
After the base coat dried, I used some craft paint I already had, and a small paint brush to paint the little spots on his shell.
6. Seal it.
Once all the paint was dry and I was happy with the look, I finished it off with a few coats of clear spray sealant made for outdoor plastic. It adds a bit of shine, protects the paint from chips, and makes cleanup after play days so much easier.
7. Fill with sand!
After everything cured, I added fresh play sand and tossed in a few fun toys. Our toddler was in it immediately, and it’s easily become one of the most-used toys.

How It’s Holding Up:
Look, when you mix sand, spray paint, and an enthusiastic toddler, you’re obviously going to get a little chipping. And yep, we do have a few spots where the paint has worn off, especially around the edges where little feet climb in and out. But honestly? It’s held up way better than I expected.
The color is still vibrant, the shell details are intact, and the sealant has definitely helped protect it from full-on flaking or fading. It lives outside, gets played with constantly, and still manages to look cute. Considering it started as a $5 thrift find, that feels like a major win.