Bringing The Outdoors In
I don’t know about you, but I am so ready for spring. The sun is starting to peek out, the trees are waking up, and my seasonal allergies are making sure I don’t forget it. Naturally, I decided to channel my spring fever into a little project: bringing some of that outdoor magic into my dining room.
Armed with my trusty saw, I ventured out to snag a few blooming branches and I may or may not have picked a tree where the flowers smell... questionable. Can’t say I nailed that part, but hey, we’re here for the vibes.
Once I got my new leafy friend inside, I realized she was a big girl and needed a little trim to fit the space.


After a bit of snipping and adjusting, I plopped her into the perfect spot in the dining room. The vase? A $6 Goodwill find. The tree? Absolutely free. The satisfaction of pulling this off? Priceless.


Now, my dining room has this fresh, organic feel that makes me smile every time I walk by. The branches are wild and a little unruly, but honestly, that makes me love them even more — perfectly imperfect, just the way I like it.
Mission "Bring the Outdoors In" accomplished. And I have to say, I’m pretty darn pleased with myself.


Links at a glance
Glass Table Top: custom 1/4”, made by local shower glass company
Clear Vase: Goodwill
Branch: my backyard
Floors: custom white oak live sawn 7 inch hardwoods that were stained on site
IF YOU ENJOYED THIS POST, YOU MIGHT BE INTERESTED IN my facebook marketplace reveal post.
FOLLOW ME ON MY SOCIALS!

Facebook Marketplace Reveal

Facebook Marketplace Console Table Makeover
One of my favorite parts of any room makeover is finding those special pieces that tie everything together – and this time, Facebook Marketplace came through in a big way! I stumbled upon the most adorable console table and instantly knew it had to be part of my sunroom refresh. It was listed for $100, but I offered $80 and got it!

FBMP Listing photo

The first thing that caught my eye? The gorgeous scallop details. They added such a charming touch that I just couldn’t resist. Of course, I had to put my own spin on it, so a little DIY magic was in order.
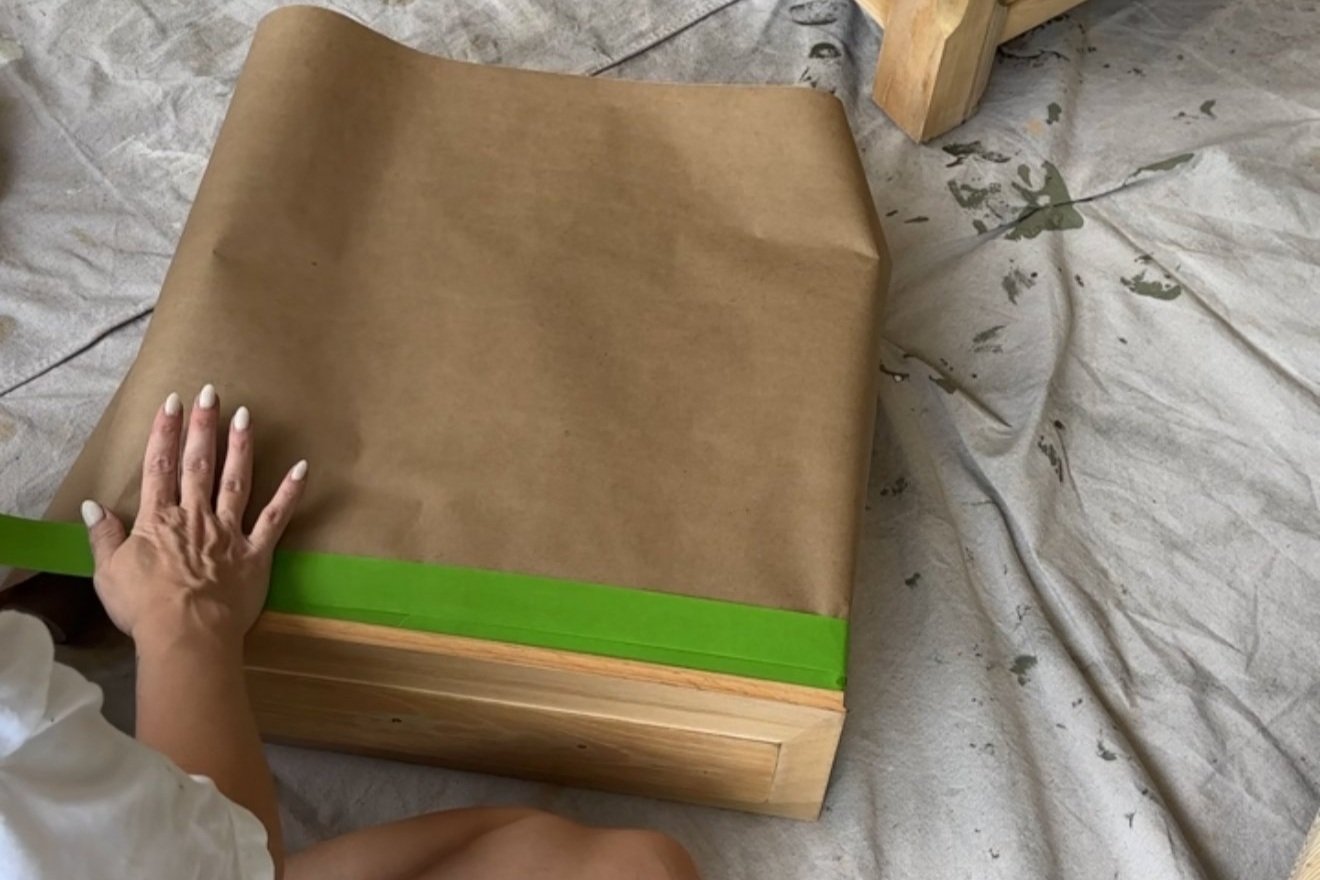
Step 1: Prepping for paint - After giving it a good clean, I removed the drawers, took off the knobs, and taped the inside of the table as well as the boxes of the drawers.
Step 2: Prime and sand – I started by applying one coat of HGTV Home by Sherwin-Williams Cabinet and Furniture Primer with my paint sprayer, ensuring smooth, even coverage. Once dry, I lightly sanded the surface with fine-grit sandpaper for a flawless finish. To remove any residual dust, I wiped everything down with a clean towel.


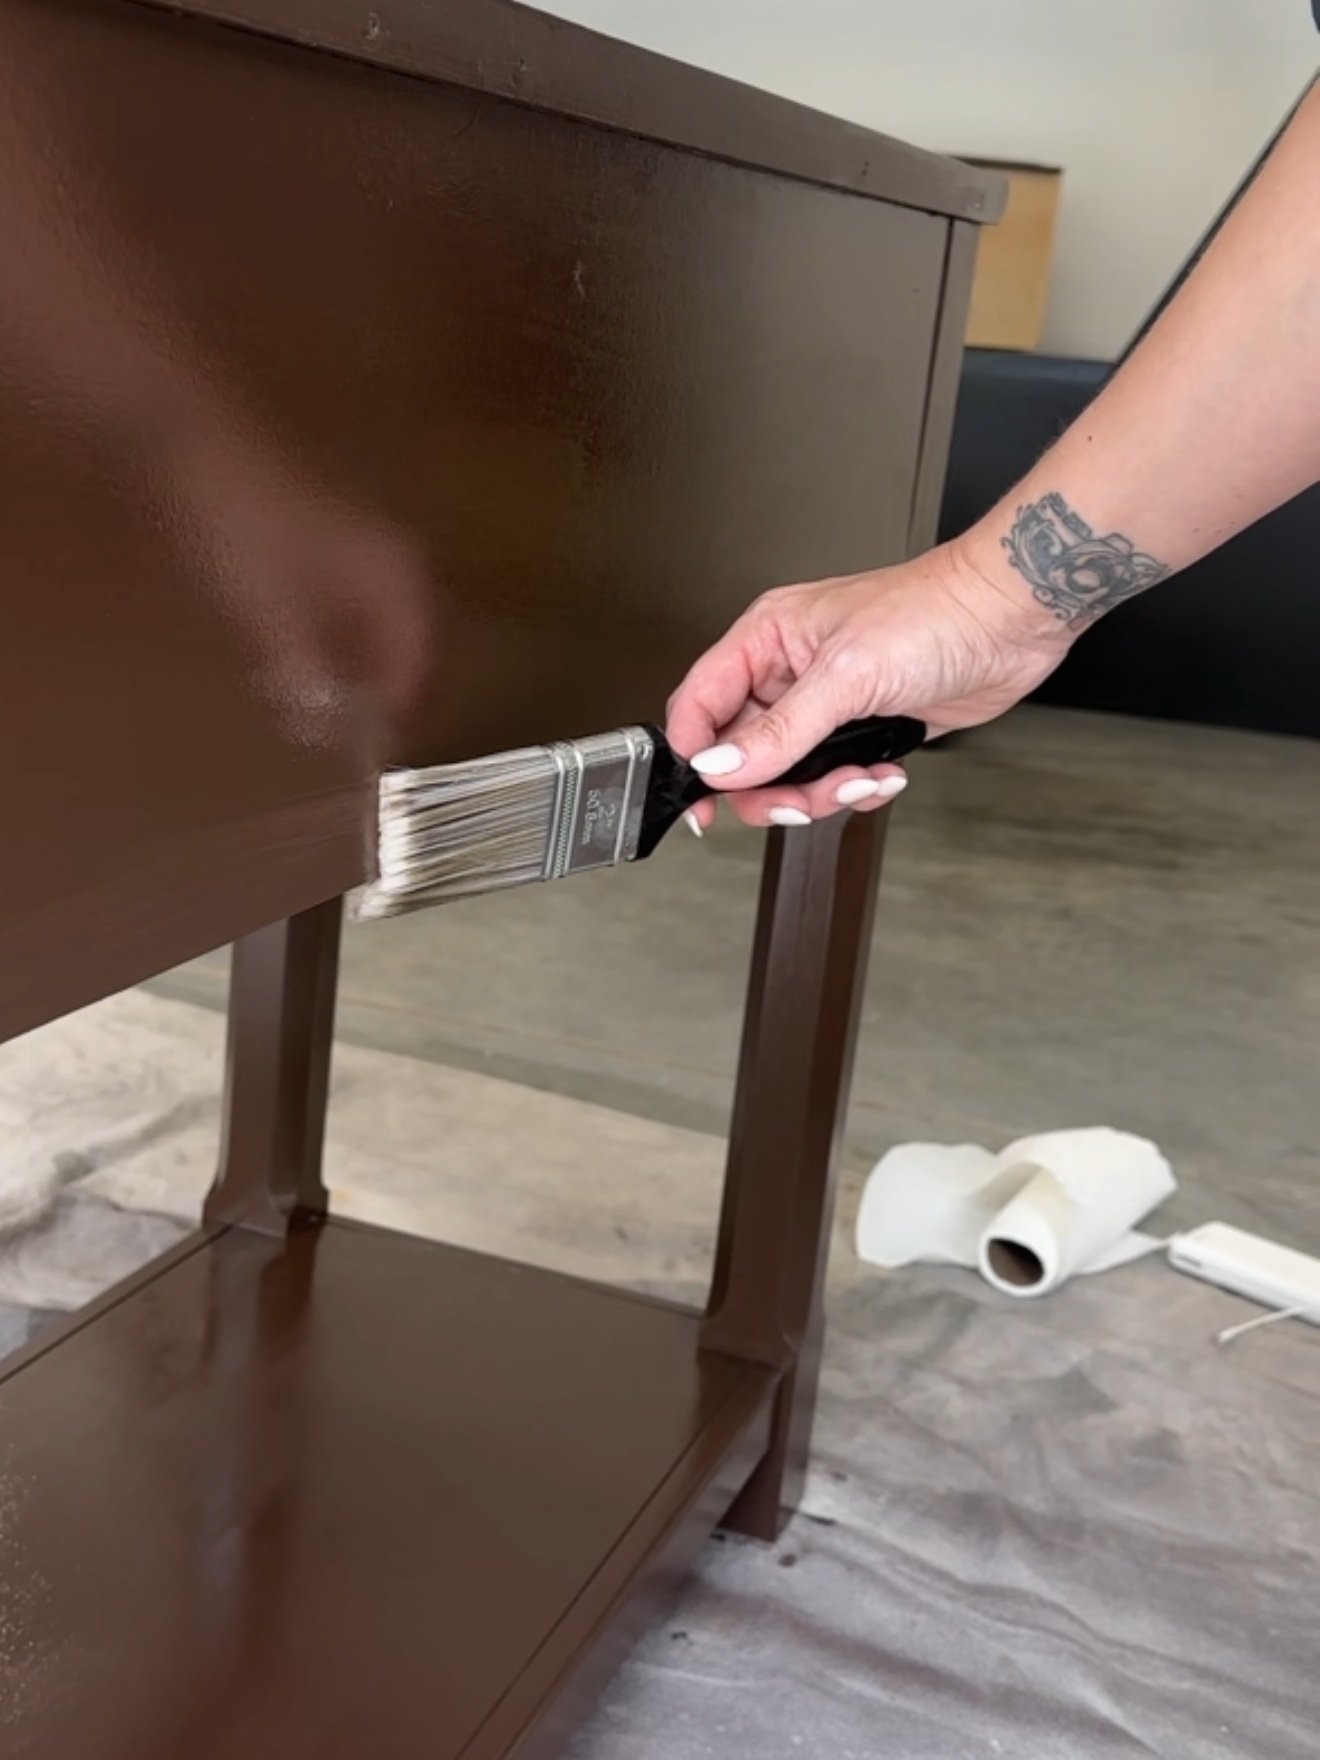
Step 3: Paint! Using my paint sprayer, I applied HGTV Home by Sherwin-Williams Cabinet and Furniture Paint in the shade "Otter." This paint is available in both satin and semi-gloss sheens, but I chose satin. Between each coat of paint, I lightly sanded with fine-grit sandpaper and wiped everything down to ensure a smooth finish.
Fun fact: I also used this same paint to transform my DIY coffee table, which now sits proudly in the sunroom alongside the console table.


Step 4: Clear Coat (Optional): To add extra durability (because I have a rambunctious toddler), I finished the piece with a coat of Minwax Fast-Drying Polyurethane in Satin. Since it’s oil-based, be sure to use a disposable brush—do not use your paint sprayer! It dries quickly, so work fast, and make sure your space is well-ventilated because the fumes are strong. Honestly, the poly coat ended up a bit glossier than I wanted, so if you prefer a more matte look, you can totally skip this step. The cabinet paint is durable enough on its own!

Step 5: Finishing Touches - Once the piece was completely dry, I swapped out the old knobs for some new ones that better fit my style. This small change made a big impact and really pulled the whole look together. Finally, I slid the drawers back into place, and just like that – my console table was complete!


This project was so simple but made such a big difference in the space. The new color and updated hardware were the perfect addition to my sunroom makeover. I couldn’t be happier with how it turned out.

Want to shop this room? Links here!
What do you think of the transformation? Have you ever scored a hidden gem on Facebook Marketplace? Let me know in the comments – I’d love to hear about your favorite finds and DIY projects!
IF YOU ENJOYED THIS POST, YOU MIGHT BE INTERESTED IN my sunroom makeover post.
FOLLOW ME ON MY SOCIALS!
Sunroom Makeover
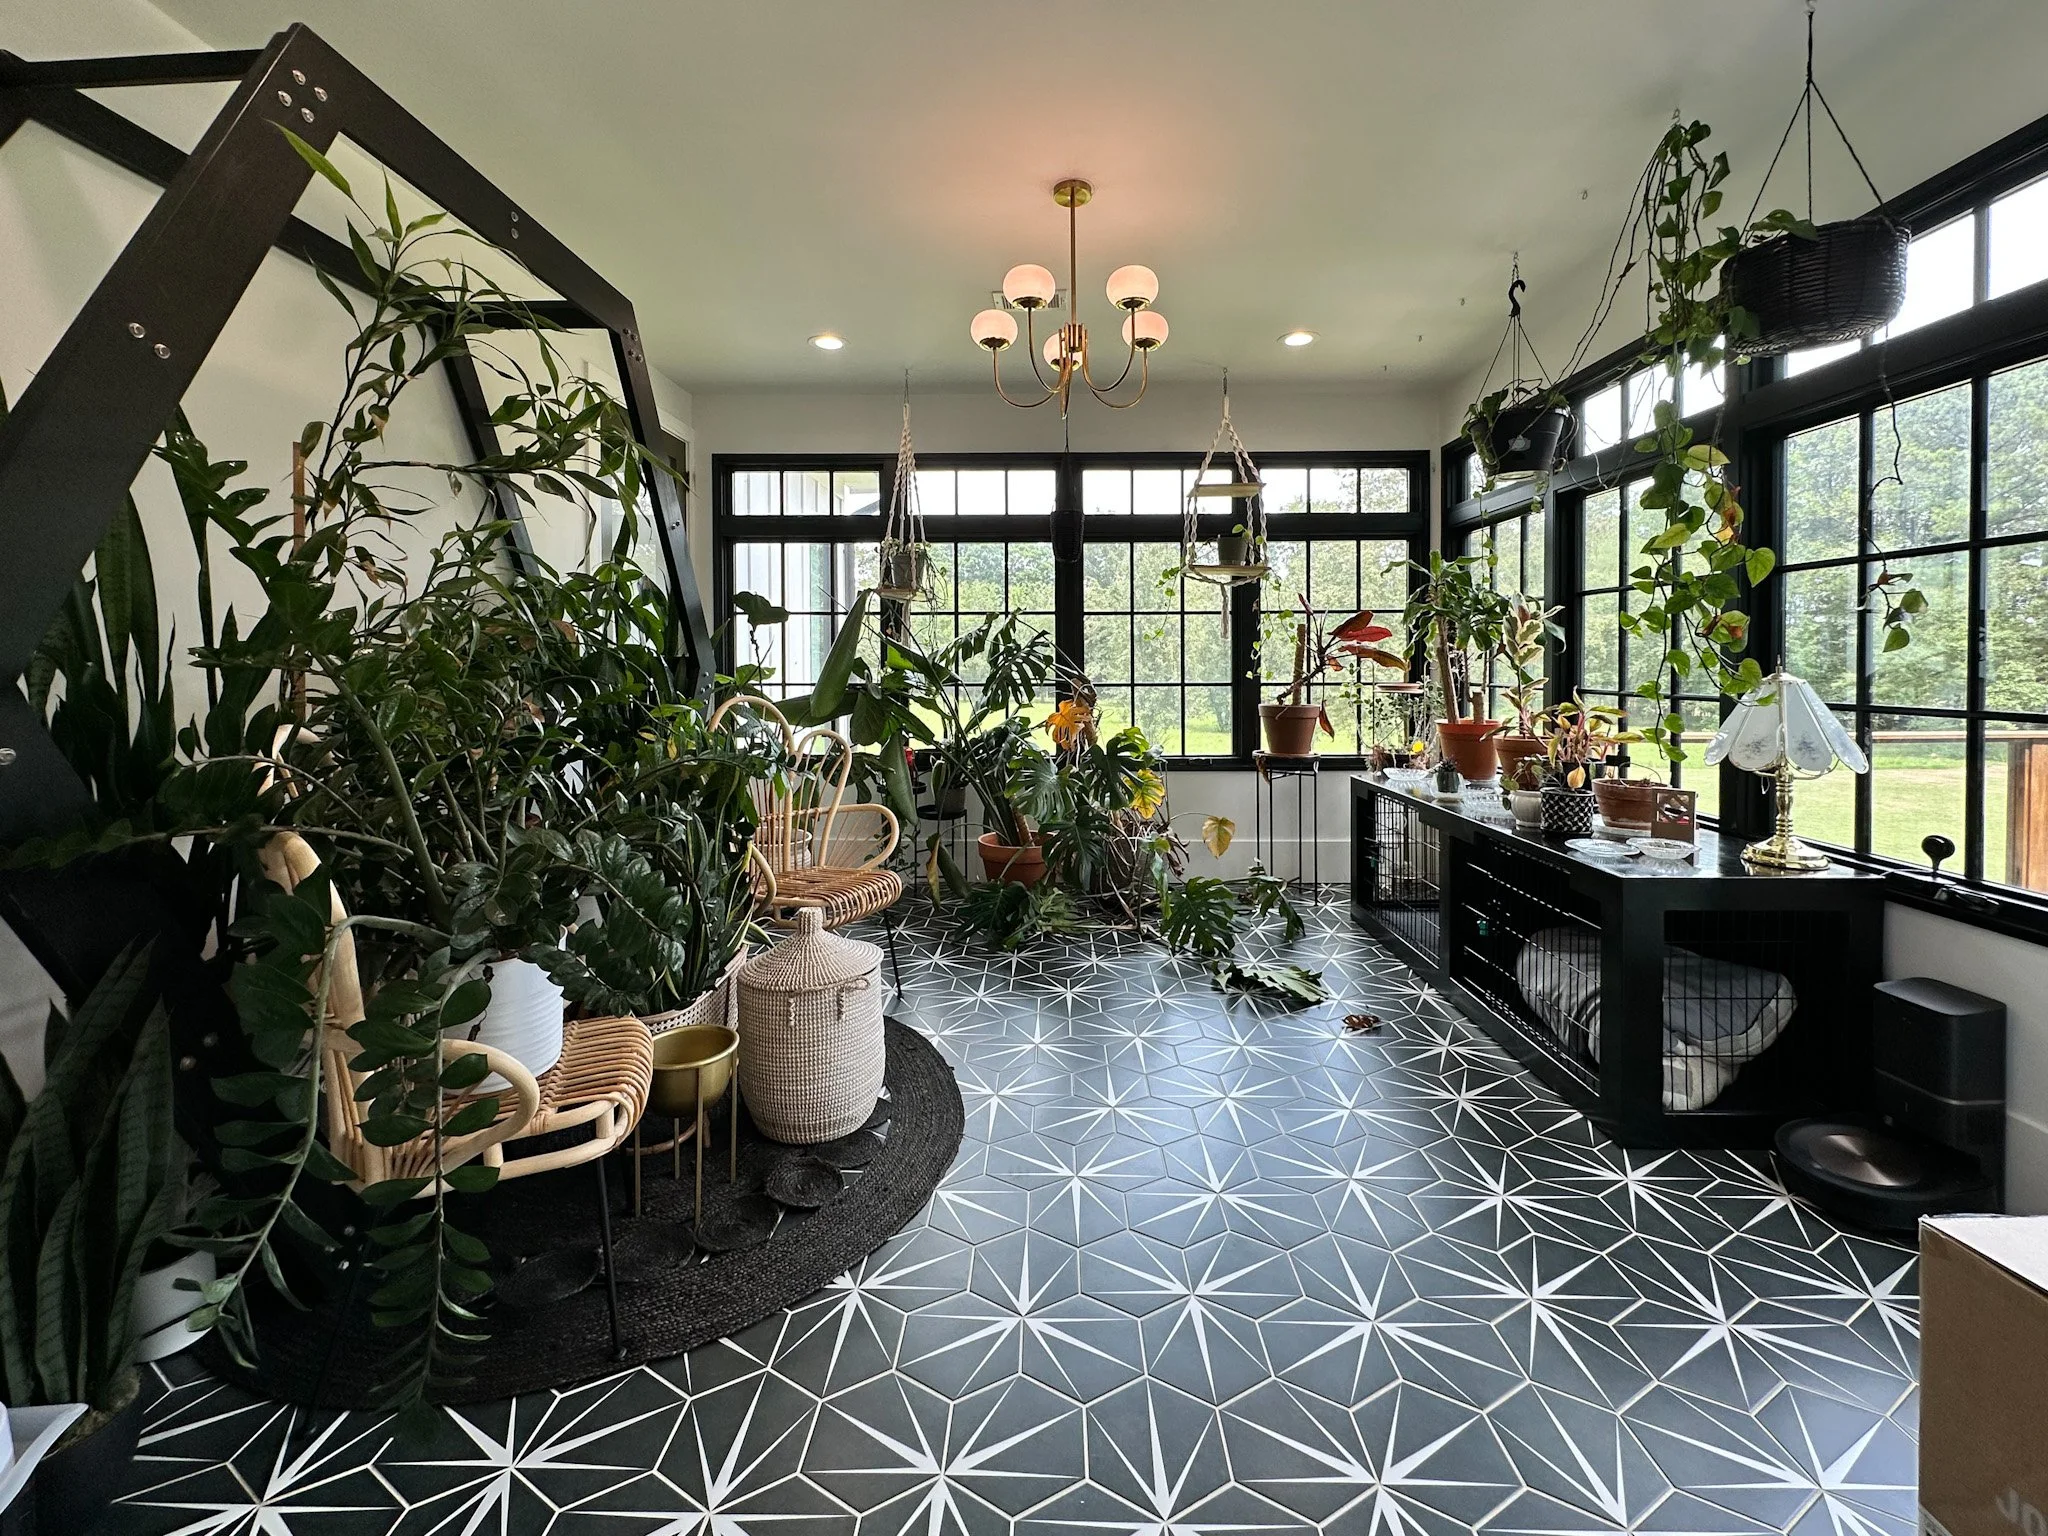
Welcome to my sunroom makeover! This space has always been a little paradise for my plant babies, but I figured it was time for me to enjoy it just as much as they do. Plus, I was over the plain white walls and ready to bring in some personality!
The Before:

The DIY Begins!
First things first—I cleared out the entire room, carefully relocating all my plants to make space for the transformation. I started by adding base cap to the top of my baseboards—something I do for all my makeovers because it makes such a difference! Then, I covered the floors with paper and painter’s tape to protect them from what was coming next—PAINT!
Crown Moulding & Painting
This was only my second time installing crown molding, but with a miter saw, adhesive, and a brad nailer, I got it up pretty quickly! (If you want a step-by-step guide, check out this blog post.) Then, I put my brand-new paint sprayer to the test, and with all the intricate details in this molding, it made the job SO much easier. Since this sprayer isn’t ideal for painting entire rooms—unless you want to refill it a thousand times—I rolled the rest of the walls and ceiling in Maison Blanche by HGTV Home by Sherwin Williams, the dreamiest creamy beige that I’m completely obsessed with!
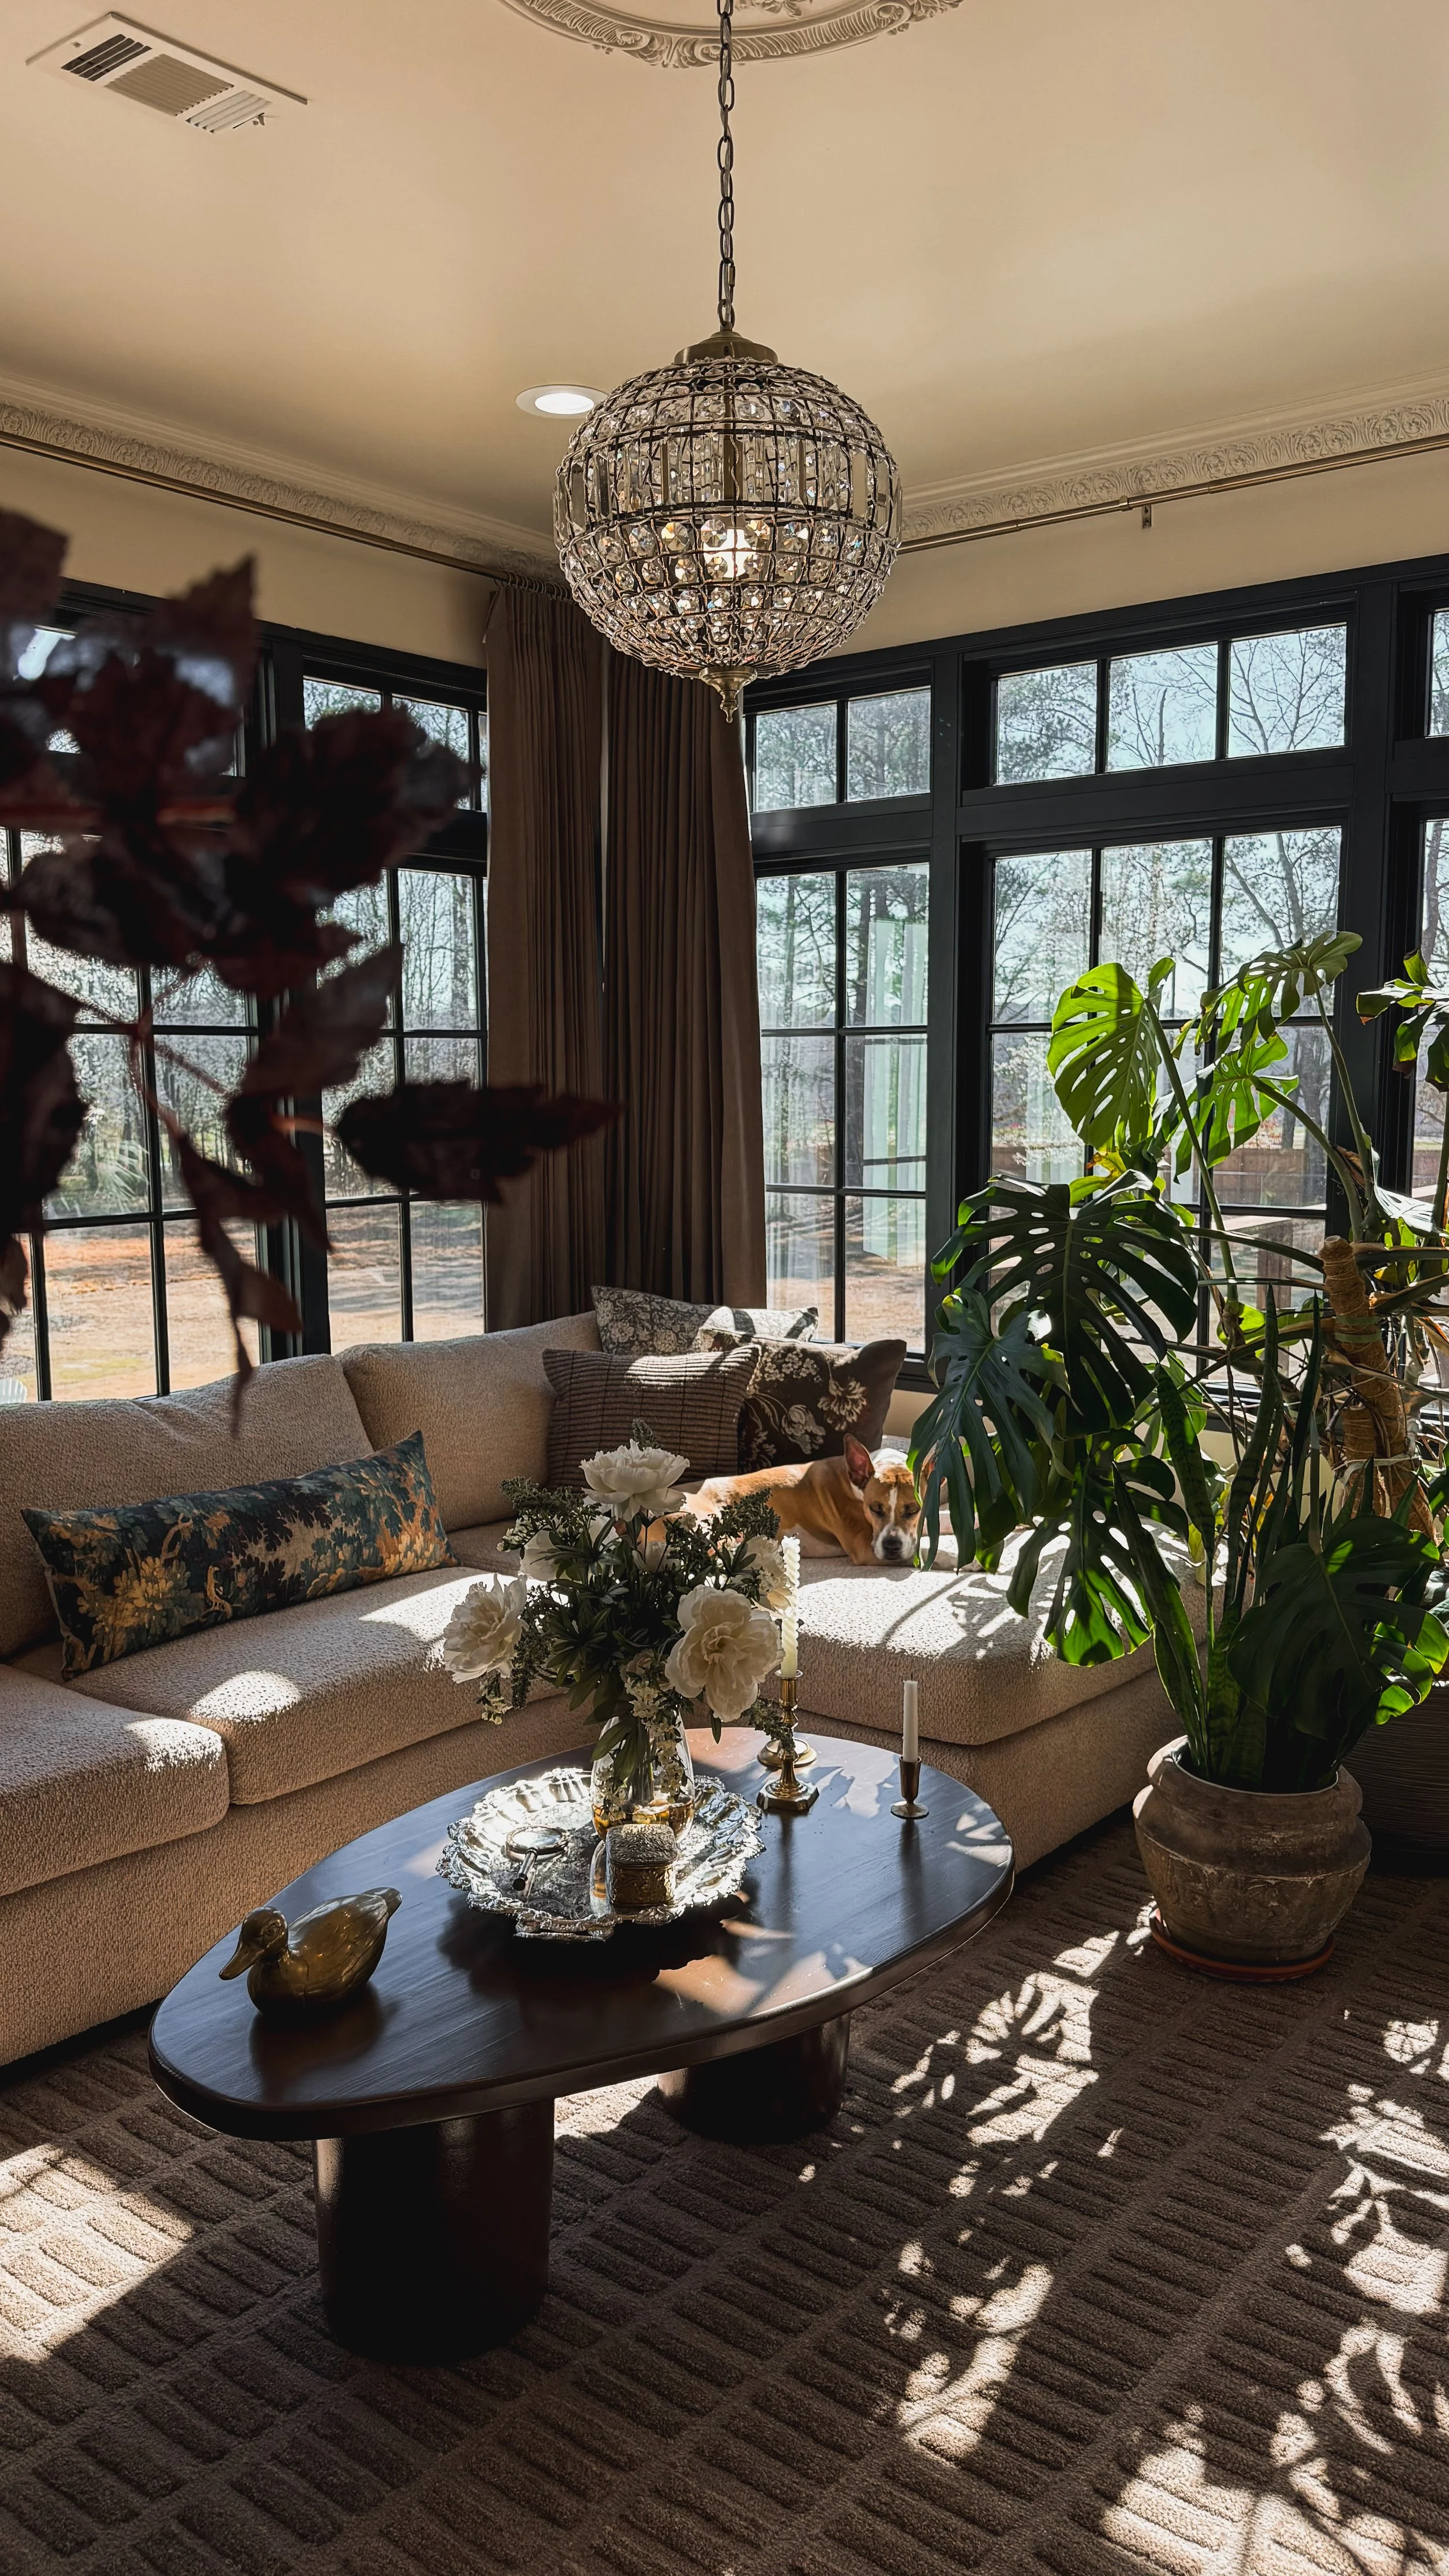
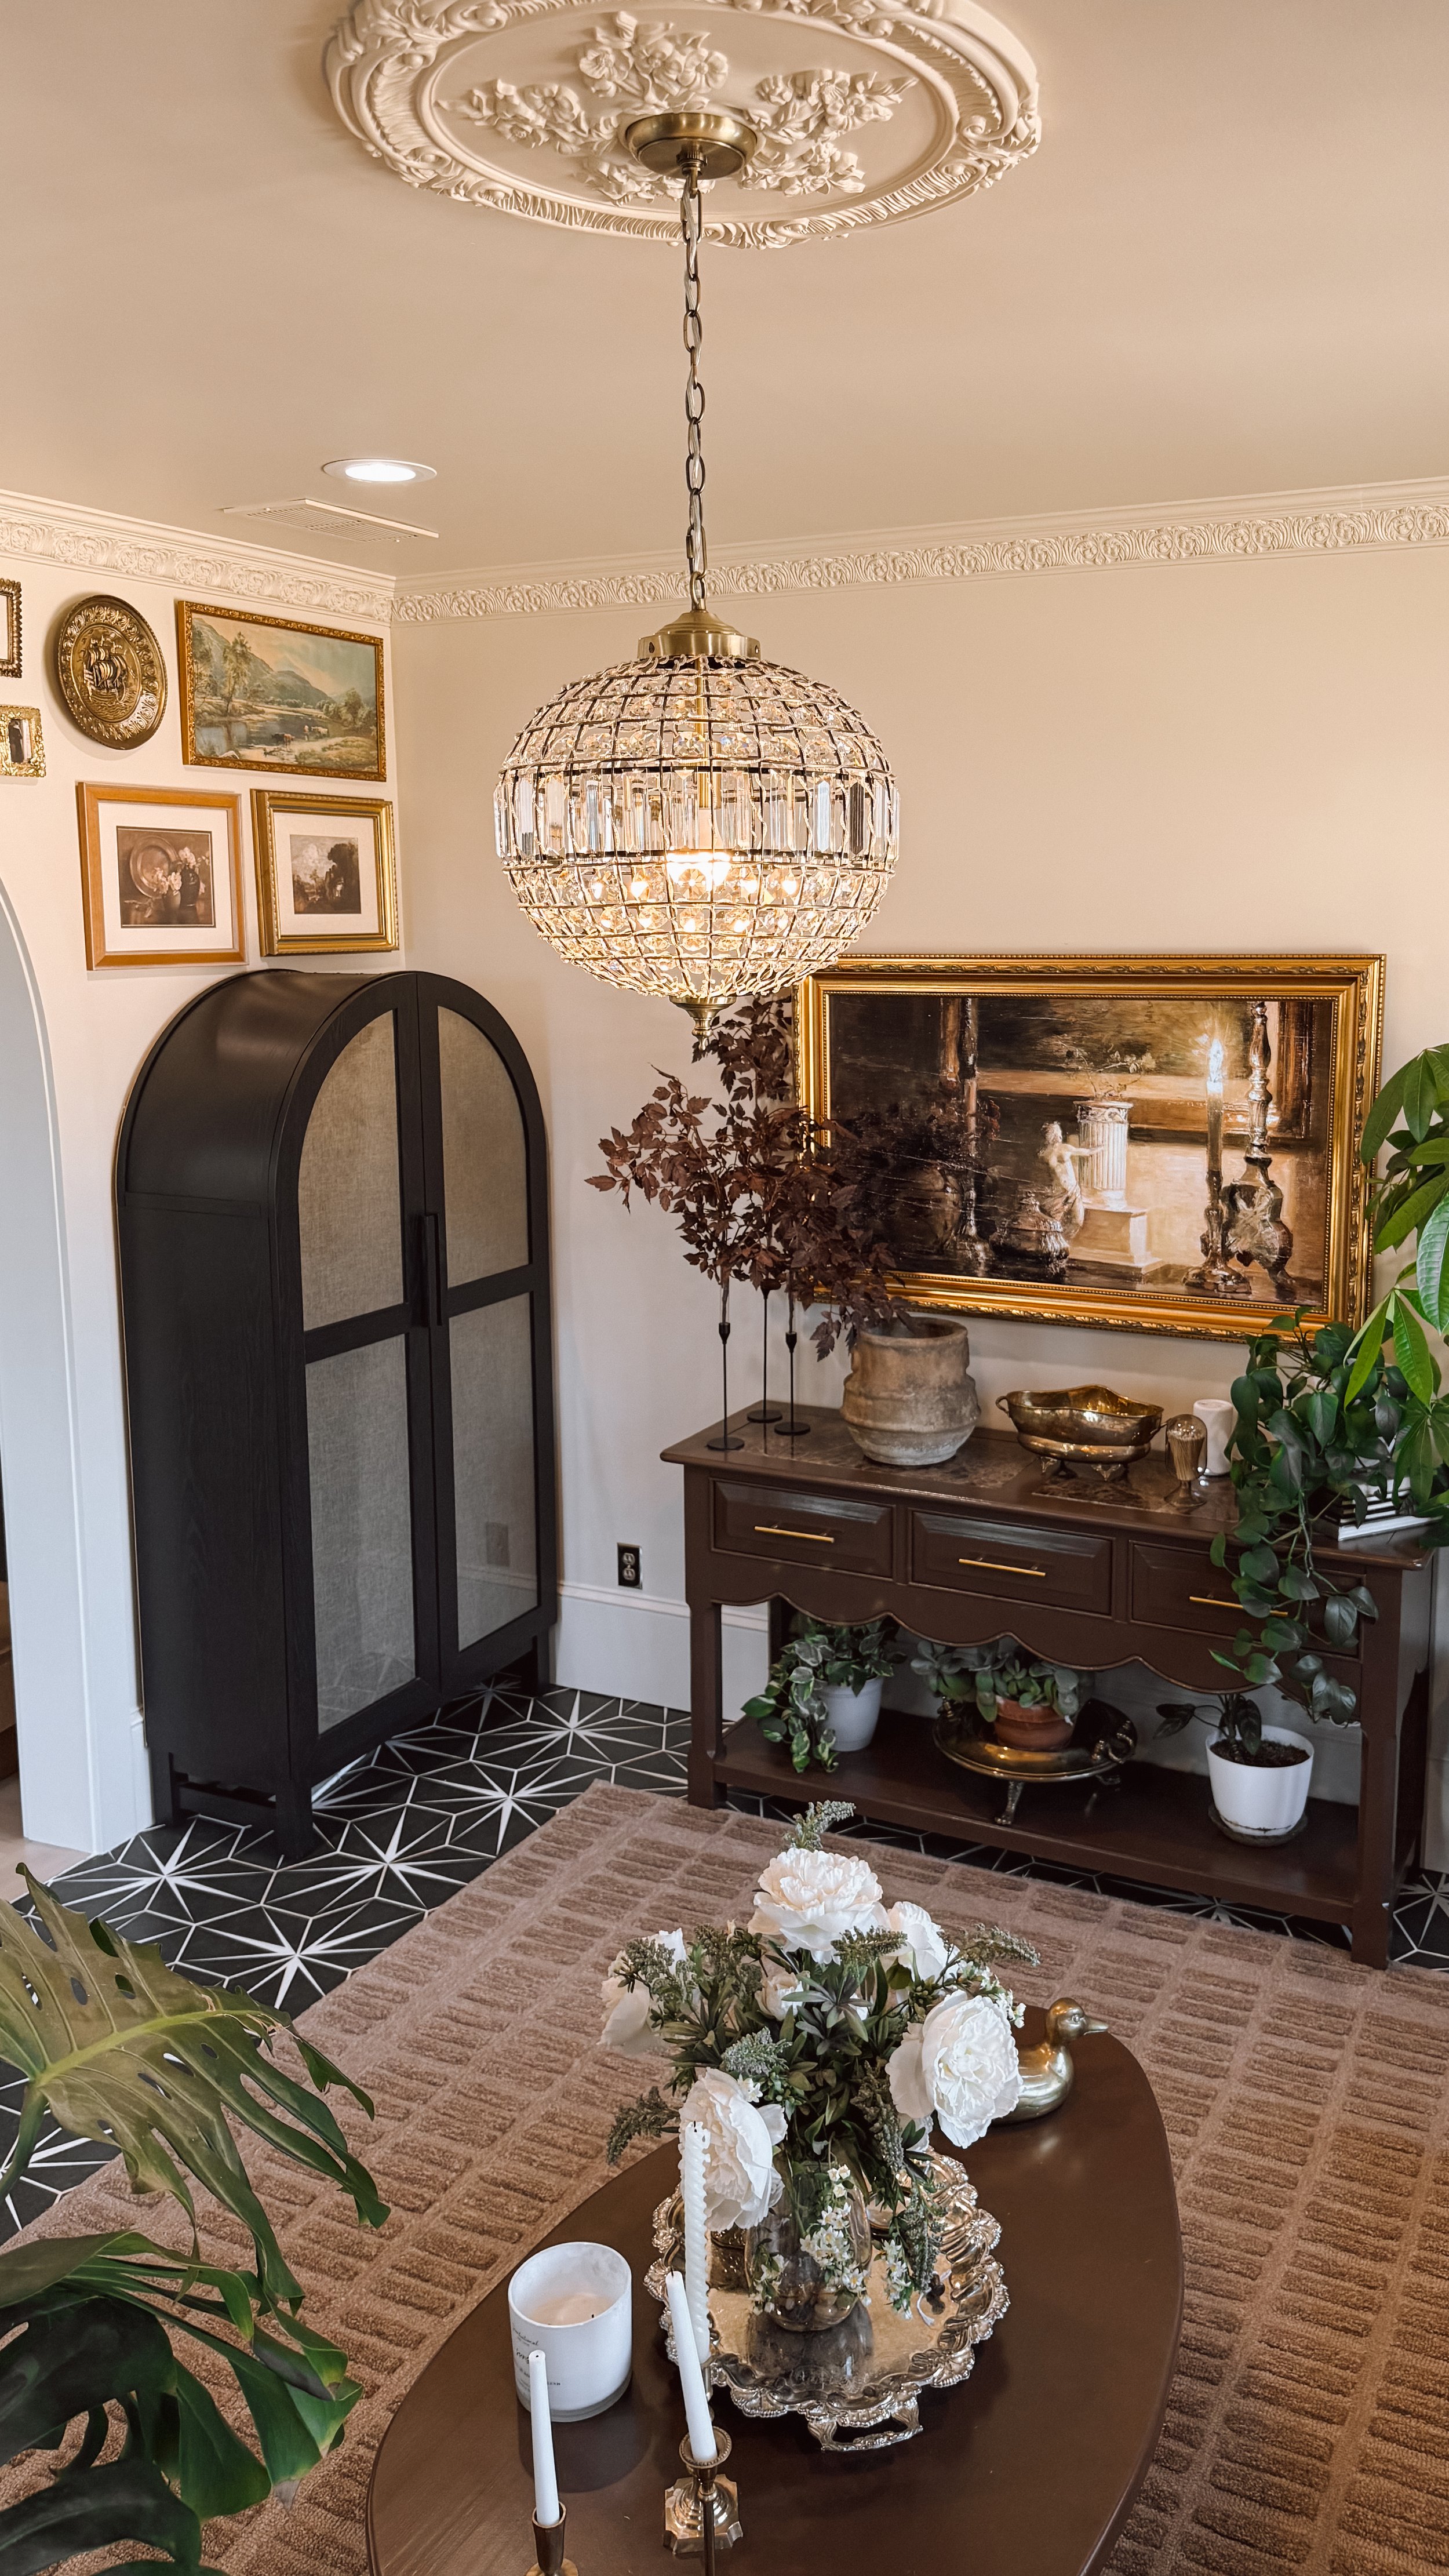
Ceiling Medallion & Chandelier
Next up was painting and hanging the gorgeous ceiling medallion! I used the paint sprayer again to get into all the intricate details, and it paired perfectly with a beautiful chandelier I found on Amazon. It instantly took the space to the next level! I also painted the arch leading into the dining room to create a smoother, more seamless color transition.


Time to Decorate!
Once the painting was done, it was time for my favorite part—decorating!
First, I rolled out this stunning brown rug that I am still completely in love with.
Then, I created a gallery wall on the arched wall—if you want to see my step-by-step method, check out this blog post!
I even built my first-ever piece of furniture—a DIY coffee table! (Check out this blog post to see how I did it!)
I found the perfect arched cabinet but decided to add fabric to the inside of the doors to hide the clutter—see the transformation here!
I painted both my DIY coffee table and a beautiful scalloped console table (a Facebook Marketplace find! Check out that blog post here!) using Cabinet and Furniture Paint in Otter by HGTV Home by Sherwin Williams. The deep brown looked stunning against the creamy walls!
To finish it off, I swapped out the knobs on the console table’s drawers for a little extra charm.
I also added brown pinch pleated blackout curtains on gold rods with gold eyelets, which added such a luxurious and cozy touch to the space. The warm tones complemented the creamy walls perfectly and tied everything together beautifully!


The Finishing Touches
One of my best finds was the bouclé couch in the color Alabaster with washable cushions—SO comfy and practical! After adding the final decor touches and bringing back some of my plants (while redistributing the rest throughout my home), I thought the room was finished... but of course, I wasn’t quite done yet!


The Final Addition: A Frame TV
Since this sunroom quickly became our go-to lounging space, adding a TV just made sense. We installed our second Frame TV, and instead of DIY-ing a frame, this time I simply bought one. To keep things sleek, my husband cut a hole in the drywall and installed a recessed box, running the power through the wall to keep the cords completely hidden. Now, the TV sits flush against the wall and looks just like a piece of art!
And that’s a wrap! My sunroom is now the coziest spot we hang out in all the time—without sacrificing my plants’ happiness. Hope you loved following along with this makeover! Let me know what you think in the comments!


Links at a glance
Cabinet and Furniture Paint: Otter by HGTV Home by Sherwin Williams
Console Table: Facebook Marketplace
IF YOU ENJOYED THIS POST, YOU MIGHT BE INTERESTED IN MY DIY: Cabinet cover-up POST.
FOLLOW ME ON MY SOCIALS!

DIY: Cabinet Door Cover-Up
DIY: Cabinet Door Cover-Up - A Simple Fabric Fix
Sometimes, finding the perfect piece of furniture within budget just isn’t possible—but a little DIY can make it work! Arch cabinets with solid doors can be pricey, so I grabbed this one with glass doors for a fraction of the cost.
I knew it would be great for storage, but I wanted to keep everything inside hidden. Let’s just say my hosting dishware collection is extensive—and while it’s all beautiful, it’s also very much crammed into this cabinet to maximize space. My first plan was to create a soft, gathered curtain look (inspo pictured below) with floral fabric. I spent about $40 on the fabric, only to realize I didn’t have enough space inside the doors to make it work.


I thought about laying the fabric flat against the glass, but it didn’t have the look I was going for. That’s when I remembered a piece of upholstery fabric I had thrifted from Goodwill for $9.99. I pulled it out, tested it on the doors, and liked it much better.


Here’s how I made it work:
Removed the doors for easier handling.
Cut the fabric to fit the glass panels.
Cleaned the glass to remove any dust or smudges.
Stapled the fabric to the back of the doors using 1/4-inch staples, pulling it tight and working in sections.
Trimmed the excess fabric for a neat finish.
Rehung the doors and started filling the cabinet.


I don’t think everyone needs to cover their cabinet doors, but for my space, I wanted a solid look without spending a fortune on new doors. This solution worked perfectly, and I love the end result. Now I have a functional storage piece that fits my needs and style.
Click here to shop the arched cabinet!
A little creativity can go a long way in making a piece work for you! Happy DIY-ing!!
IF YOU ENJOYED THIS POST, YOU MIGHT BE INTERESTED IN MY DIY: Coffee table post.
FOLLOW ME ON MY SOCIALS!

DIY: Coffee Table
DIY Concrete Coffee Table: How I Made My First Piece of Furniture!
I got the biggest compliment ever! Someone asked me where I bought my coffee table, and I proudly told them, “I freaking made it!!!” Yes, you read that right—this beautiful piece of furniture is 100% DIY, and I couldn't be more excited to share how I did it!
A year and a half ago, I decided it was time to stop just wishing and start doing. There was this huge item on my “to-make” list: a handmade coffee table. But even with all my accomplishments, this was the one thing I had never attempted. I always thought furniture-building was something I’d never tackle—but it turns out, all I needed was the right project to make it happen.
I kept it simple because, let’s face it, I have a tendency to overcomplicate things, which can lead to procrastination (yep, guilty!). I needed something easy to ease into this whole furniture-making world. So, I grabbed a piece of project board from Lowes, a couple of 5-gallon buckets, and some concrete, and got to work. Here’s how I did it!
Plan the Design
First things first, I decided on the size and shape of the table I wanted. I drew everything out with pencil directly on the project board and carefully cut it out with my jig saw, then sanded it on both side including rounding out the edges. Simple and clean. No overthinking.


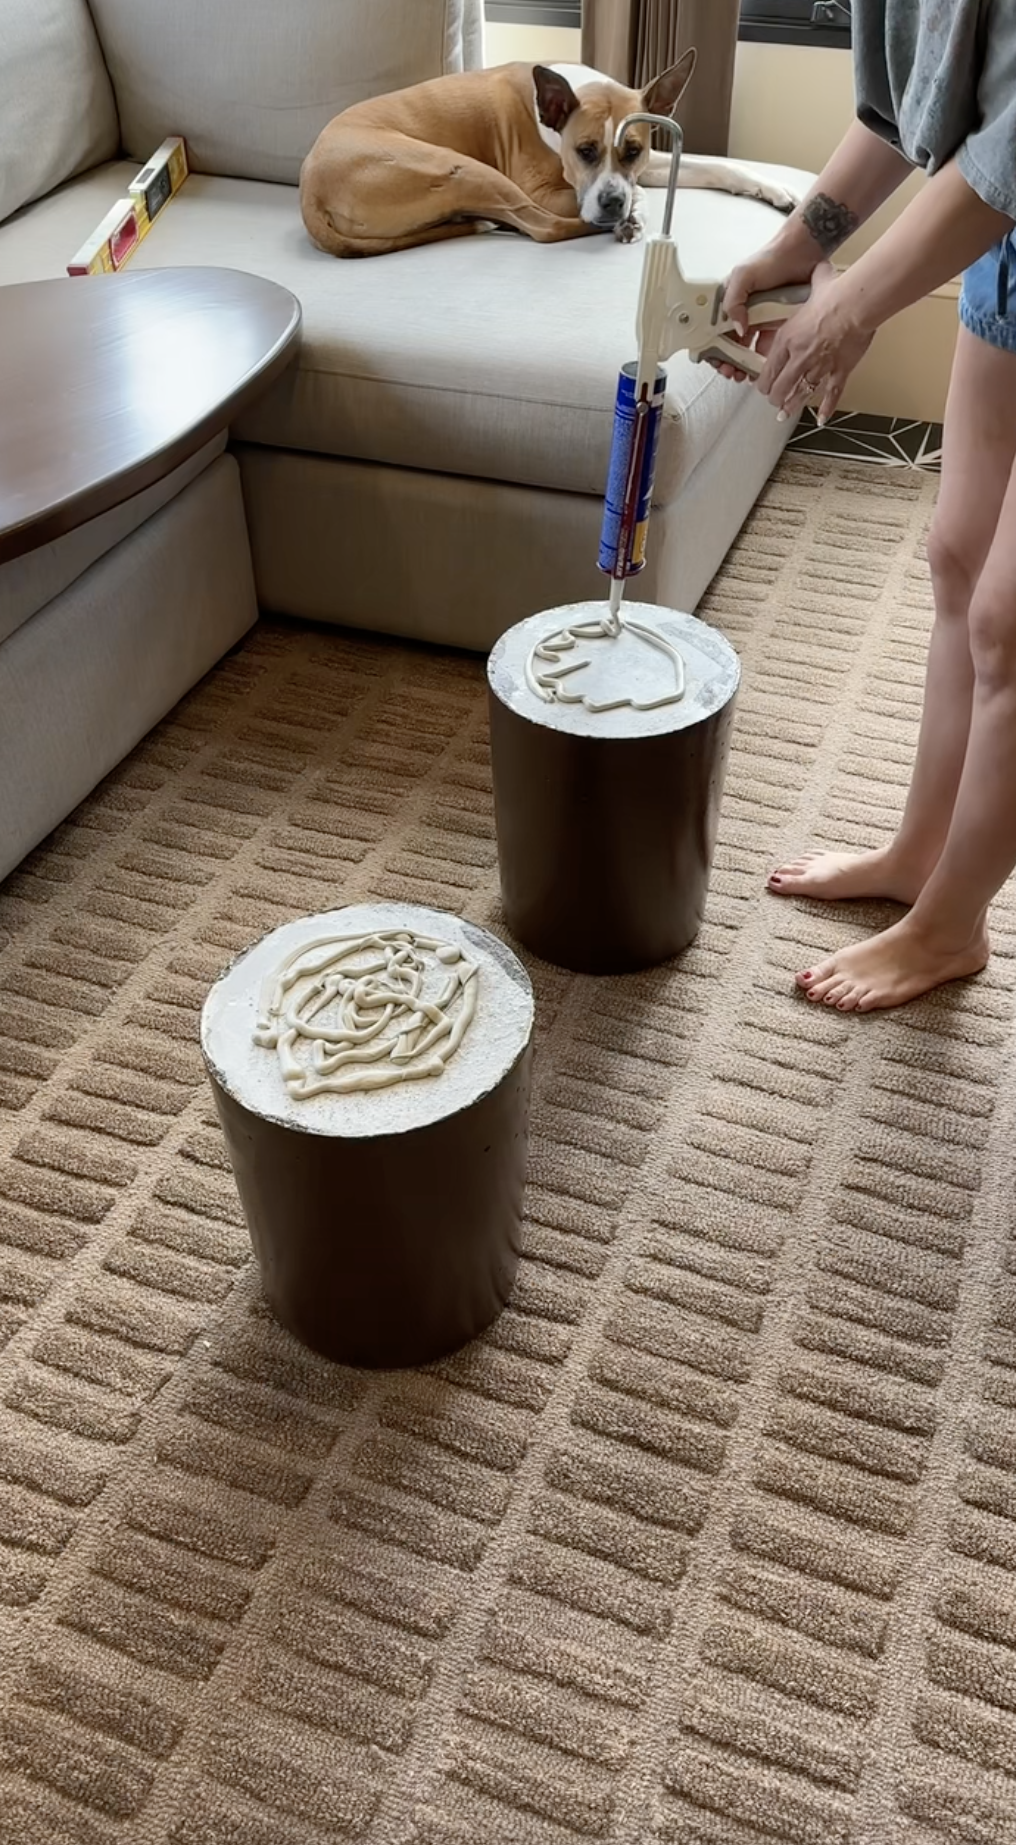
Concrete Molds
Then, I greased the inside and filled two 5-gallon buckets with mixed concrete using an eggbeater attachment on my drill (talk about a heavy project—good thing I had help!). After the concrete set and dried inside the buckets overnight, I removed it to reveal the perfect concrete molds for the legs. To release the concrete I cut a slit on the bottom of the bucket to make the removal of the bucket easier! Note: concrete is heavy—this is definitely a two-person job. Trust me, my back can tell you all about it (I’m basically 80, with the way I decorate my house, right?!).


Painting the Table
Now the real fun begins. I started with one coat of primer, followed by a couple of coats of paint using my paint sprayer - making sure I was lightly hand sanding in-between each coat with 220 grit sandpaper. I used Cabinet and Furniture Paint in the color Otter by HGTV Home by Sherwin Williams! Then, to protect my hard work, I added a few layers of polyurethane using a throw away roller and brush.


Putting It All Together
Let this part be a lesson on what not to do. I connected the concrete legs to the table top using construction adhesive. Sure, maybe it wasn’t the most professional connection, but I’m still learning! Next time I’ll upgrade my technique.

Final Product!
And voila—look at this beauty! It’s gorgeous and it’s 100% made by me. In fact, someone even asked if they could buy one just like it. I’m taking that as a massive win!
So if you've been dreaming about creating something like this, stop waiting for the "perfect" time. Grab your materials, keep it simple, and just start. You might surprise yourself with what you can create. Happy DIY-ing!


IF YOU ENJOYED THIS POST, YOU MIGHT BE INTERESTED IN MY FAQ: Color drenching doorways POST.
FOLLOW ME ON MY SOCIALS!

FAQ: Color Drenching Doorways
How to Color Drench Your Doorways Like a Pro!
One of the biggest questions I get when it comes to color drenching is: What do you do with the door?! If you’ve been wondering the same thing, don’t worry—I’ve got you covered! Let’s break it down step by step so you can achieve that seamless, stylish look in your space.
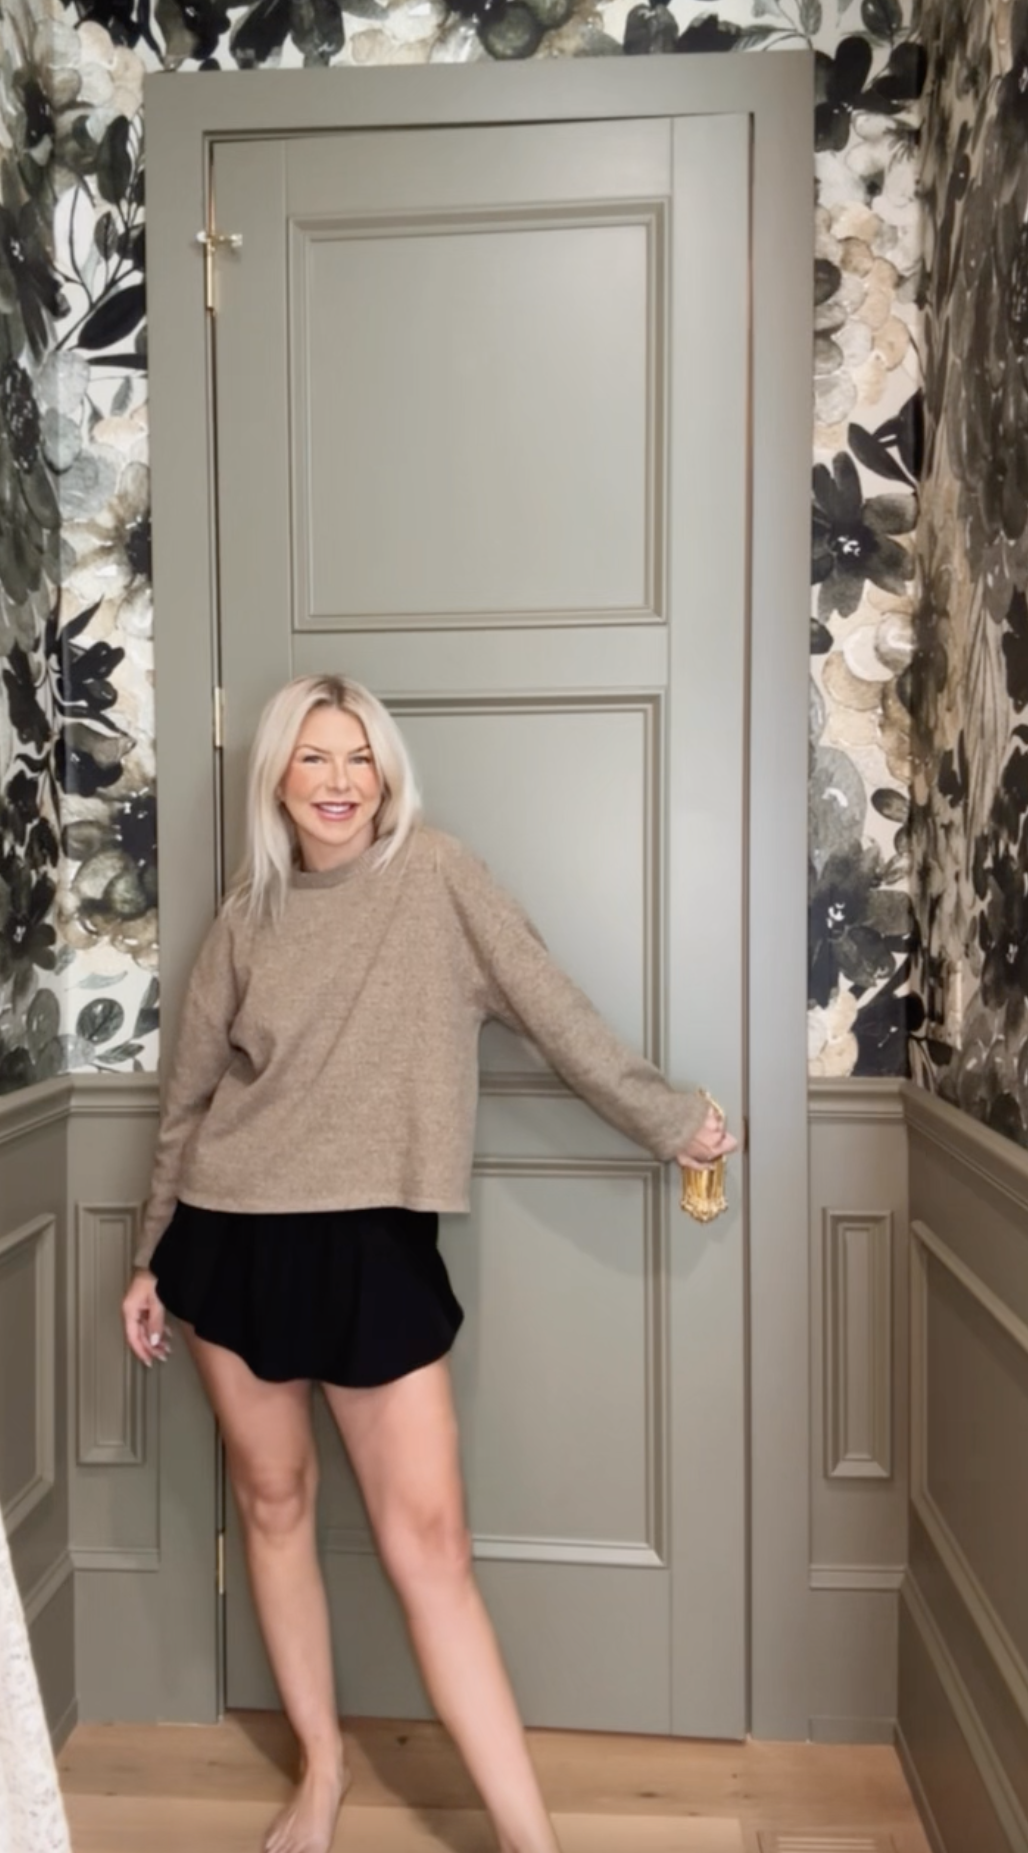
Step 1: When the Door is Shut…
When your door is completely closed, it should match the walls in that room. That means if you’re drenching your space in a dreamy shade of green, your closed door should blend right in with that same color. Easy, right?
Step 2: When the Door Swings Open…
Here’s where it gets a little more dynamic! When you open the door, the front side (the side that faces into the next room) should match that room’s color. So if you’re stepping into a green-painted space, the front side of the door that faces that room should be green.
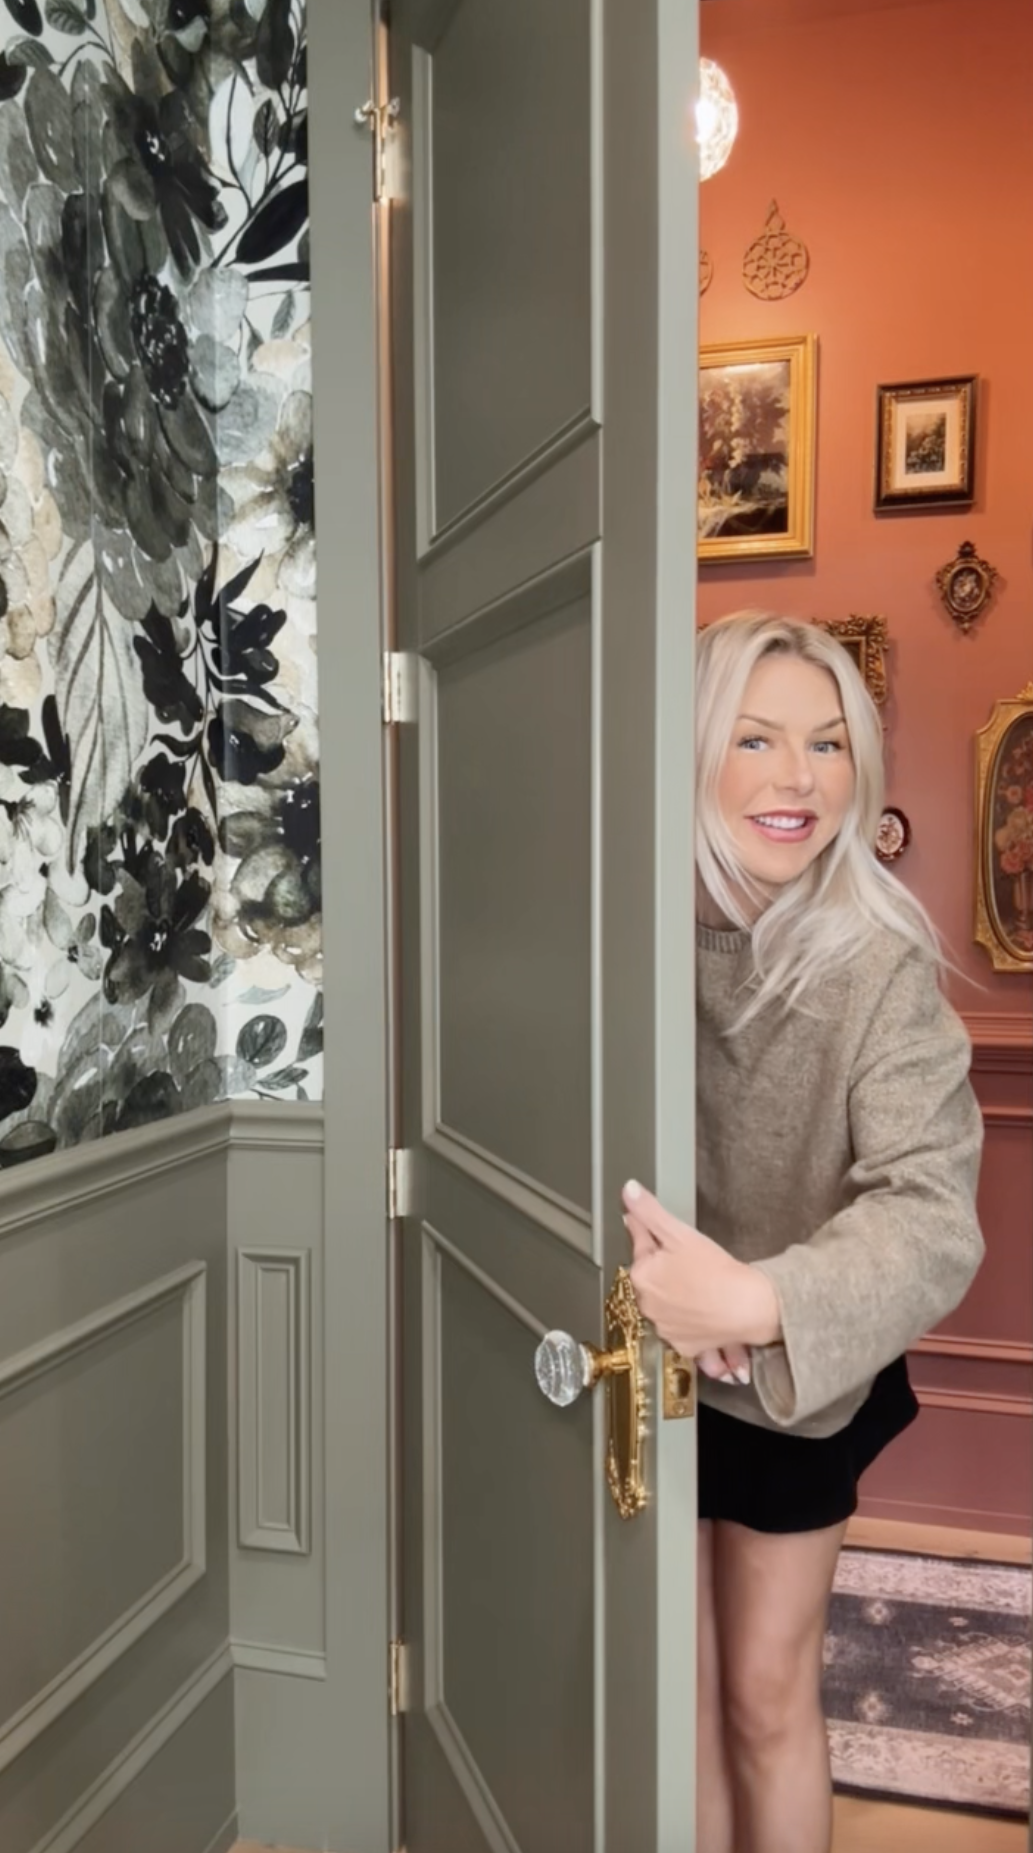
Step 3: What About the Backside of the Door?
Now, go to the backside of the door and check the hinges. This side of the door should match the room you are standing in when the door is open. So, if you’re standing in a pink room, that side of the door should be pink.


Step 4: The Door Jamb—Let’s Walk Through It Together!
Now, let’s talk about the door jamb (the frame around your door).
Stand on the side where you pull the door shut. Every part of the jamb that you see from this angle should match the door. So if your door is pink, the visible jamb here should also be pink.
Now move to the other side, where you push the door shut. The rest of the jamb on this side should match the walls of that room. Imagine your door “nestled” into its frame—it should all be a smooth continuation of color.


The Key to a Seamless Look
The main goal here is to avoid seeing another color peeking through when your door is closed. Keeping the door and its surrounding frame within the same color family ensures a cohesive, wrapped-in-color effect that truly embodies the color-drenched aesthetic.
Now, It’s Your Turn!
I promise—it’s just paint! You can always tweak and adjust as you go. So go ahead, grab that paintbrush, and transform your space with the magic of color drenching. You got this!
Happy painting!
Shop This Post
Interested in my paint colors? Click here!
Interested in my wallpaper? Click here!
Found something you like? Shop these rooms here!
IF YOU ENJOYED THIS POST, YOU MIGHT BE INTERESTED IN MY HOW TO Make a Floor Plan: To Scale POST.
FOLLOW ME ON MY SOCIALS!

How To Make a Floor Plan: To Scale
Creating a floor plan to scale is a game-changer when it comes to designing and arranging a space. Whether you're planning a new layout, rearranging furniture, or just getting a better feel for your room’s dimensions, mapping it out properly will save you a ton of time and effort. Here’s how to do it step by step.
Step 1: Start with a Rough Sketch
Before you even think about scale, grab a piece of paper and make a rough sketch of your room. This doesn’t have to be perfect—it’s just a guide to help you take accurate measurements.
Here are the key measurements to note:
The perimeter of your walls
The dimensions of your doors and windows
Any architectural details or built-in furniture
The sizes of your existing furniture pieces (if you plan to include them in your layout)
Once you’ve got those measurements jotted down, your rough sketch should look something like this:


Step 2: Transfer to Scale Using Graph Paper
Now, it’s time to make it official! Grab some graph paper because we’re going to transfer your rough sketch into a properly scaled floor plan.
To keep things simple, let’s set our scale: One box = 6 inches in real life.
For example, if your wall measures 13 feet, here’s how you plot it:
Double the feet count (since each foot contains two 6-inch segments): 13 feet → 26 boxes
If your window wall is 11 feet 8 inches:
11 feet = 22 boxes
8 inches is just over one extra box, so round up slightly to 23 boxes (with a touch of a 24th box for accuracy)


Step 3: Add Doors and Windows
Now, let’s position doors and windows precisely.
Say the distance from the left wall to the start of your pocket door is 6 feet 3 inches. That translates to:
6 feet = 12 boxes
3 inches = half a box
If on the other side, the measurement is 4 feet 1 inch, that would be:
4 feet = 8 boxes
1 inch = just a touch into the next box
Now that everything is positioned correctly, your to-scale floor plan should resemble this:


Step 4: Add Furniture to Scale
Here’s where the magic happens! Using the same scale (1 box = 6 inches), sketch out your furniture pieces, cut them out, and move them around on your floor plan.
By doing this, you can:
Experiment with different layouts
Ensure there’s enough walking space
Avoid placement mistakes before moving heavy furniture
For example, I quickly realized that centering the bed on this wall wouldn’t work—there wouldn’t be enough walking space to access the bathroom. By shifting things around, I could find a layout that worked without cramping the room.


Why This Method Works
This technique is a lifesaver because it allows you to visualize your space accurately. You can see what your current furniture fits, what doesn’t, and even test new furniture sizes before making a purchase. No more guessing if that new couch will be too big—it’s all planned out beforehand!
Give this method a try next time you're rearranging a room—it’ll make your life so much easier!
IF YOU ENJOYED THIS POST, YOU MIGHT BE INTERESTED IN my blue floral bathroom makeover post.
FOLLOW ME ON MY SOCIALS!

Blue Floral Bathroom Makeover
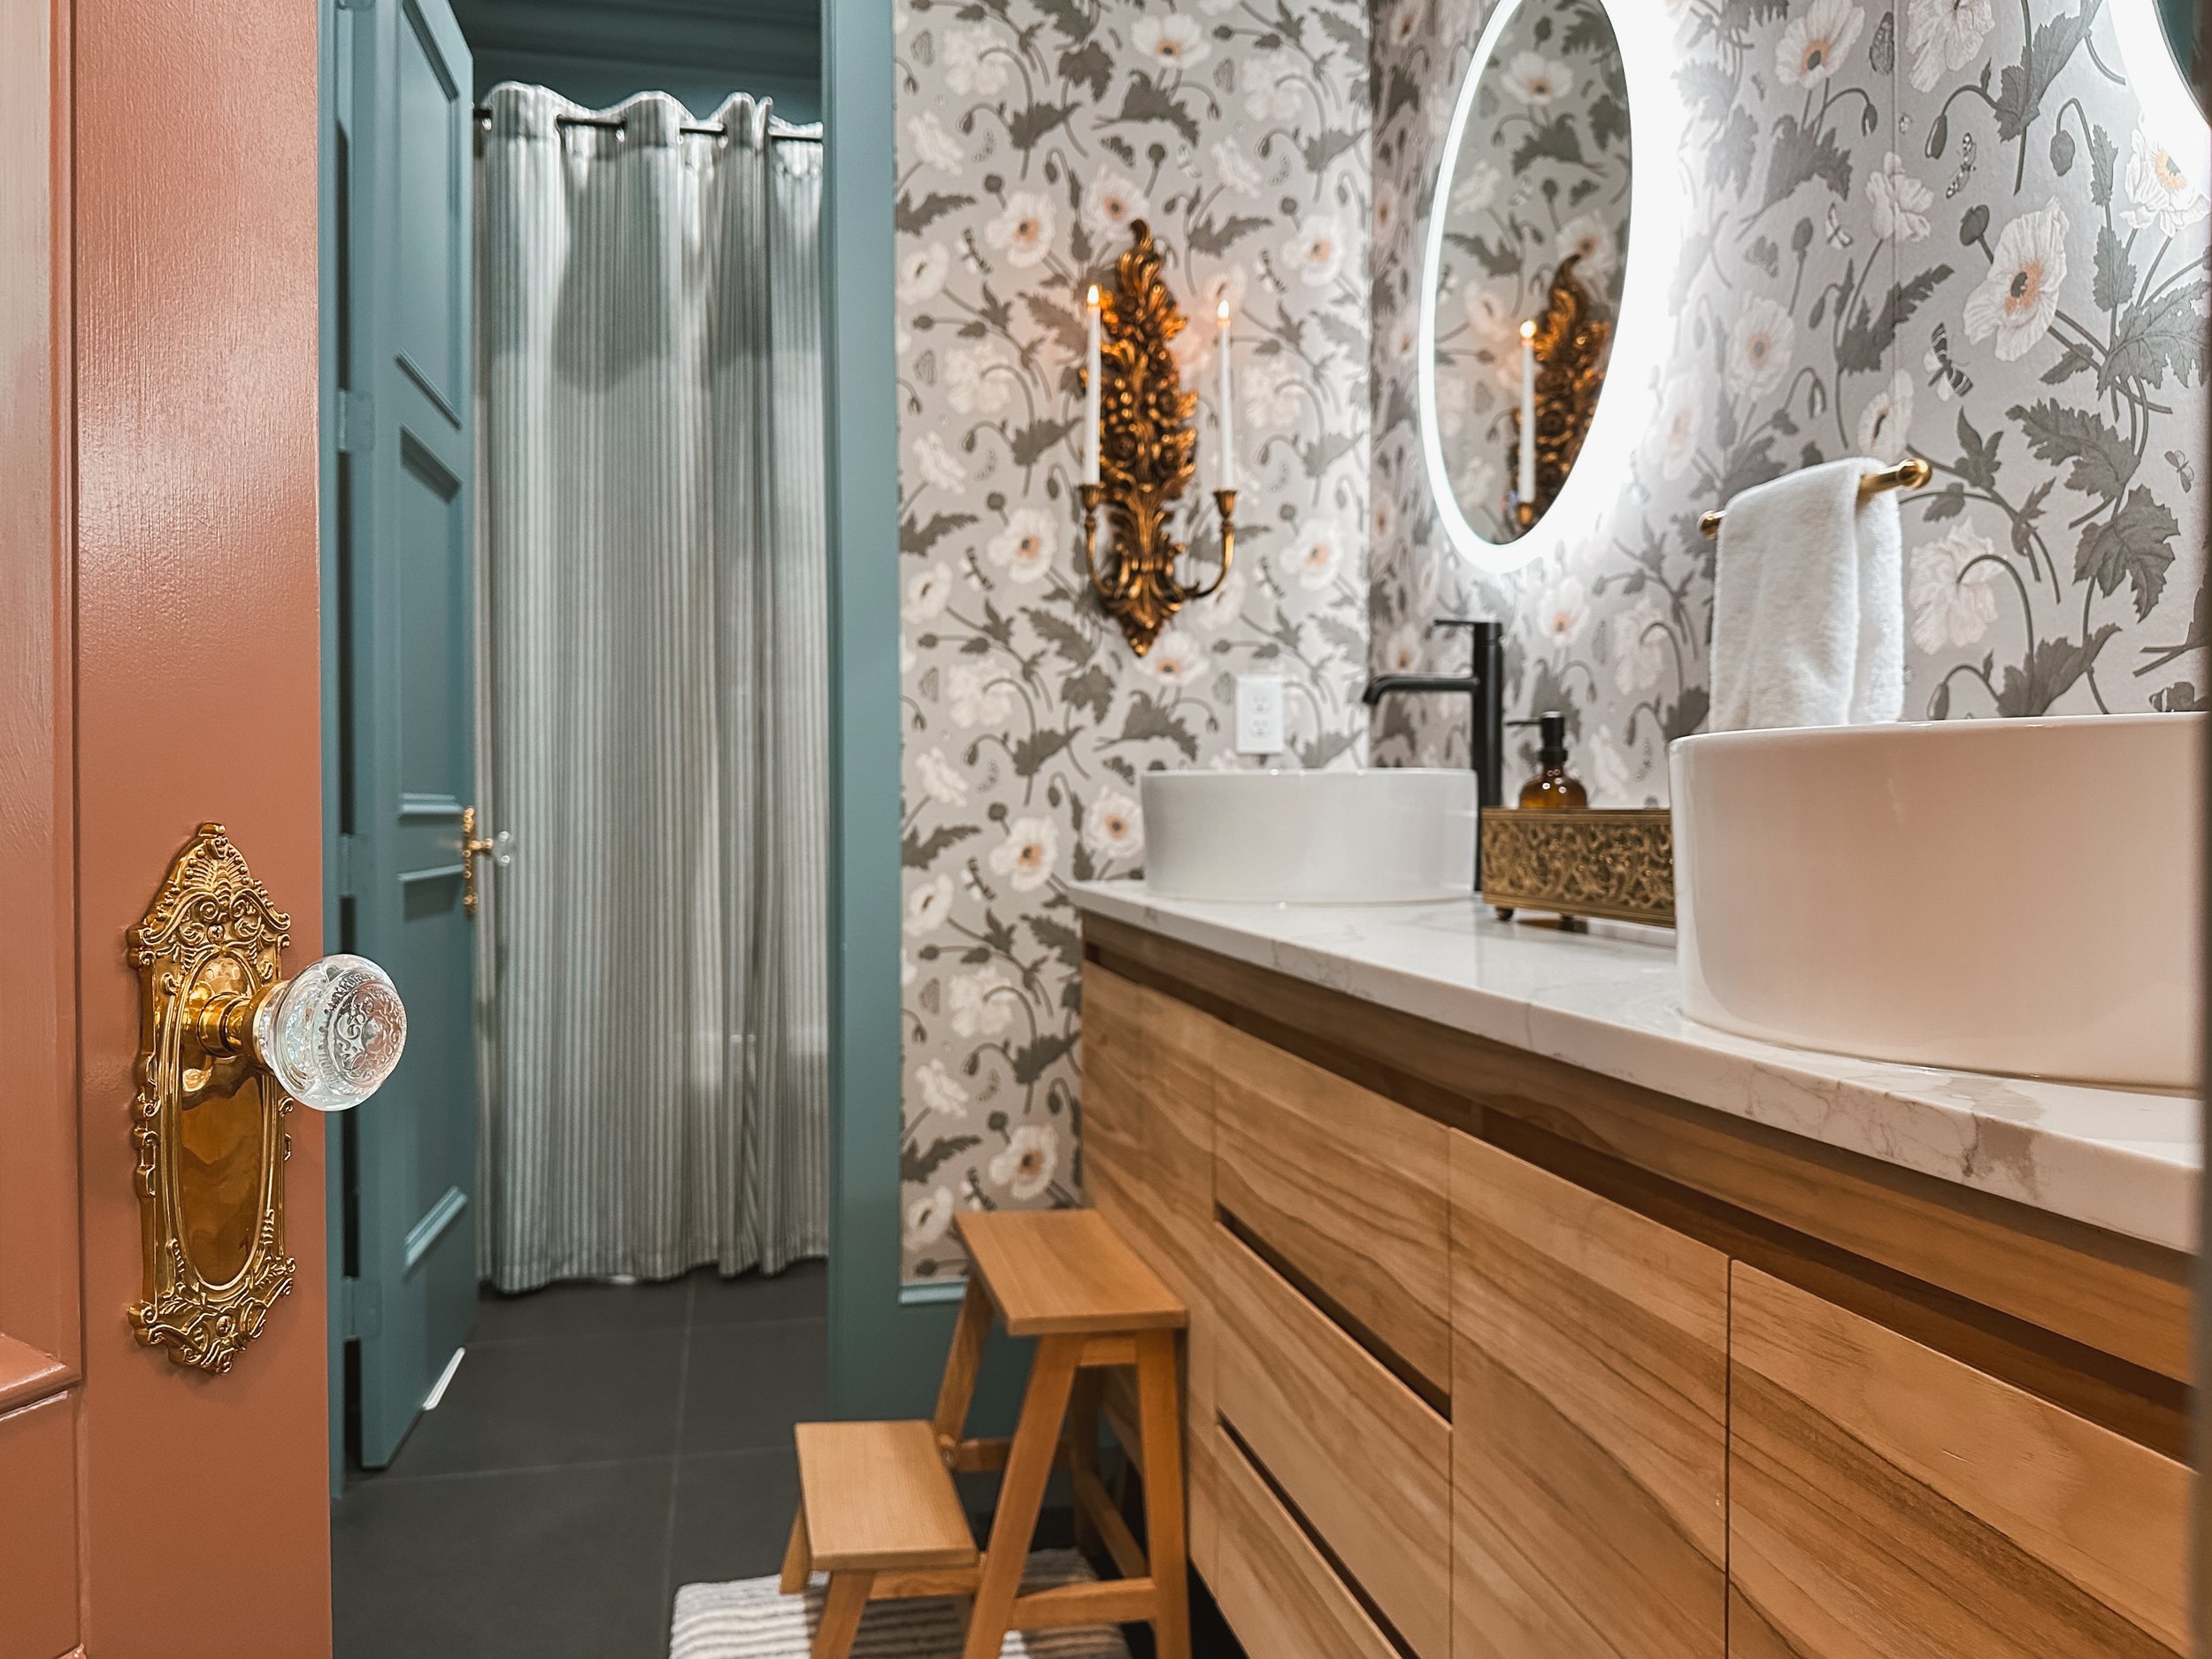
A Blue Floral Bathroom Makeover: From Stark White to Stunning!
There’s nothing quite like a fresh, stylish bathroom makeover to completely transform a space! When I started this project, I knew I wanted something bold yet elegant, and the moment I saw the Natalia by Peel and Paper wallpaper, I was hooked. This gorgeous blue floral pattern was the perfect starting point, and with Peel and Paper’s customizable color options, I was able to make it truly my own! Plus, their matte peel-and-stick paper (not vinyl!) offers a seamless butted joint application—no overlap! If you’re looking to try it yourself, don’t forget to use code LUTZGOHOME10 for 10% off!


Finding the Perfect Paint Match
The next step was finding the ideal paint color to complement the wallpaper, and let me tell you—it was no easy task! I knew I wanted something that would enhance the beautiful floral design without overpowering it, so I narrowed it down to a few options (as seen in the image). After testing several shades and seeing how they played with the natural lighting in the space, I ultimately landed on Norwegian Blue by Behr in an eggshell sheen.
This soft yet rich tone struck the perfect balance—it adds depth and contrast while still feeling cohesive with the wallpaper’s muted greens, warm neutrals, and subtle pops of color. The eggshell finish gives it just the right amount of sophistication, offering a slight sheen without being too reflective.


Elevating the Details: Base Cap molding
Once I had my color scheme set, I turned my focus to adding base cap molding to the baseboards and doors. This small but impactful detail adds an extra layer of character and polish to the space, giving it a more refined and custom look. Base cap molding enhances the depth and dimension of standard baseboards, making them appear more substantial and decorative without requiring a full replacement. It’s one of those subtle upgrades that might not immediately stand out but makes a huge difference in the overall feel of a room.
If you’re considering this, it’s an easy and budget-friendly DIY project that can completely transform your space. With just a little measuring, cutting, and nailing, you can give your baseboards and door frames a high-end, finished look. Plus, it’s a great way to add charm to older homes or bring more architectural interest to newer builds. Whether you prefer a sleek, modern vibe or a more traditional aesthetic, base cap molding is a simple yet effective way to elevate your home’s design. Trust me—it’s a small detail that makes a big impact!


Elevating the Details: Crown Molding
After that I moved on to one of my favorite design elements—crown molding! There’s just something about adding that extra touch at the top of a room that makes everything feel more polished and elegant. Not only does crown molding elevate the overall look, but it also has a little design magic to it—it draws the eye upward, creating the illusion of a taller ceiling and a more spacious room.
One of my favorite tricks when working with crown molding is to paint it the same color as the ceiling. This simple choice creates a smooth, seamless transition between the walls and ceiling, making the space feel more open and cohesive. Plus, it softens the contrast between surfaces, giving the room a light and airy feel rather than a choppy, broken-up look. Whether you’re working with a traditional or modern space, crown molding is an easy way to add a timeless touch of sophistication. If you’ve been thinking about adding it to your home, I say go for it—you’ll love the difference it makes!
For an in-depth tutorial on crown molding check out this post: How To: Crown Molding!


Painting & Wallpaper Application
With the molding complete, it was time to paint! I always recommend painting first before applying wallpaper—this way, you don’t have to worry about accidentally getting paint on your beautiful new wallpaper. Once the walls were dry, I installed the peel-and-stick wallpaper, and wow—what a transformation


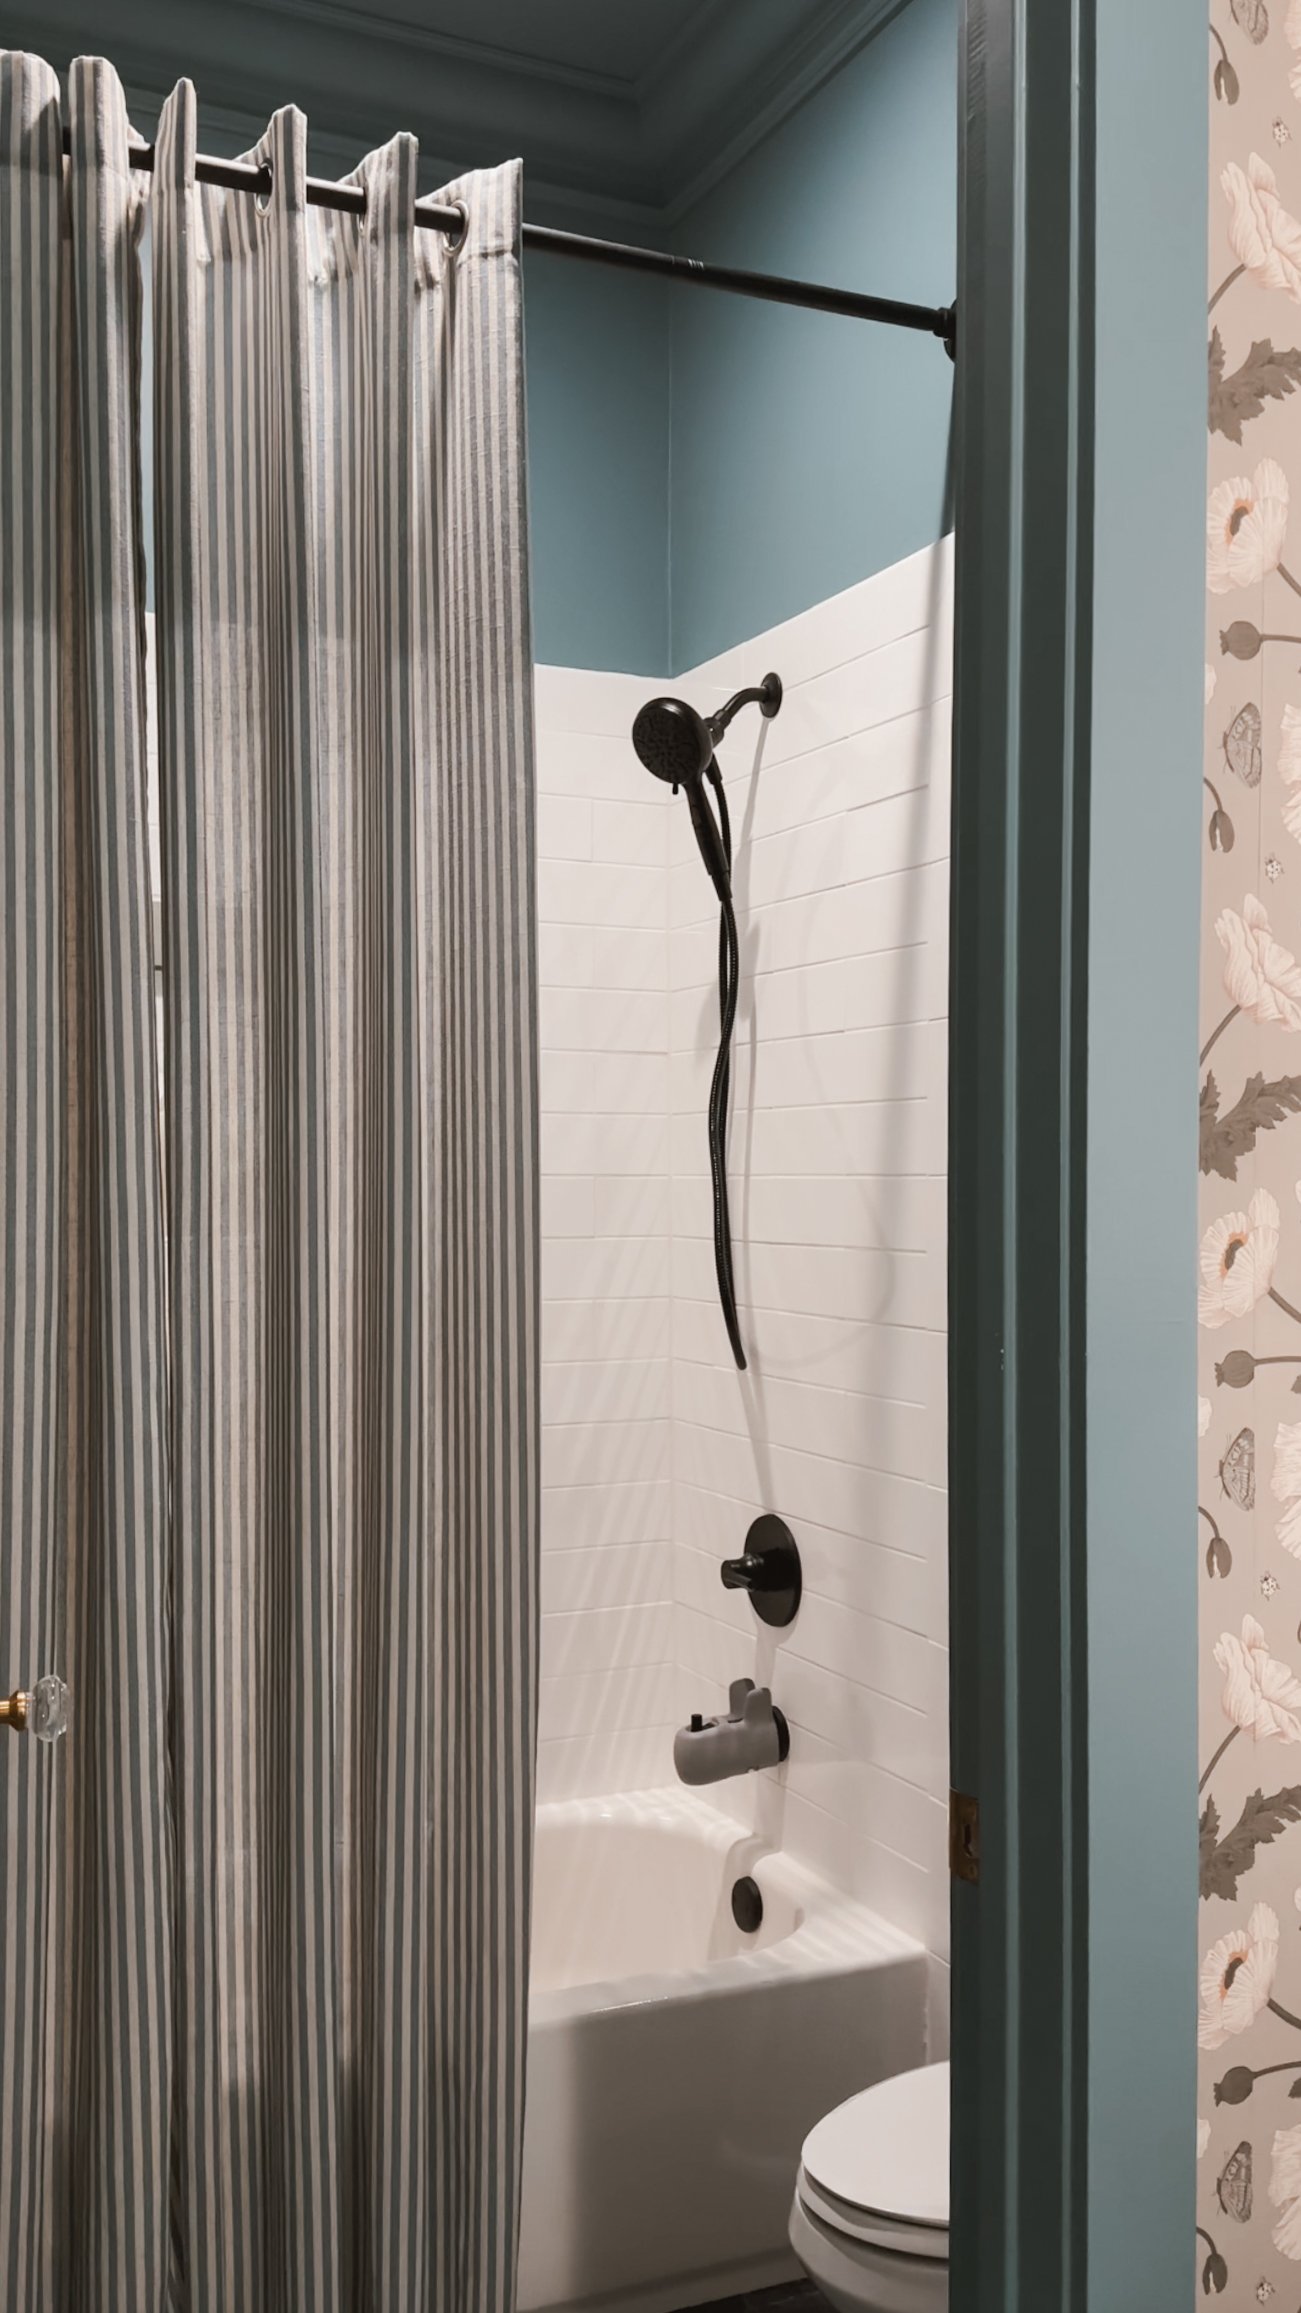
A Simple Trick for a Luxe, Spacious Bathroom
One of the biggest game-changers in making this bathroom feel larger was raising the shower curtain rod higher than the standard height. This simple yet effective trick draws the eye upward, creating the illusion of taller ceilings and a more spacious room. It’s amazing how such a small adjustment can completely transform the feel of a space!
To take it a step further, I decided to skip the traditional shower curtain and instead use a set of regular curtains from Amazon, layering them with an extra-long, no-hook shower liner behind them. Not only does this setup add height and drama, but it also gives the bathroom a more elegant, custom feel—almost like a luxe hotel or boutique spa. The added length and fuller drape of the curtains make the space feel intentional and polished rather than just functional.
If you’re looking for a simple way to elevate your bathroom’s design, I highly recommend trying this trick. It’s a budget-friendly upgrade that makes a big visual impact and instantly gives your bathroom a more refined, high-end look!

Amazon Favorites From This Makeover
I found a couple of standout Amazon vintage-inspired items that really helped pull this makeover together:


The Final Look
This bathroom started as a plain white box, and now it feels like a boutique hotel retreat! The combination of striking wallpaper, rich blue paint, elegant moldings, and thoughtful details created a space that feels both fresh and timeless. If you’re considering a bathroom refresh, don’t be afraid to go bold—a little color and pattern can completely change the vibe of your space!
What do you think of this transformation? Would you try a bold wallpaper in your bathroom? Let me know if you do!