Sunroom Makeover
Welcome to my sunroom makeover! This space has always been a little paradise for my plant babies, but I figured it was time for me to enjoy it just as much as they do. Plus, I was over the plain white walls and ready to bring in some personality!
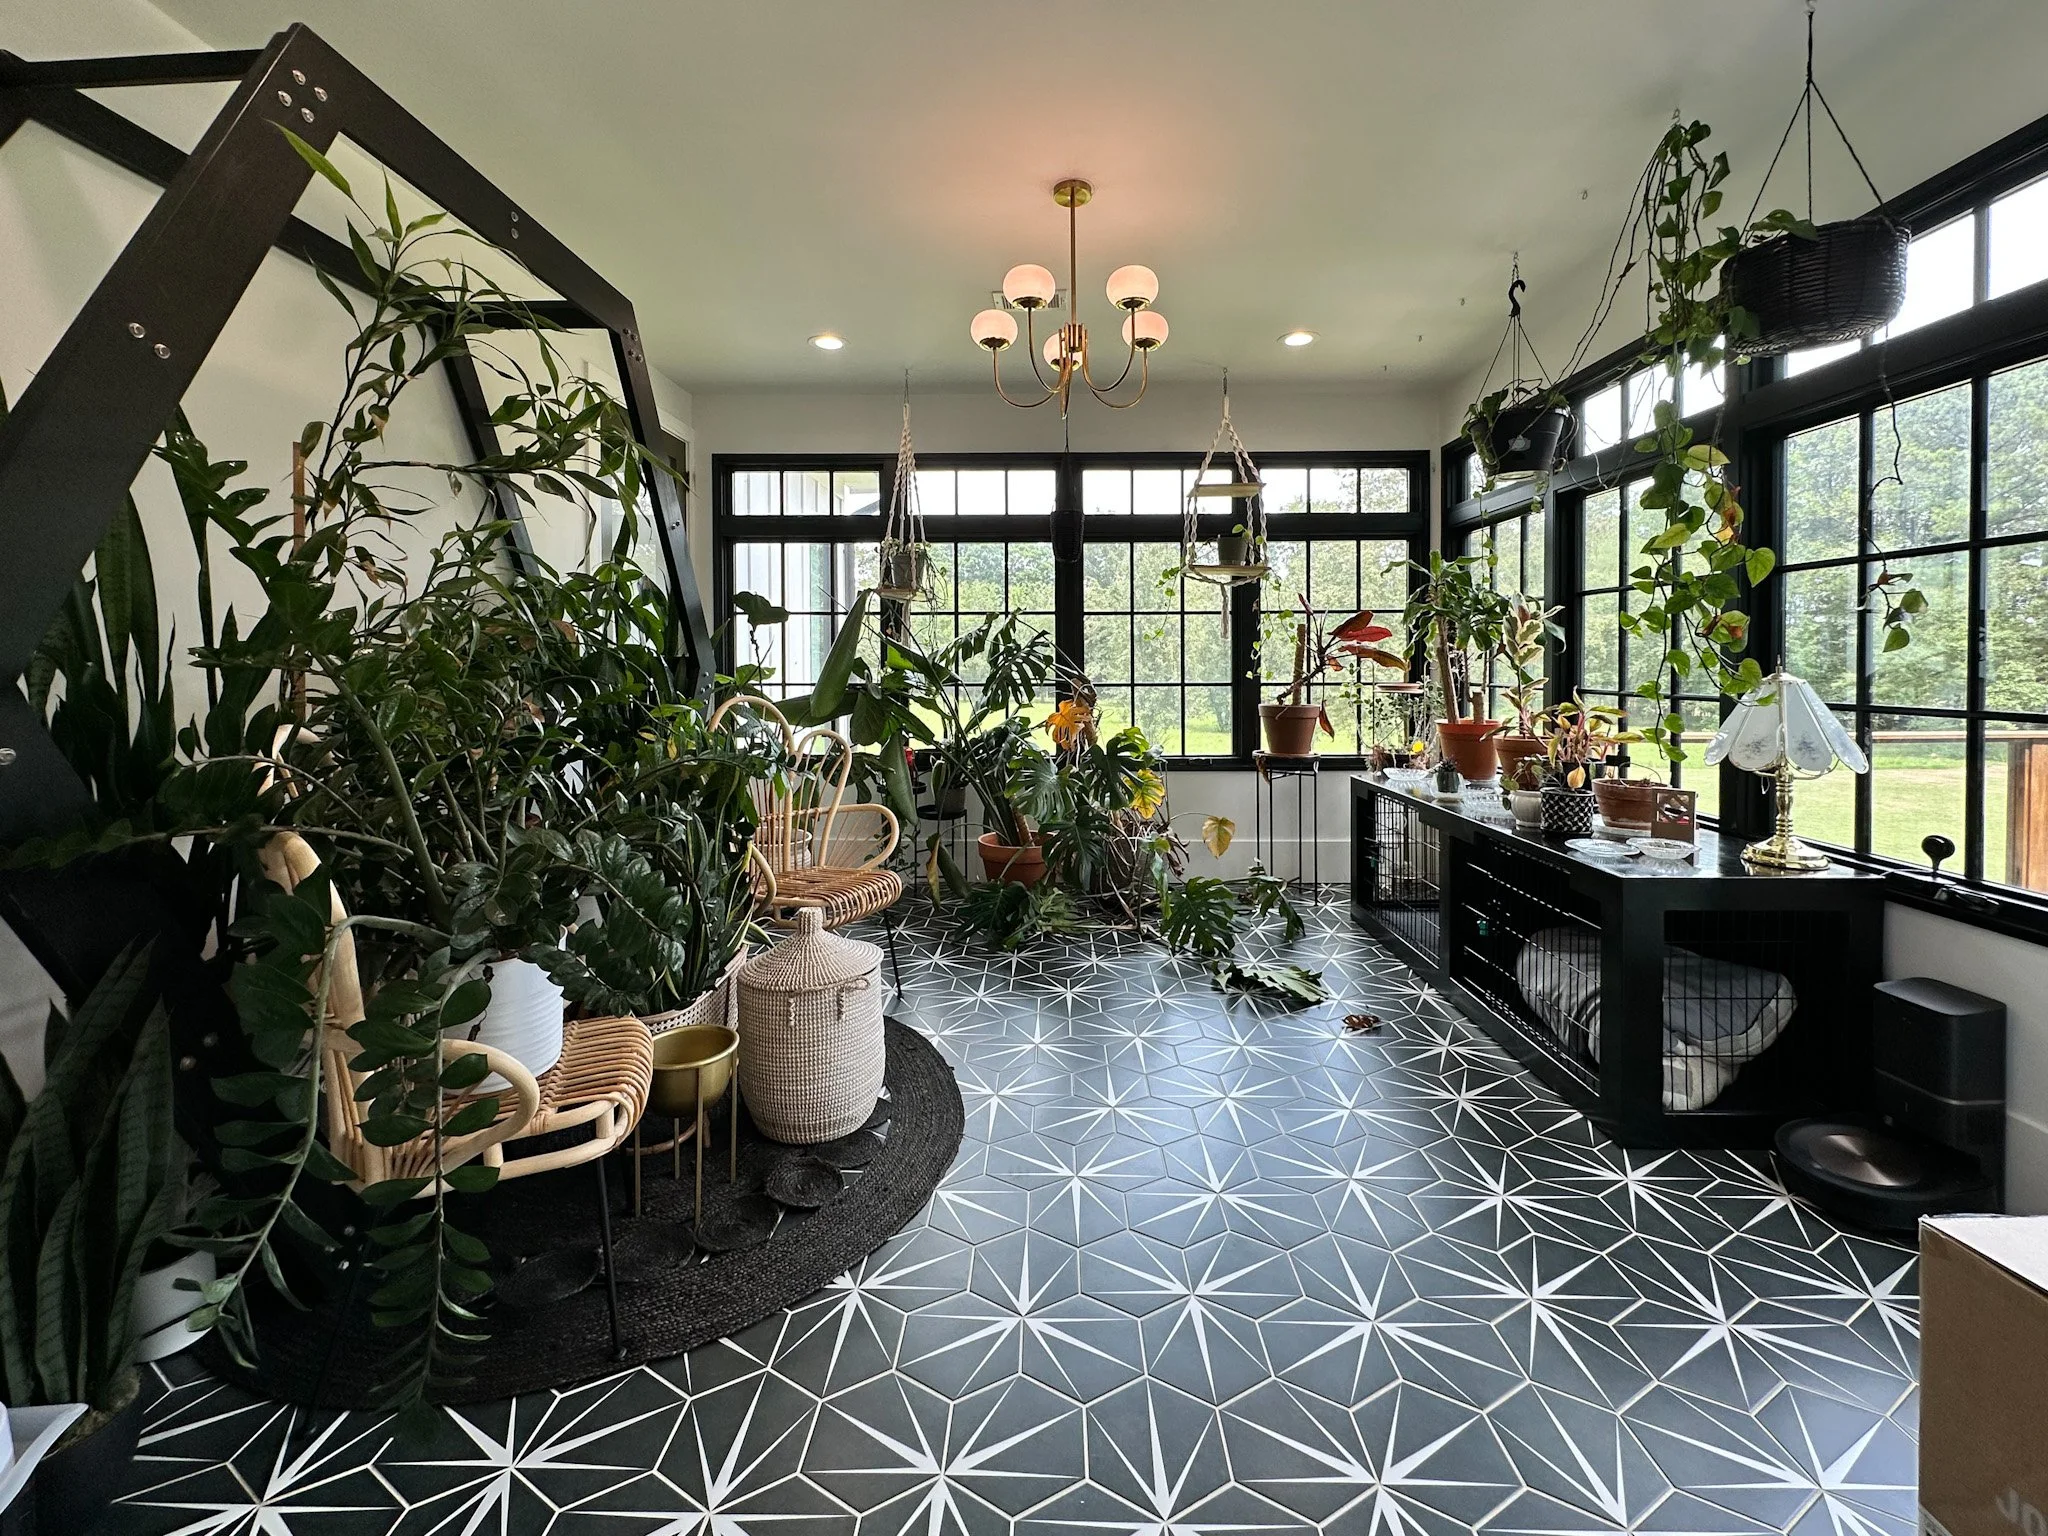
The Before:

The DIY Begins!
First things first—I cleared out the entire room, carefully relocating all my plants to make space for the transformation. I started by adding base cap to the top of my baseboards—something I do for all my makeovers because it makes such a difference! Then, I covered the floors with paper and painter’s tape to protect them from what was coming next—PAINT!
Crown Moulding & Painting
This was only my second time installing crown molding, but with a miter saw, adhesive, and a brad nailer, I got it up pretty quickly! (If you want a step-by-step guide, check out this blog post.) Then, I put my brand-new paint sprayer to the test, and with all the intricate details in this molding, it made the job SO much easier. Since this sprayer isn’t ideal for painting entire rooms—unless you want to refill it a thousand times—I rolled the rest of the walls and ceiling in Maison Blanche by HGTV Home by Sherwin Williams, the dreamiest creamy beige that I’m completely obsessed with!
Ceiling Medallion & Chandelier
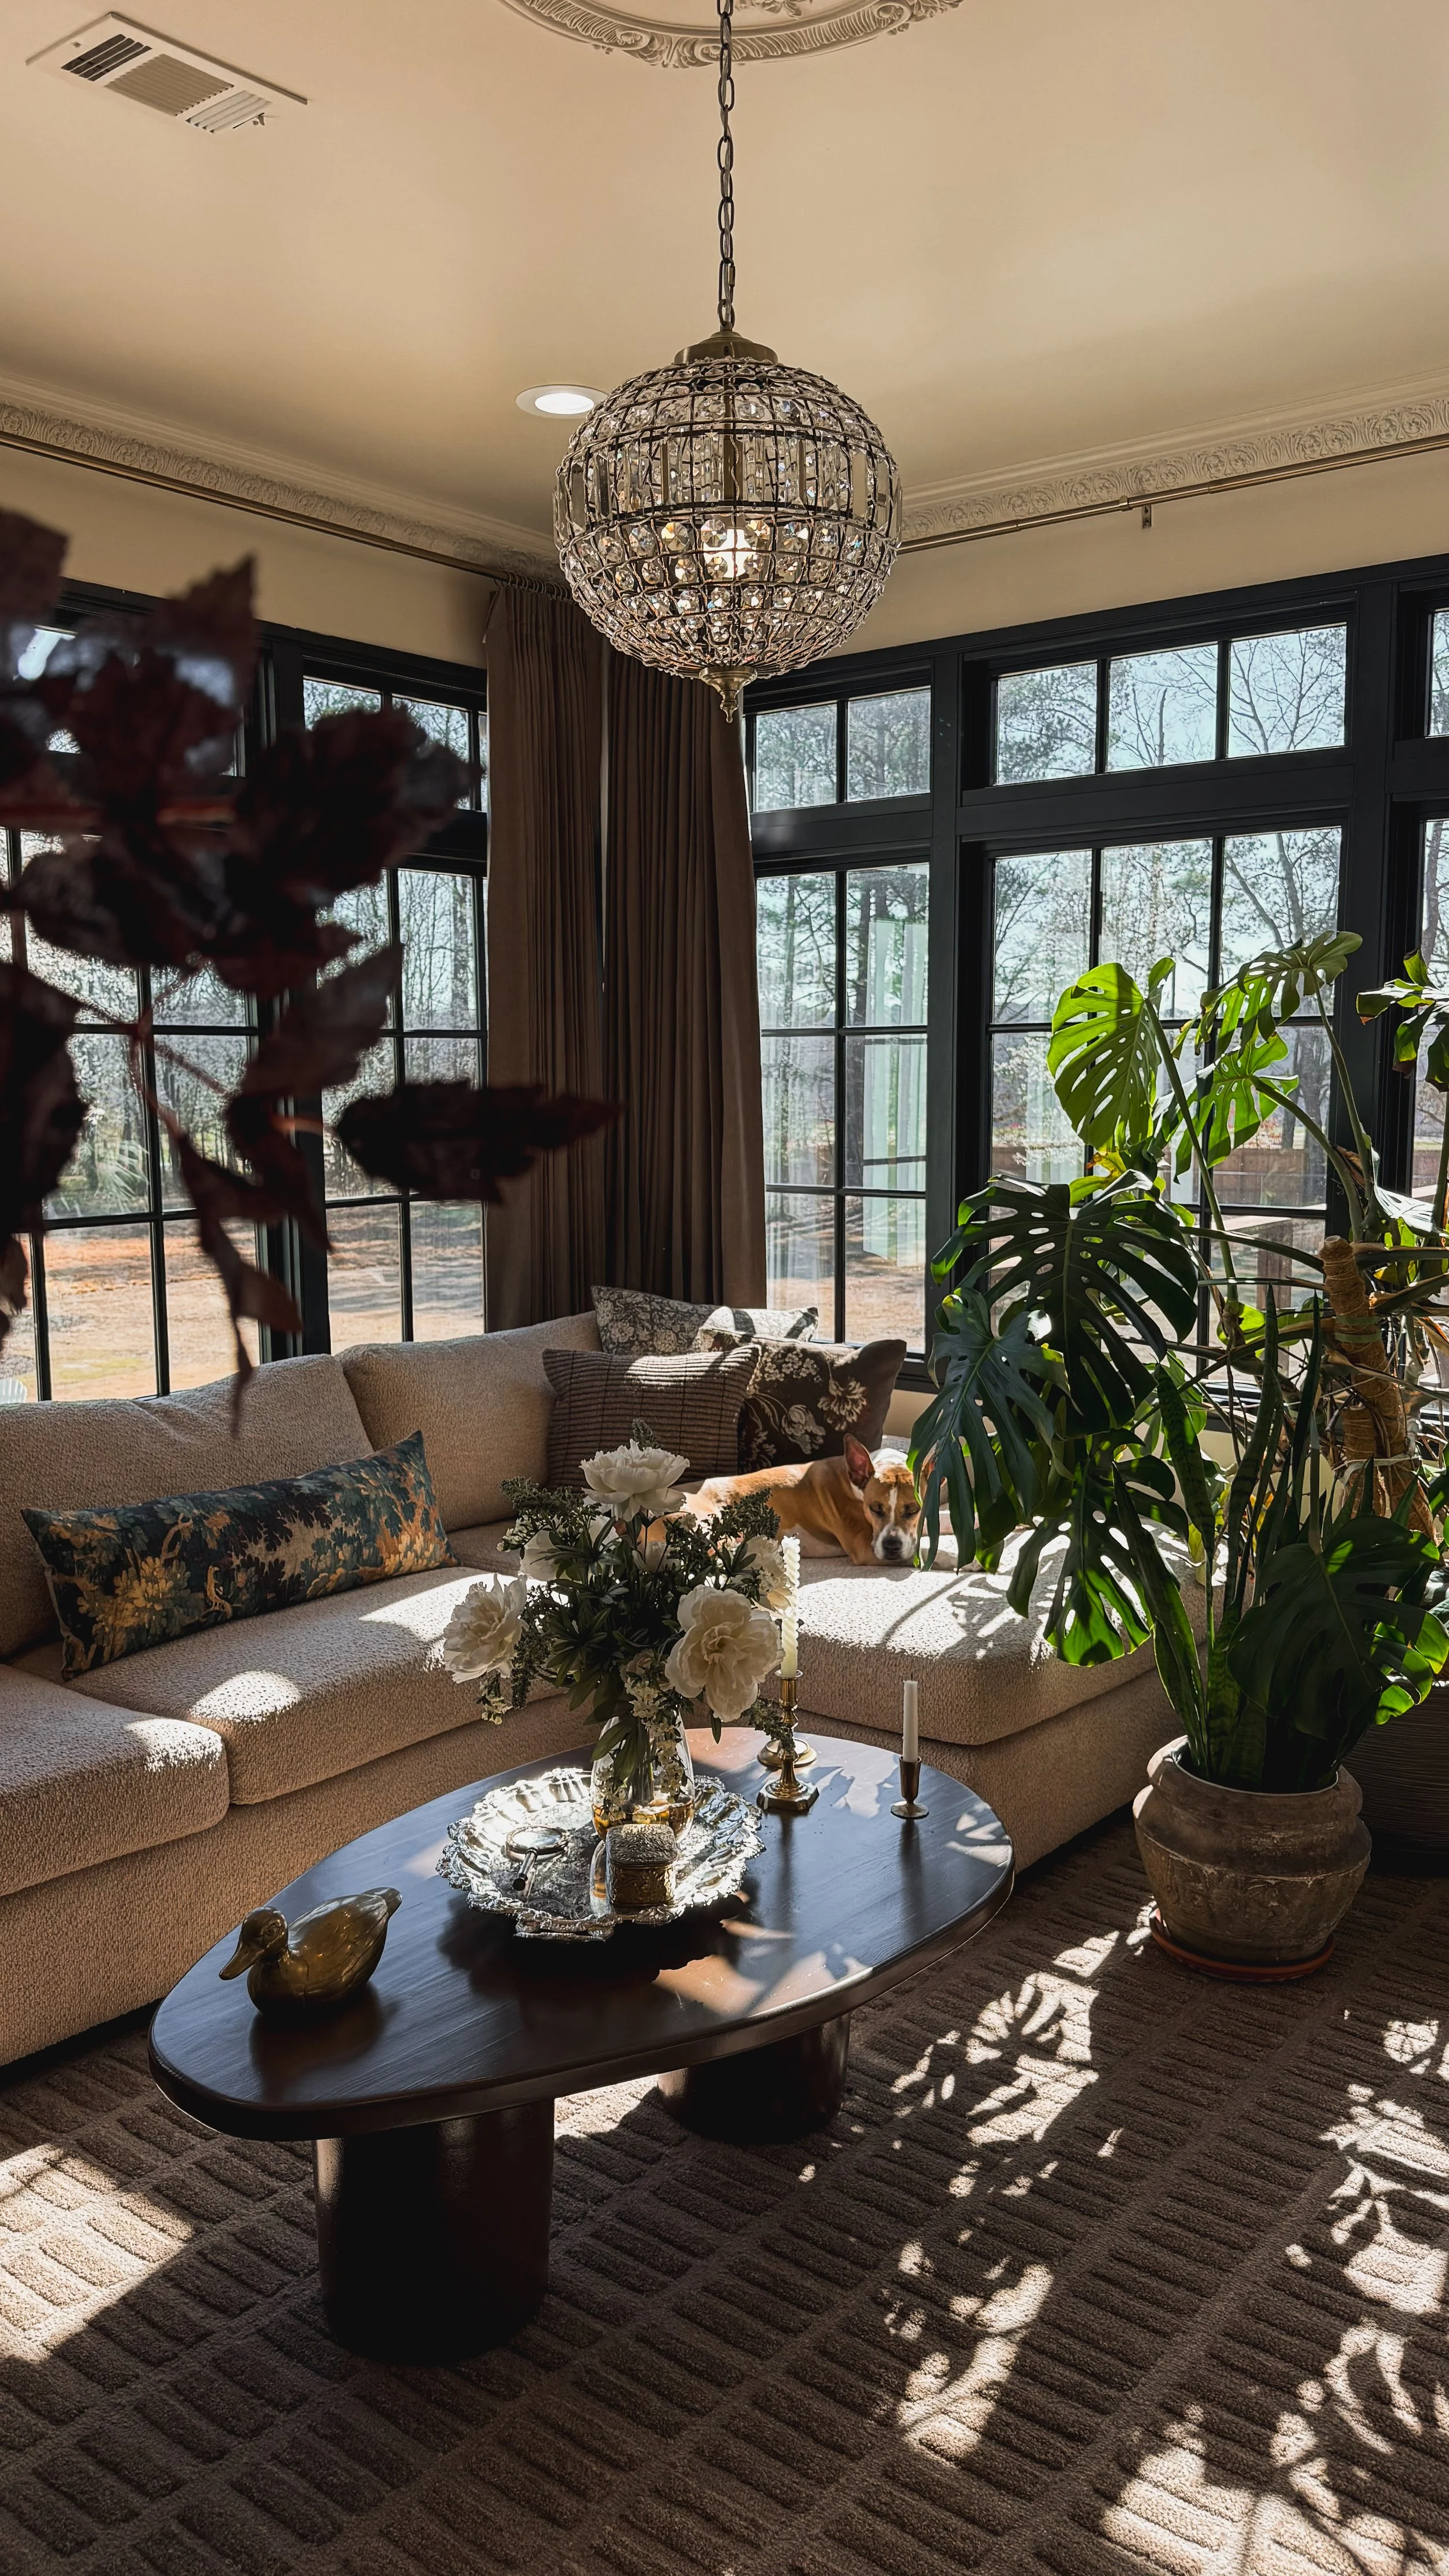
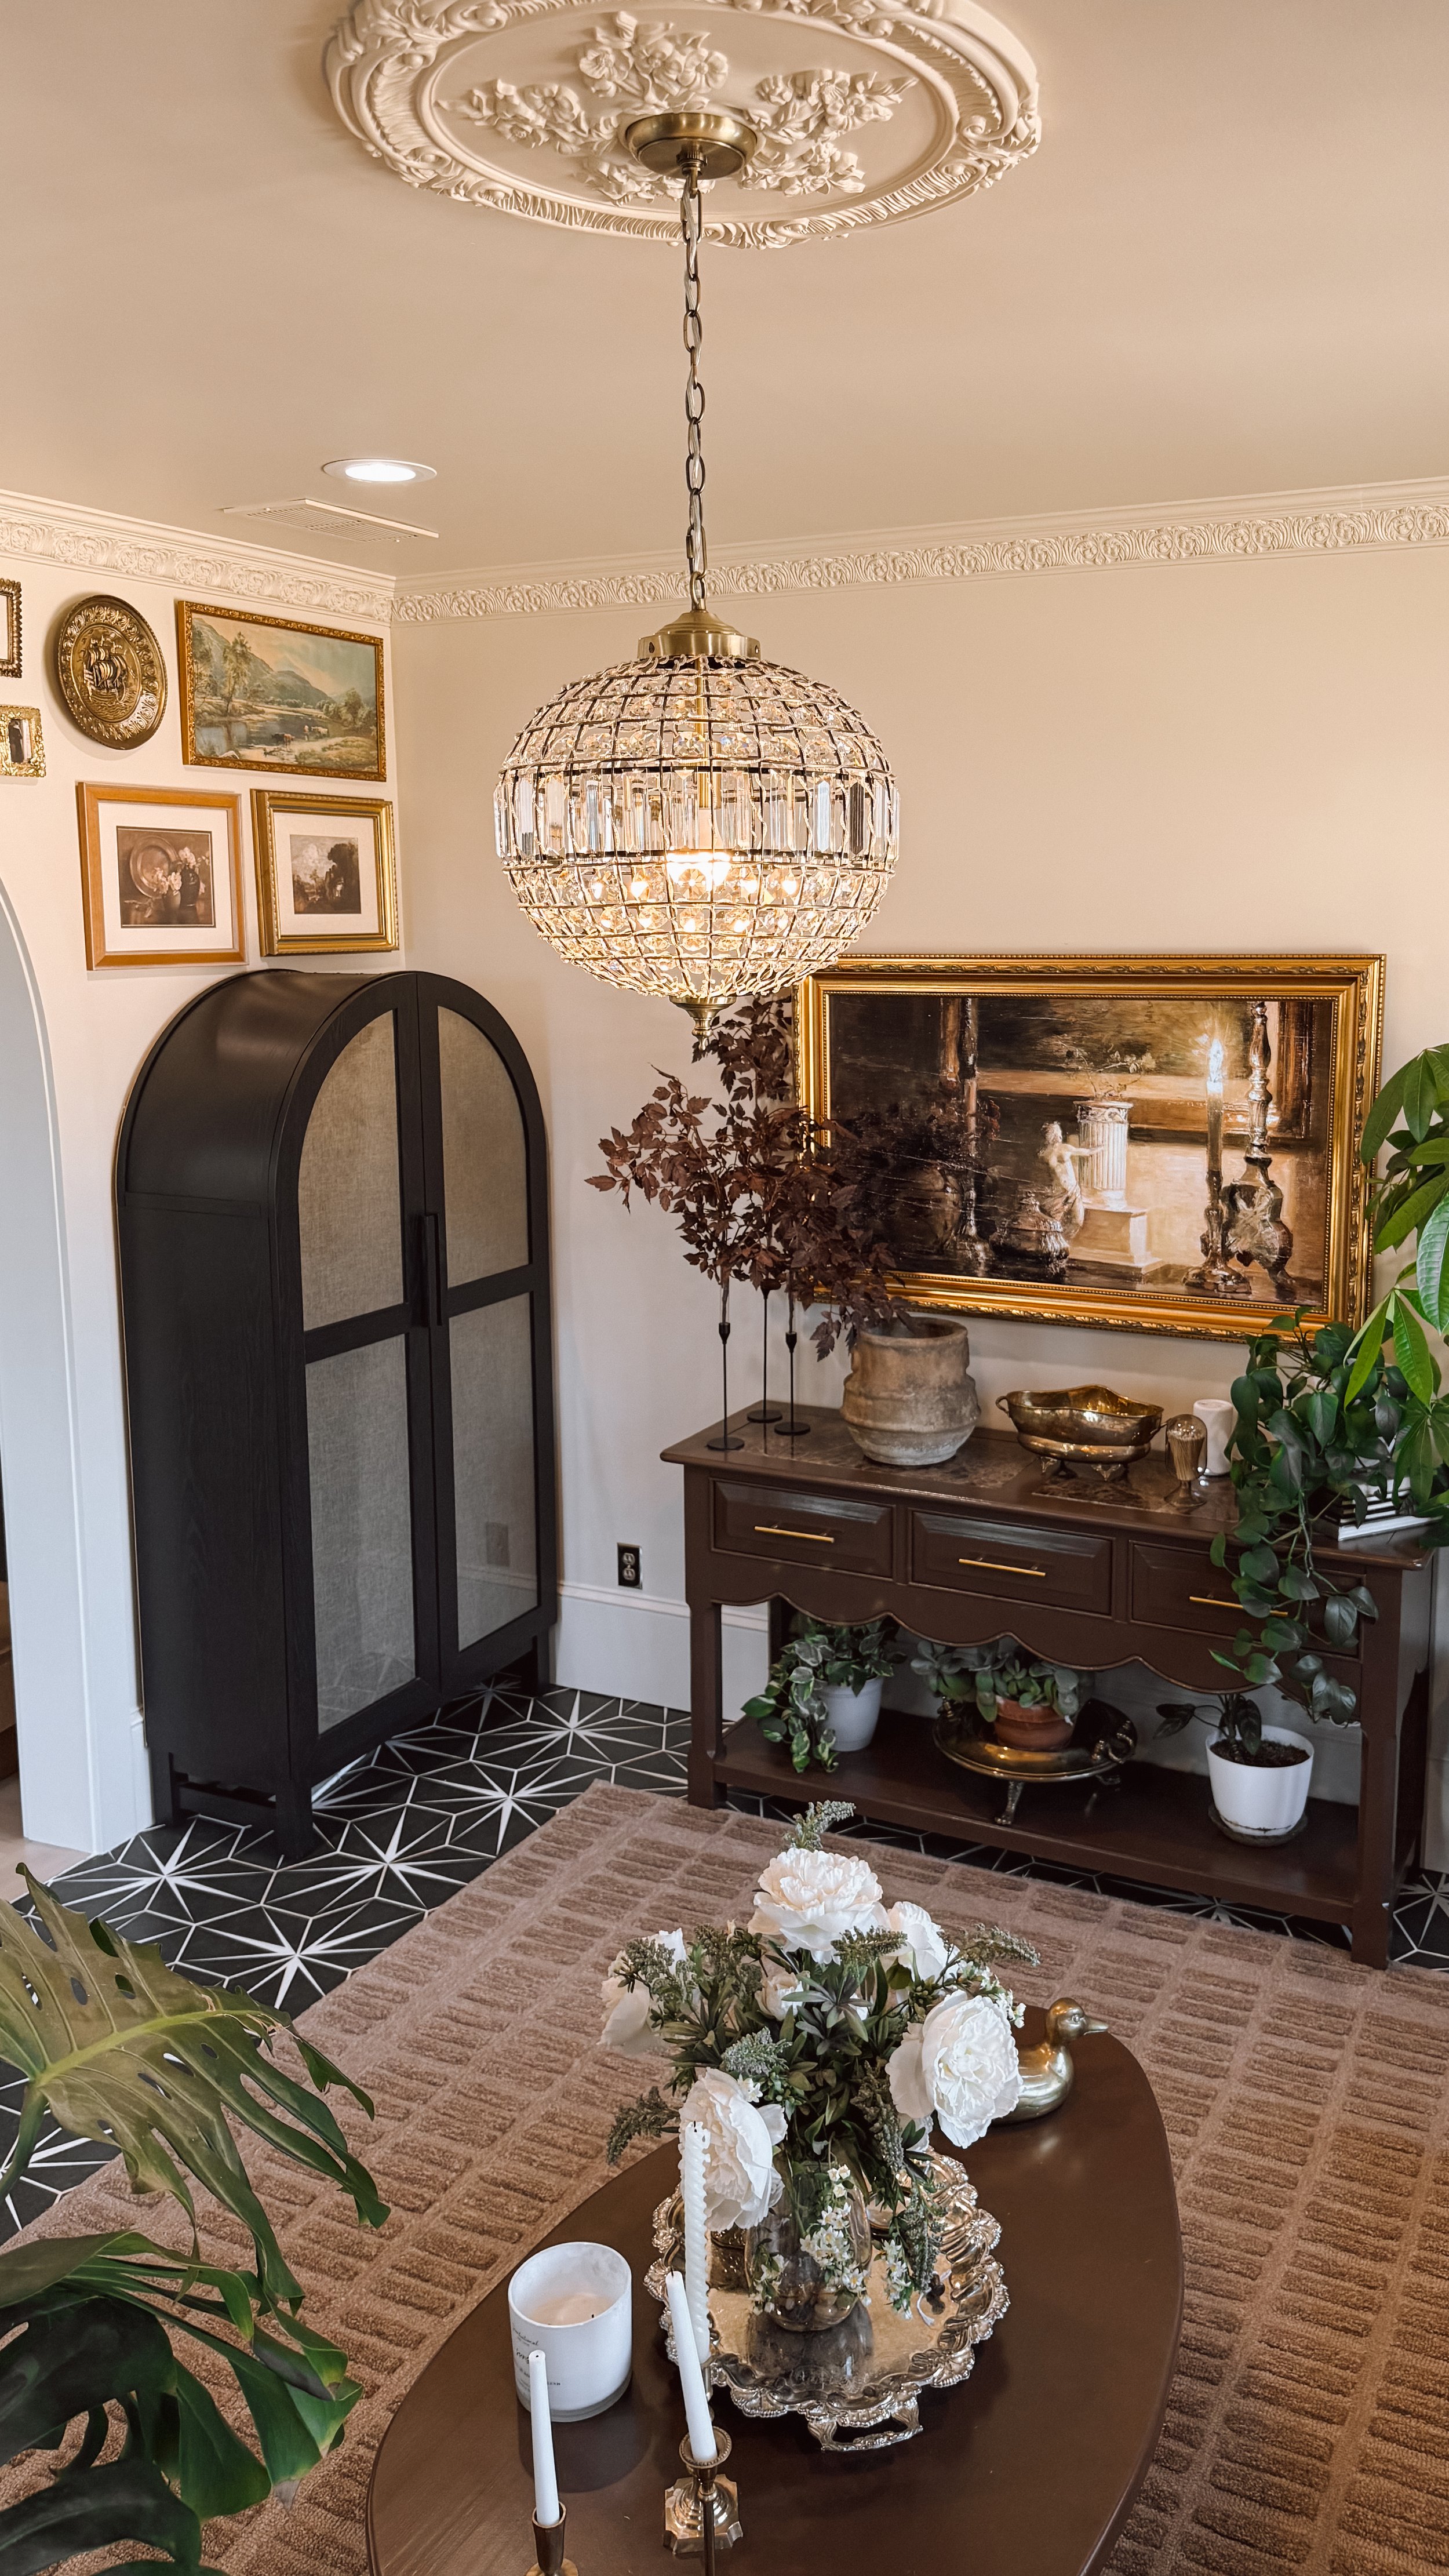
Next up was painting and hanging the gorgeous ceiling medallion! I used the paint sprayer again to get into all the intricate details, and it paired perfectly with a beautiful chandelier I found on Amazon. It instantly took the space to the next level! I also painted the arch leading into the dining room to create a smoother, more seamless color transition.


Time to Decorate!
Once the painting was done, it was time for my favorite part—decorating!
First, I rolled out this stunning brown rug that I am still completely in love with.
Then, I created a gallery wall on the arched wall—if you want to see my step-by-step method, check out this blog post!
I even built my first-ever piece of furniture—a DIY coffee table! (Check out this blog post to see how I did it!)
I found the perfect arched cabinet but decided to add fabric to the inside of the doors to hide the clutter—see the transformation here!
I painted both my DIY coffee table and a beautiful scalloped console table (a Facebook Marketplace find! Check out that blog post here!) using Cabinet and Furniture Paint in Otter by HGTV Home by Sherwin Williams. The deep brown looked stunning against the creamy walls!
To finish it off, I swapped out the knobs on the console table’s drawers for a little extra charm.
I also added brown pinch pleated blackout curtains on gold rods with gold eyelets, which added such a luxurious and cozy touch to the space. The warm tones complemented the creamy walls perfectly and tied everything together beautifully!


The Finishing Touches
One of my best finds was the bouclé couch in the color Alabaster with washable cushions—SO comfy and practical! After adding the final decor touches and bringing back some of my plants (while redistributing the rest throughout my home), I thought the room was finished... but of course, I wasn’t quite done yet!


The Final Addition: A Frame TV
Since this sunroom quickly became our go-to lounging space, adding a TV just made sense. We installed our second Frame TV, and instead of DIY-ing a frame, this time I simply bought one. To keep things sleek, my husband cut a hole in the drywall and installed a recessed box, running the power through the wall to keep the cords completely hidden. Now, the TV sits flush against the wall and looks just like a piece of art!
And that’s a wrap! My sunroom is now the coziest spot we hang out in all the time—without sacrificing my plants’ happiness. Hope you loved following along with this makeover! Let me know what you think in the comments!


Links at a glance
Cabinet and Furniture Paint: Otter by HGTV Home by Sherwin Williams
Console Table: Facebook Marketplace
IF YOU ENJOYED THIS POST, YOU MIGHT BE INTERESTED IN MY DIY: Cabinet cover-up POST.
FOLLOW ME ON MY SOCIALS!

Hallway Gallery Wall
How I Created My Hallway Gallery Wall (and Had an Excuse to Go Thrifting!)
There’s just something about a well-curated gallery wall that makes a home feel extra special! I’ve been thrifting and estate sale-hopping for months, collecting frames and unique pieces, but even after all that—I still didn’t have enough to finish my hallway wall. So, naturally, I had to take another trip to my favorite antique shop, Queen of Hearts, and grab a few more fun finds. (I mean, twist my arm, right?)
Once I had everything, it was time to get to work! Here’s how I put it all together:
Step-by-Step: Hanging a Gallery Wall Like a Pro
Trace & Cut – I traced each piece onto brown paper and cut them out individually. Pro tip: Mark the orientation on each paper cutout, so you don’t accidentally hang anything upside down later.
Plan Your Layout – Using painter’s tape, I arranged and rearranged my paper cutouts on the wall until I found a layout I loved. The best part? You can move them around as many times as you want before committing!
Toothpaste Trick for Easy Nail Placement – This hack is a game changer! I dabbed a little toothpaste on the back of each piece where it hangs on the nail, then gently pressed it against the wall. When I pulled it away, it left the perfect little mark for where to hammer my nail!
Hang It Up! – I removed the paper cutouts, hammered in my nails (or used hooks where needed), and hung each piece. A handheld level helped keep things straight, but if you have a laser level, even better!
How I Hung My Pieces
None of my pieces were too heavy, so I used a mix of:
✔ A picture hanging kit
✔ Velcro Command Hooks for 1-2 pieces
✔ These awesome new plate hangers I found (a great way to mix in non-frame pieces!)
And that’s it! My gallery wall is officially up, and I LOVE how it turned out! There’s even a little room at the top to grow—which means more thrifting trips in my future. (Like I needed an excuse!)
If you’ve been thinking about starting a gallery wall, do it! It’s such a fun way to showcase your style, and with these simple steps, it’s easier than you think. Happy decorating!!
For all of my gallery wall essentials click here!!

IF YOU ENJOYED THIS POST, YOU MIGHT BE INTERESTED IN My color drenching post!
FOLLOW ME ON MY SOCIALS!

Hallway Makeover
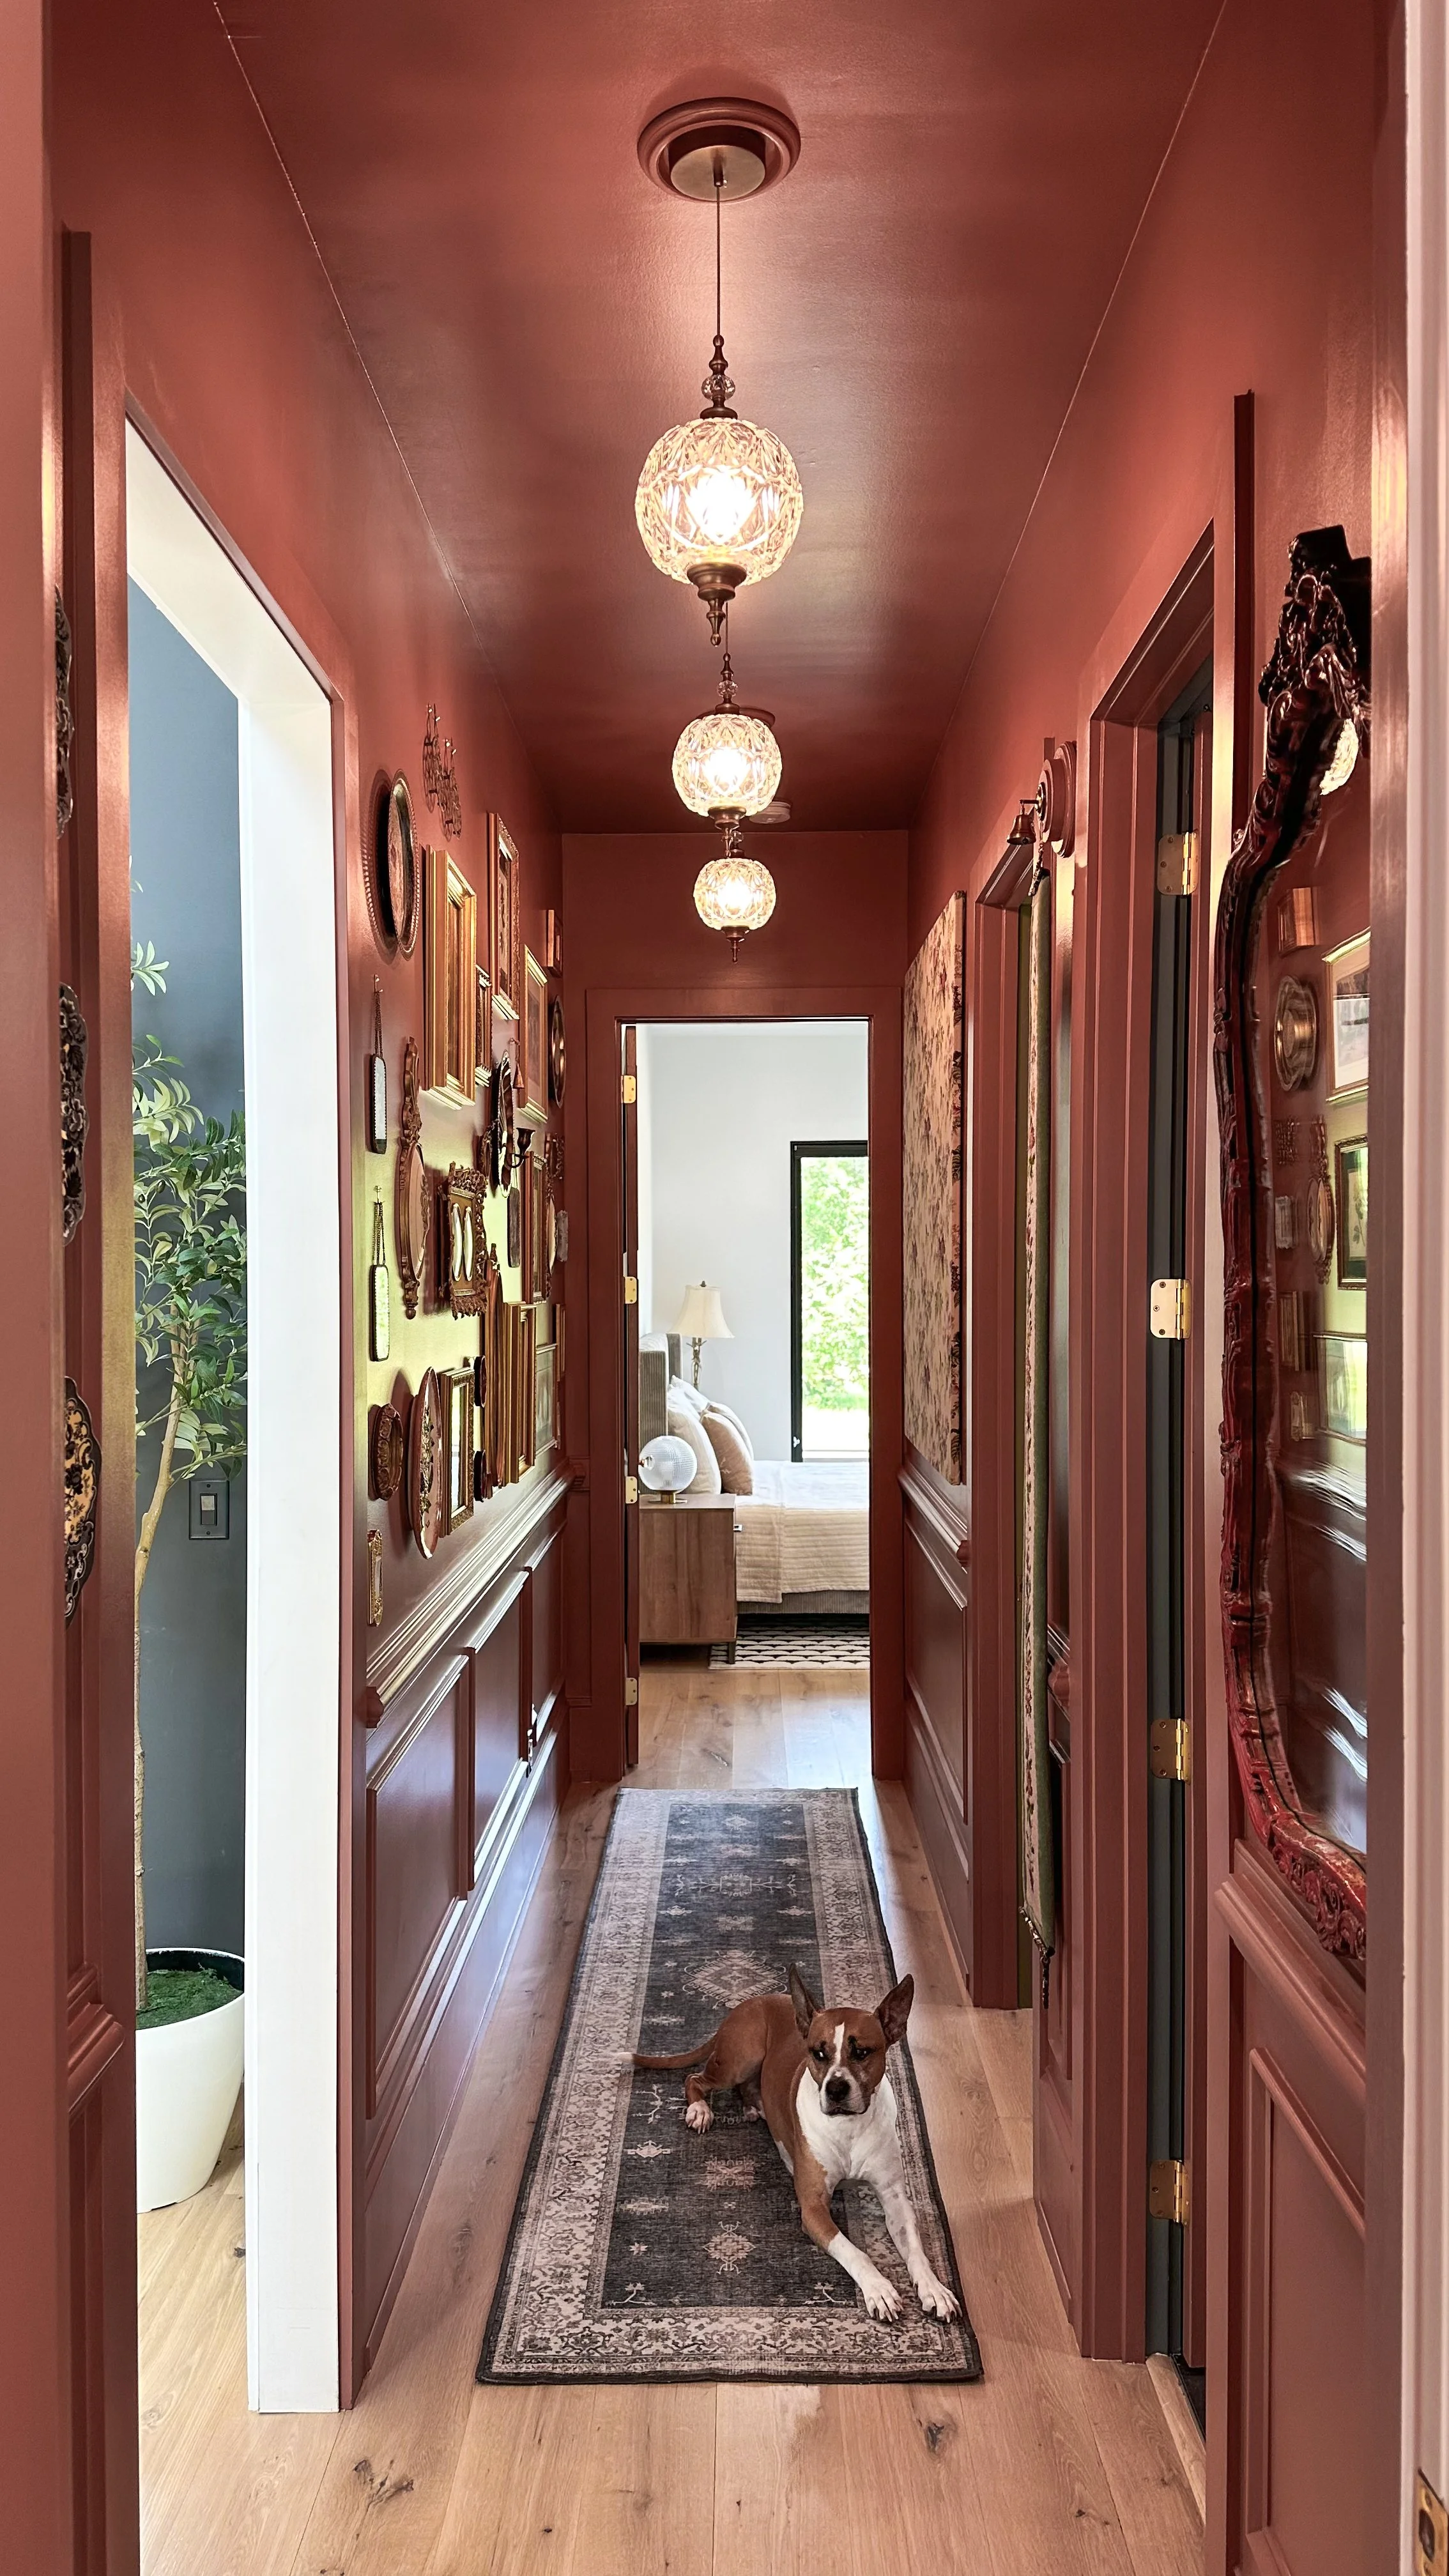
What was once a plain, white hallway has now become a rich and dramatic space, thanks to wall trim, paint, new lighting and a lot of second hand finds.

Architectural Details & Moulding Upgrades
Before painting, I wanted to enhance the walls with architectural details. I added:
Chair rail (2 styles stacked) and box moulding (basecap) to the lower third of the walls for depth and texture.
Basecap moulding to the tops of my existing baseboards for an upgraded, built-in look.
Basecap trim to my 3-panel doors to add extra interest and cohesion.
These small additions made a huge difference in making the hallway feel elevated and custom. I would love to add crown moulding soon!
Paint
Color drenching was my go-to in this space using a bold coat of Reddened Earth by HGTV Home by Sherwin-Williams in a satin sheen. This warm, dusty pinky-brown hue completely transformed the area, adding depth and character while making it feel both inviting and intentional. I love how this color brings a sense of coziness while still making a statement.

Gold Details
I swapped out standard hardware for vintage-inspired solid brass doorknobs, which instantly elevated the charm of each doorway. To keep the look cohesive, I also installed solid brass light switch covers, gold outlets, and gold door hinges. These small but impactful details add a polished, timeless feel and complement the overall moody aesthetic of the space. The richness of the brass contrasts beautifully with the deeper tones in the hallway, making everything feel thoughtfully curated.
Vintage Lighting & DIY Conversions
Lighting played a big role in this makeover. I swapped out the old can lights for three vintage-inspired pendant lights that I found on Amazon (affordable and such a great find!). To make this switch, I used a can light converter, which made it super easy to install the new fixtures without an electrician and add that charming, collected feel.
DIY Gallery Wall
The focal point of the hallway is undoubtedly the collected gallery wall. I spent months sourcing the pieces from estate sales and thrift shops, and I love how each one tells a story. The mix of art, frames, and vintage finds adds so much character and makes the space feel curated and personal. (Shop my gallery wall essentials here!)

Statement Artwork & Decorative Finds
On the adjacent wall, I created a large square artwork piece using leftover wood and beautiful fabric I found at Queen of Hearts, an antique store here in Georgia. The size and floral pattern make it such a unique, personal piece.
Another standout is the bell tapestry in the center of the wall, an estate sale treasure that brings a hint of old-world charm. The brass bow plate hanger (also from Queen of Hearts) holds vintage plates I sourced from an estate sale, adding a whimsical, elegant touch. And that big red mirror? Another $30 estate sale find that ties in perfectly with the new wall color.
Finishing Touch: The Washable Rug
The hallway still features the same washable rug I’ve had for a while, and I love that it still complements the new color scheme beautifully. It adds a layer of coziness and practicality without clashing with the bold walls.

This hallway makeover proves that small spaces can have big impact when you embrace color, texture, and thoughtful details. The mix of vintage finds, DIY elements, and rich color truly makes it feel intentional, curated, and full of personality. I’m so happy with how it turned out!