
Athlete Bath Bombs

The other day I was thinking about what to buy for one of my best friends who already has everything when I remembered that she handmade me a present a few years ago and I wanted to do the same for her. (Hi Liz, now you know what part of your Christmas present is). Anyways, I was pretty excited about it, so I decided to share it with you incase you were in need of a good handmade Christmas gift as well. Now you can make these for anyone who loves a good bath, but I've catered these two recipes specifically for athlete recovery. Be ready because your house is about to smell amazzzzing.
Epsom Salt and Coconut Oil Bath Bombs : (makes 3)
Benefit: Coconut oil is moisturizing for the skin, while Epsom Salt relieves pain and muscle cramps, eliminates toxins from the body, soothes sprains and bruises, etc. Although you can use whatever essential oil you'd like, I chose Patchouli. A more earthy scent, this essential oil is known for being an antidepressant and sedative, helps speed up the recovery of wounds and prevents them from developing infections, and lastly is an aphrodisiac.
1 1/4 cup Baking Soda
2/3 cup Corn Starch
2/3 cup Citric Acid (It took me forever to find this. I found it in the canning section of Walmart)
2/3 cup Epsom Salt
2+ teaspoons water
2 teaspoon essential oil (I used patchouli)
2 1/2 teaspoons melted coconut oil
4+ drops of food coloring
Items You Will Need:
Mold (I bought mine on Amazon, here)
Mixing Bowls
Whisk
Measuring cups
Measuring spoons
Tray
Metal Utensil
Start by combining the four dry ingredients and whisking until the clumps are gone. In a separate bowl, combine and mix the water, essential oil, and coconut oil (don't forget to melt your coconut oil). Optional: you can go ahead and add the food coloring now for one color bath bombs, or later if you want multi colored bath bombs - like I did below.
Now you're going to SLOWLY whisk in the wet ingredients with the dry ones. If the mixture starts to fizz, go slower. Once it's all combined, it should be the consistency of wet sand. If it's too dry, you can add a bit more water. I separated my final mixture into a few different bowls so I could add different colors to each.
Now you need to OVER fill both sides of your bath bomb mold. I found that packing in the mixture tightly and adding a bit more at the end before I put them together worked best for me. Do this over your bowl because you're going to lose some of the extra as your fitting the two sides of the mold together. Lightly tap the filled bath bomb mold with a metal spoon (or whatever you have around). Begin by removing one side of the mold carefully, and then the other. Put on a tray and let it dry 1-2 days, That's it! I had no problems with the mixture not sticking to each other or breaking apart, but they are very delicate so be gentle.


The next is the Oatmeal Bath Bomb. Quick tip: Although this one is pretty and full of benefits, the oatmeal in the mixture made it harder for both sides of the mold to stick together. It's totally worth it and I've put more tips in the recipe section to help you out. I recommend only using one color or not using the food coloring at all. Incase you don't have the mixture damn enough, this allows you to retry without mixing up your pretty colors.
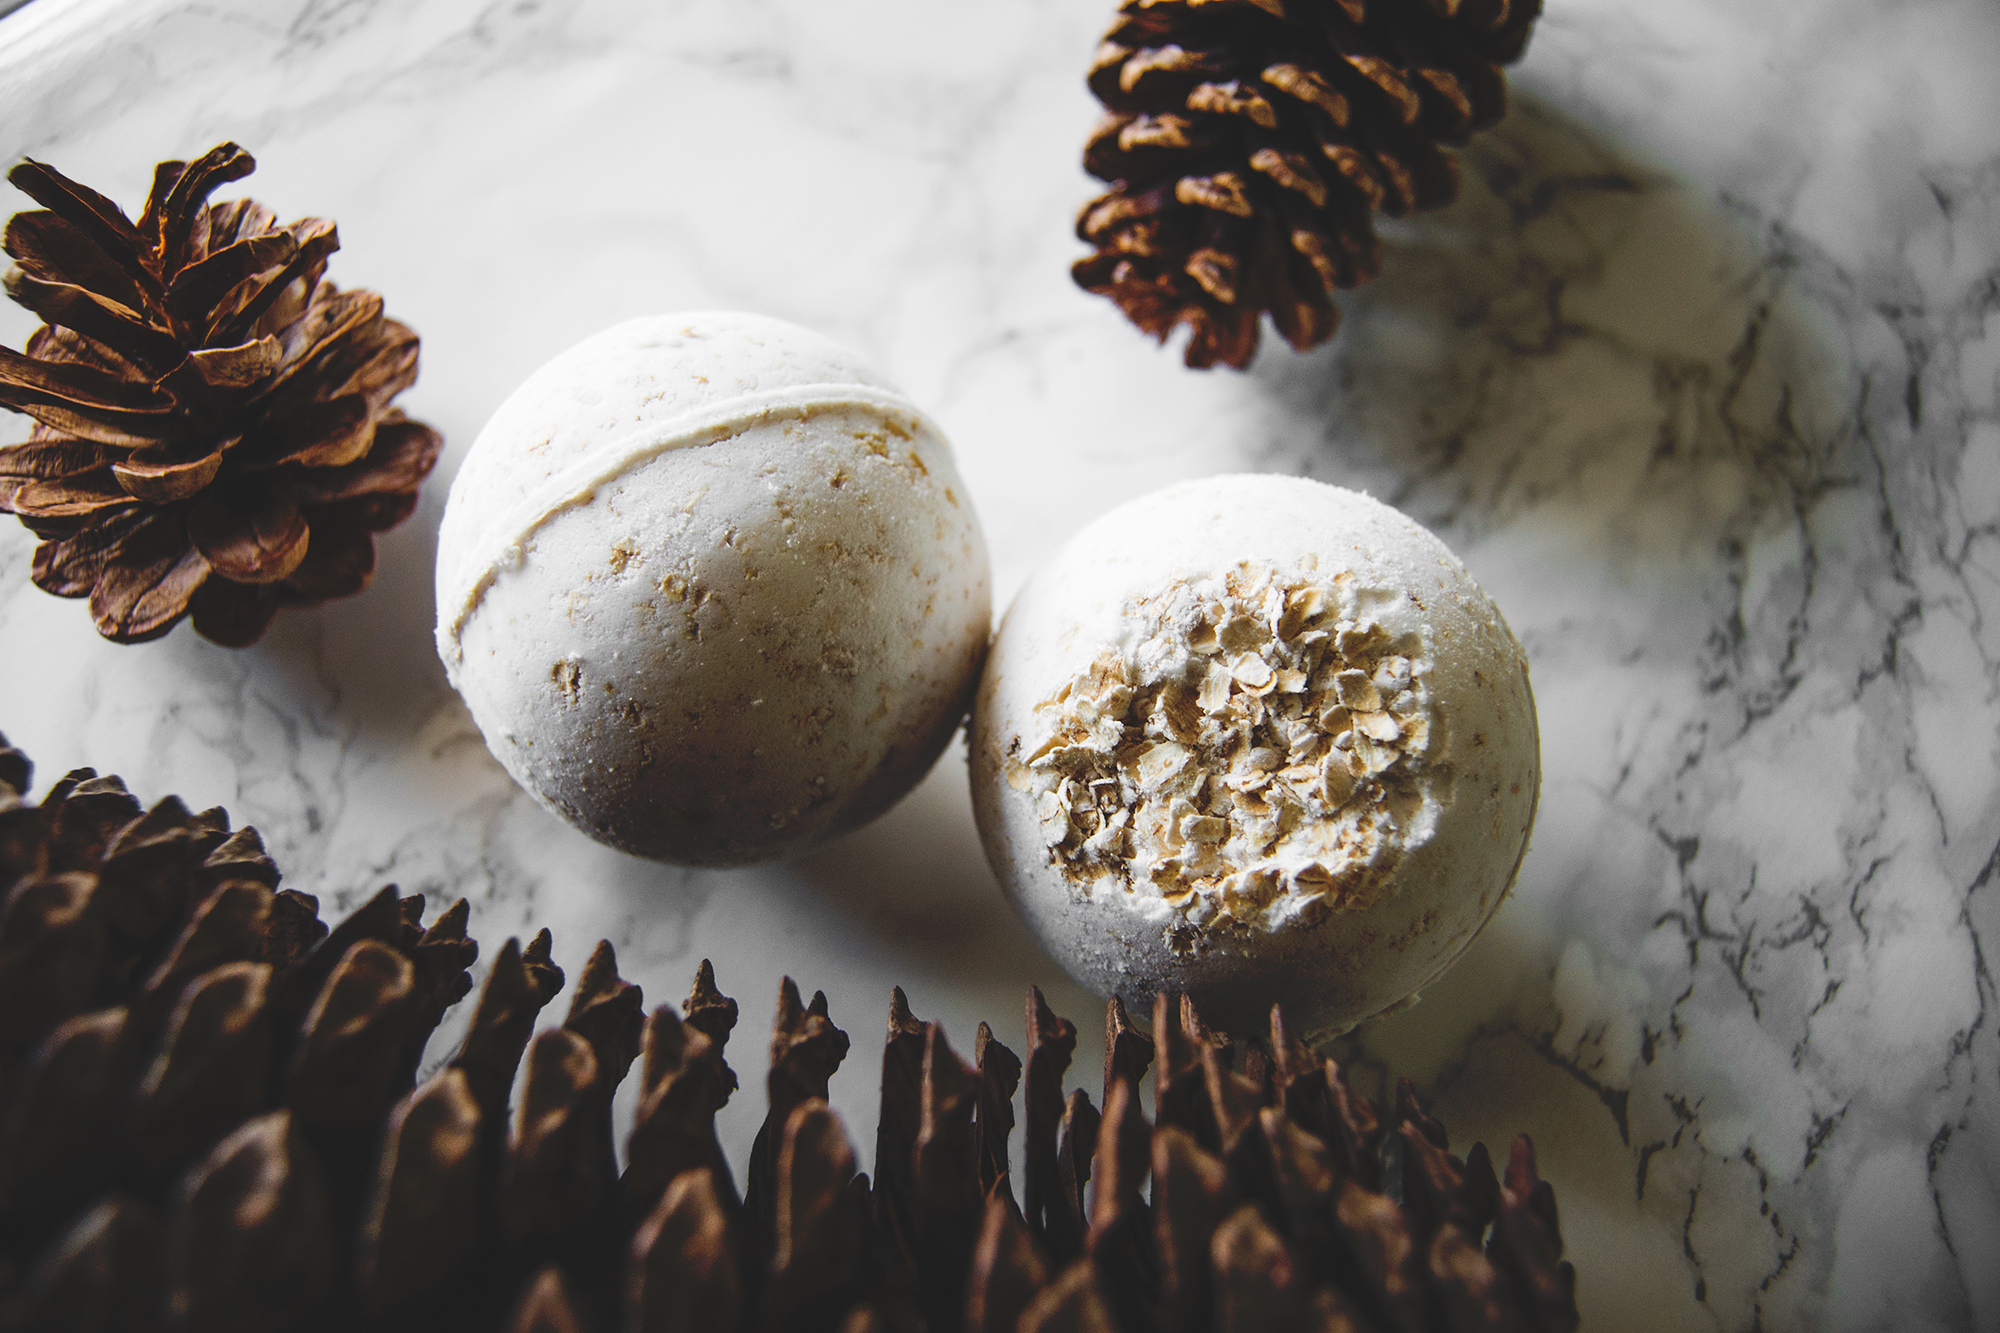
Oatmeal Bath Bomb (makes 2)
Benefits: Oatmeal makes for a very relaxing bath. It's great to cleanse your skin and lock in moisture. Lavender is known to be anti-inflammatory, reduces anxiety, improves sleep and helps heal wounds. Witch Hazel disinfects wounds, helps balance skin, treats sunburn, etc.
2/3 cup Baking Soda
1/3 cup Corn Starch
1/2 cup quick oats
1/3 cup Citric Acid
1 teaspoon Witch Hazel
1-2 teaspoons water
1 teaspoon essential oil (I used lavender for this one)
You'll want to follow the same method as before. Whisk the dry ingredients together in one bowl and the wet in another. Slowly combine them together and try not to let the mixture fizz. Once it's the consistency of wet sand, pack and overfill both sides of your mold. If it doesn't stick together, try whisking in a little more water and attempt again. I found that making the mixture a little more damp than my first recipe helped the two sides of the mold to stick together.
Lightly tap the filled bath bomb mold with a metal spoon (or whatever you have around). Begin by removing one side of the mold carefully, and then the other. Put on a tray and let it dry 1-2 days before using!
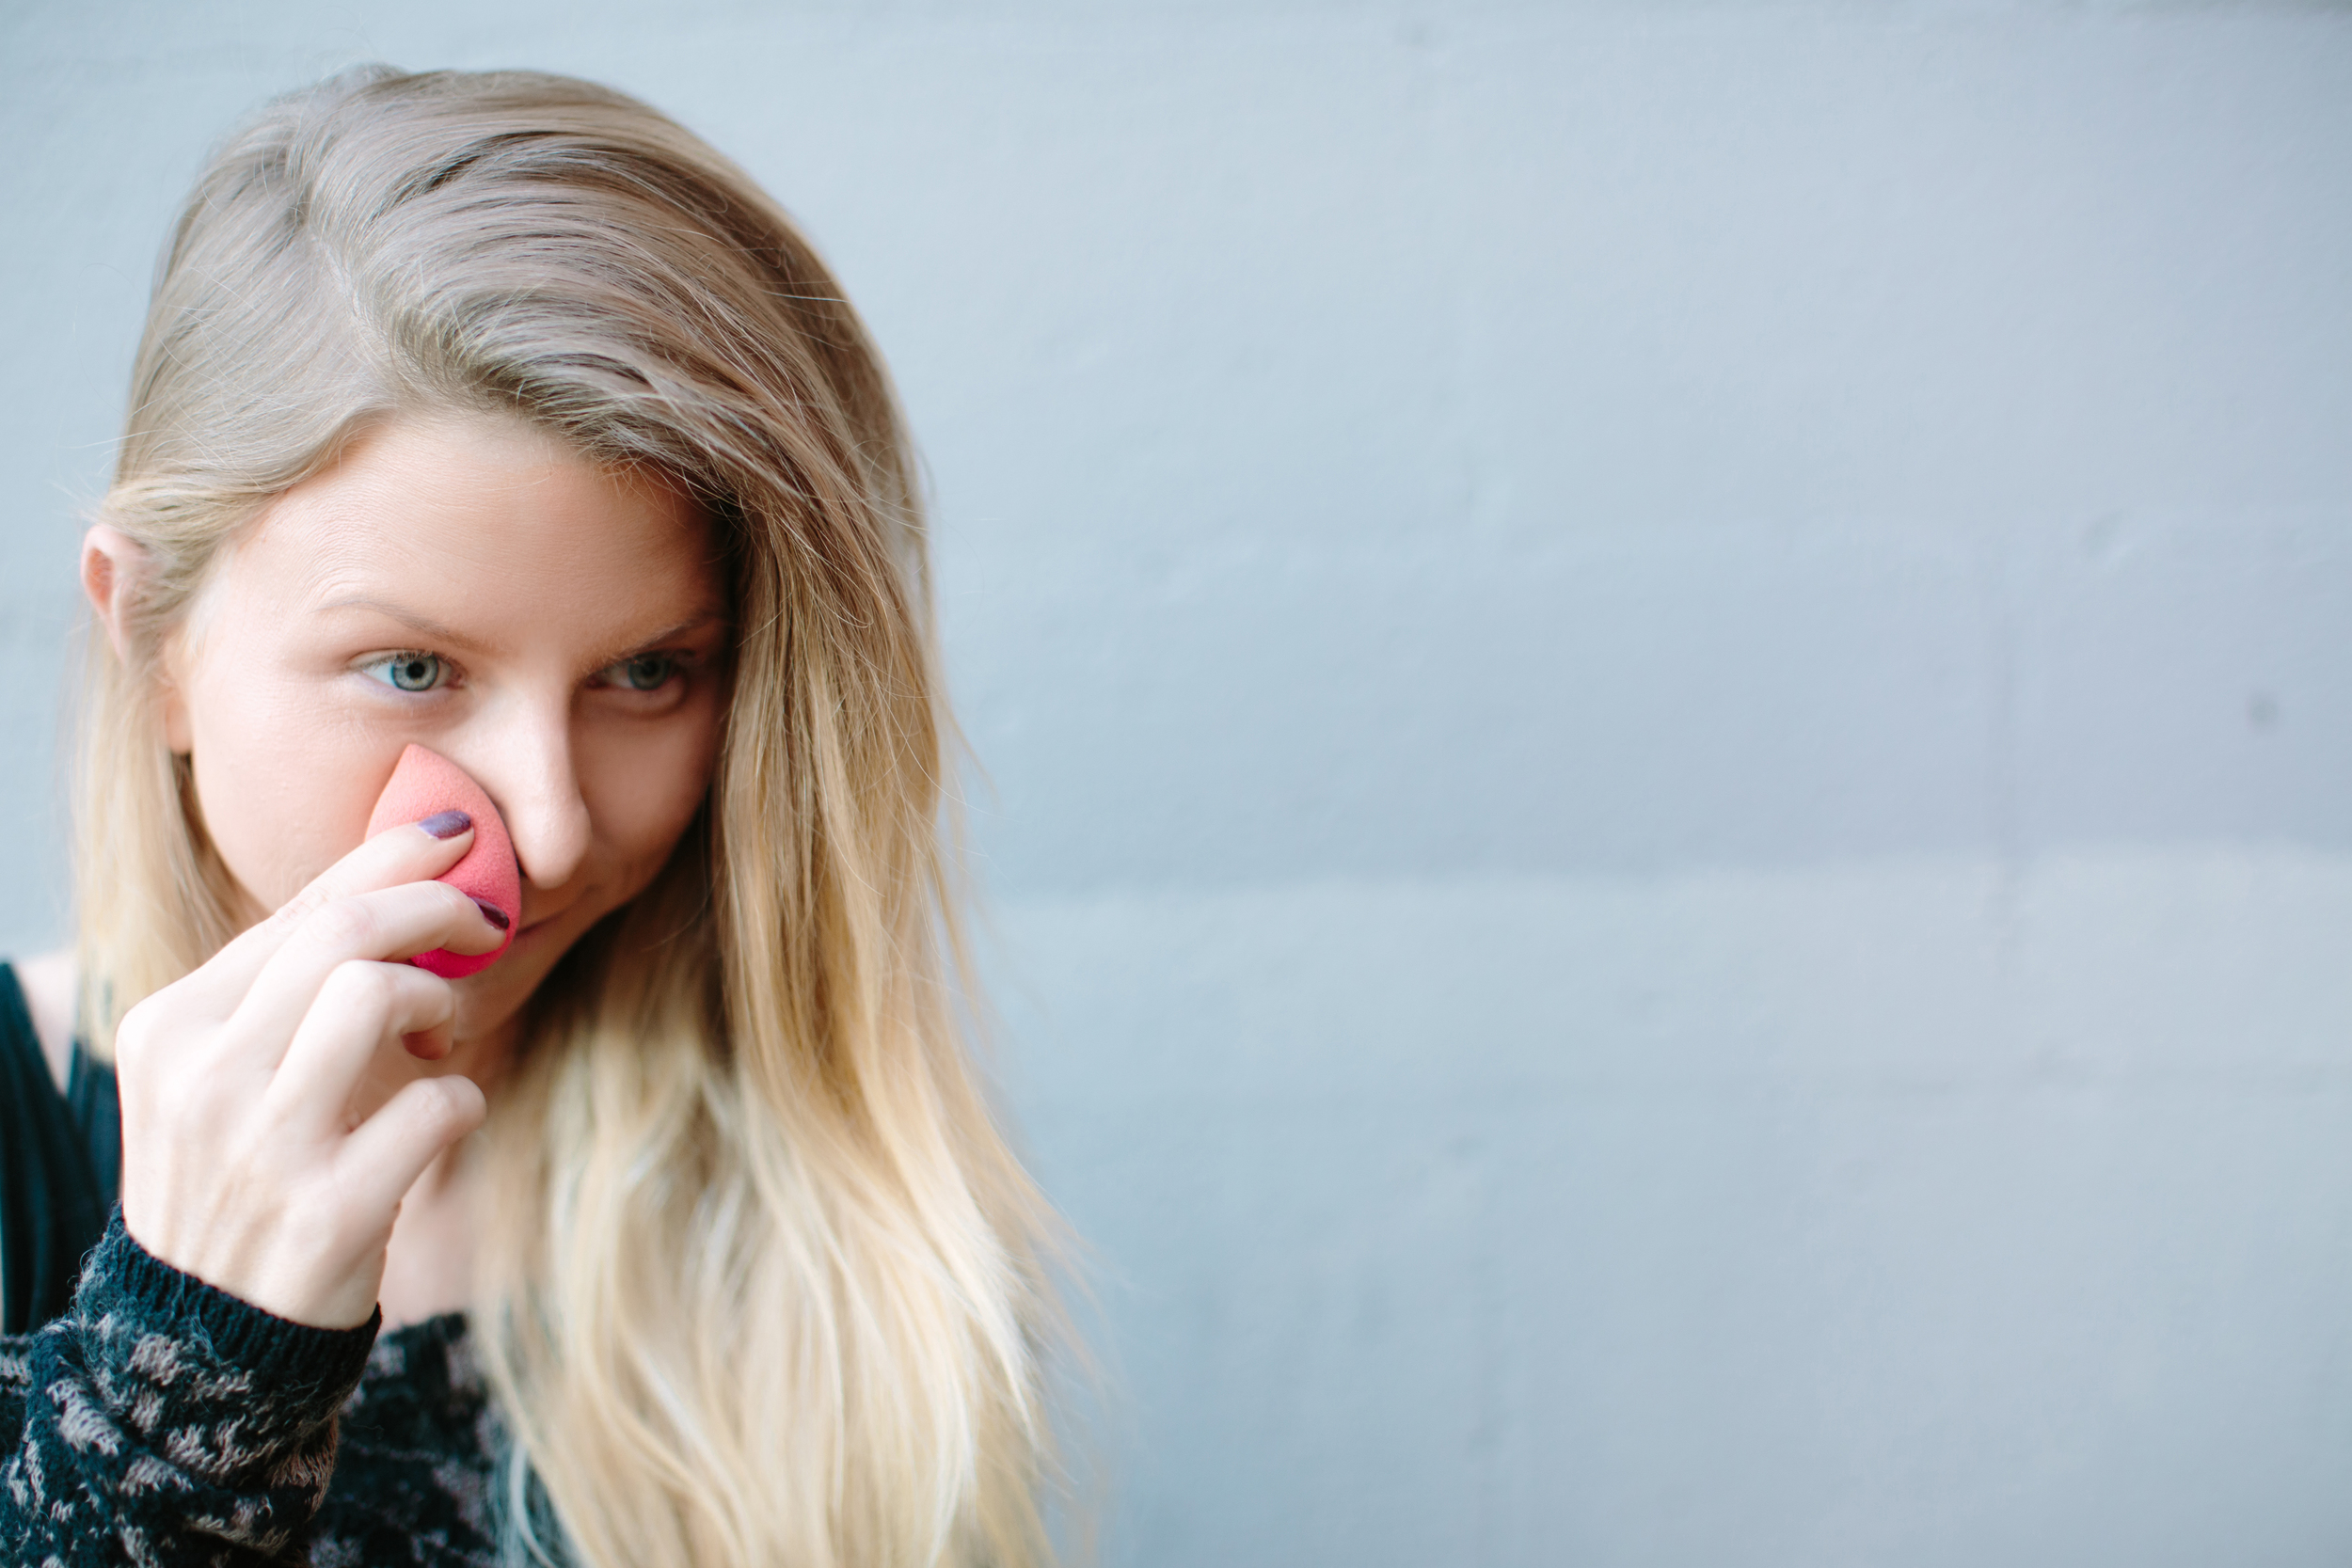
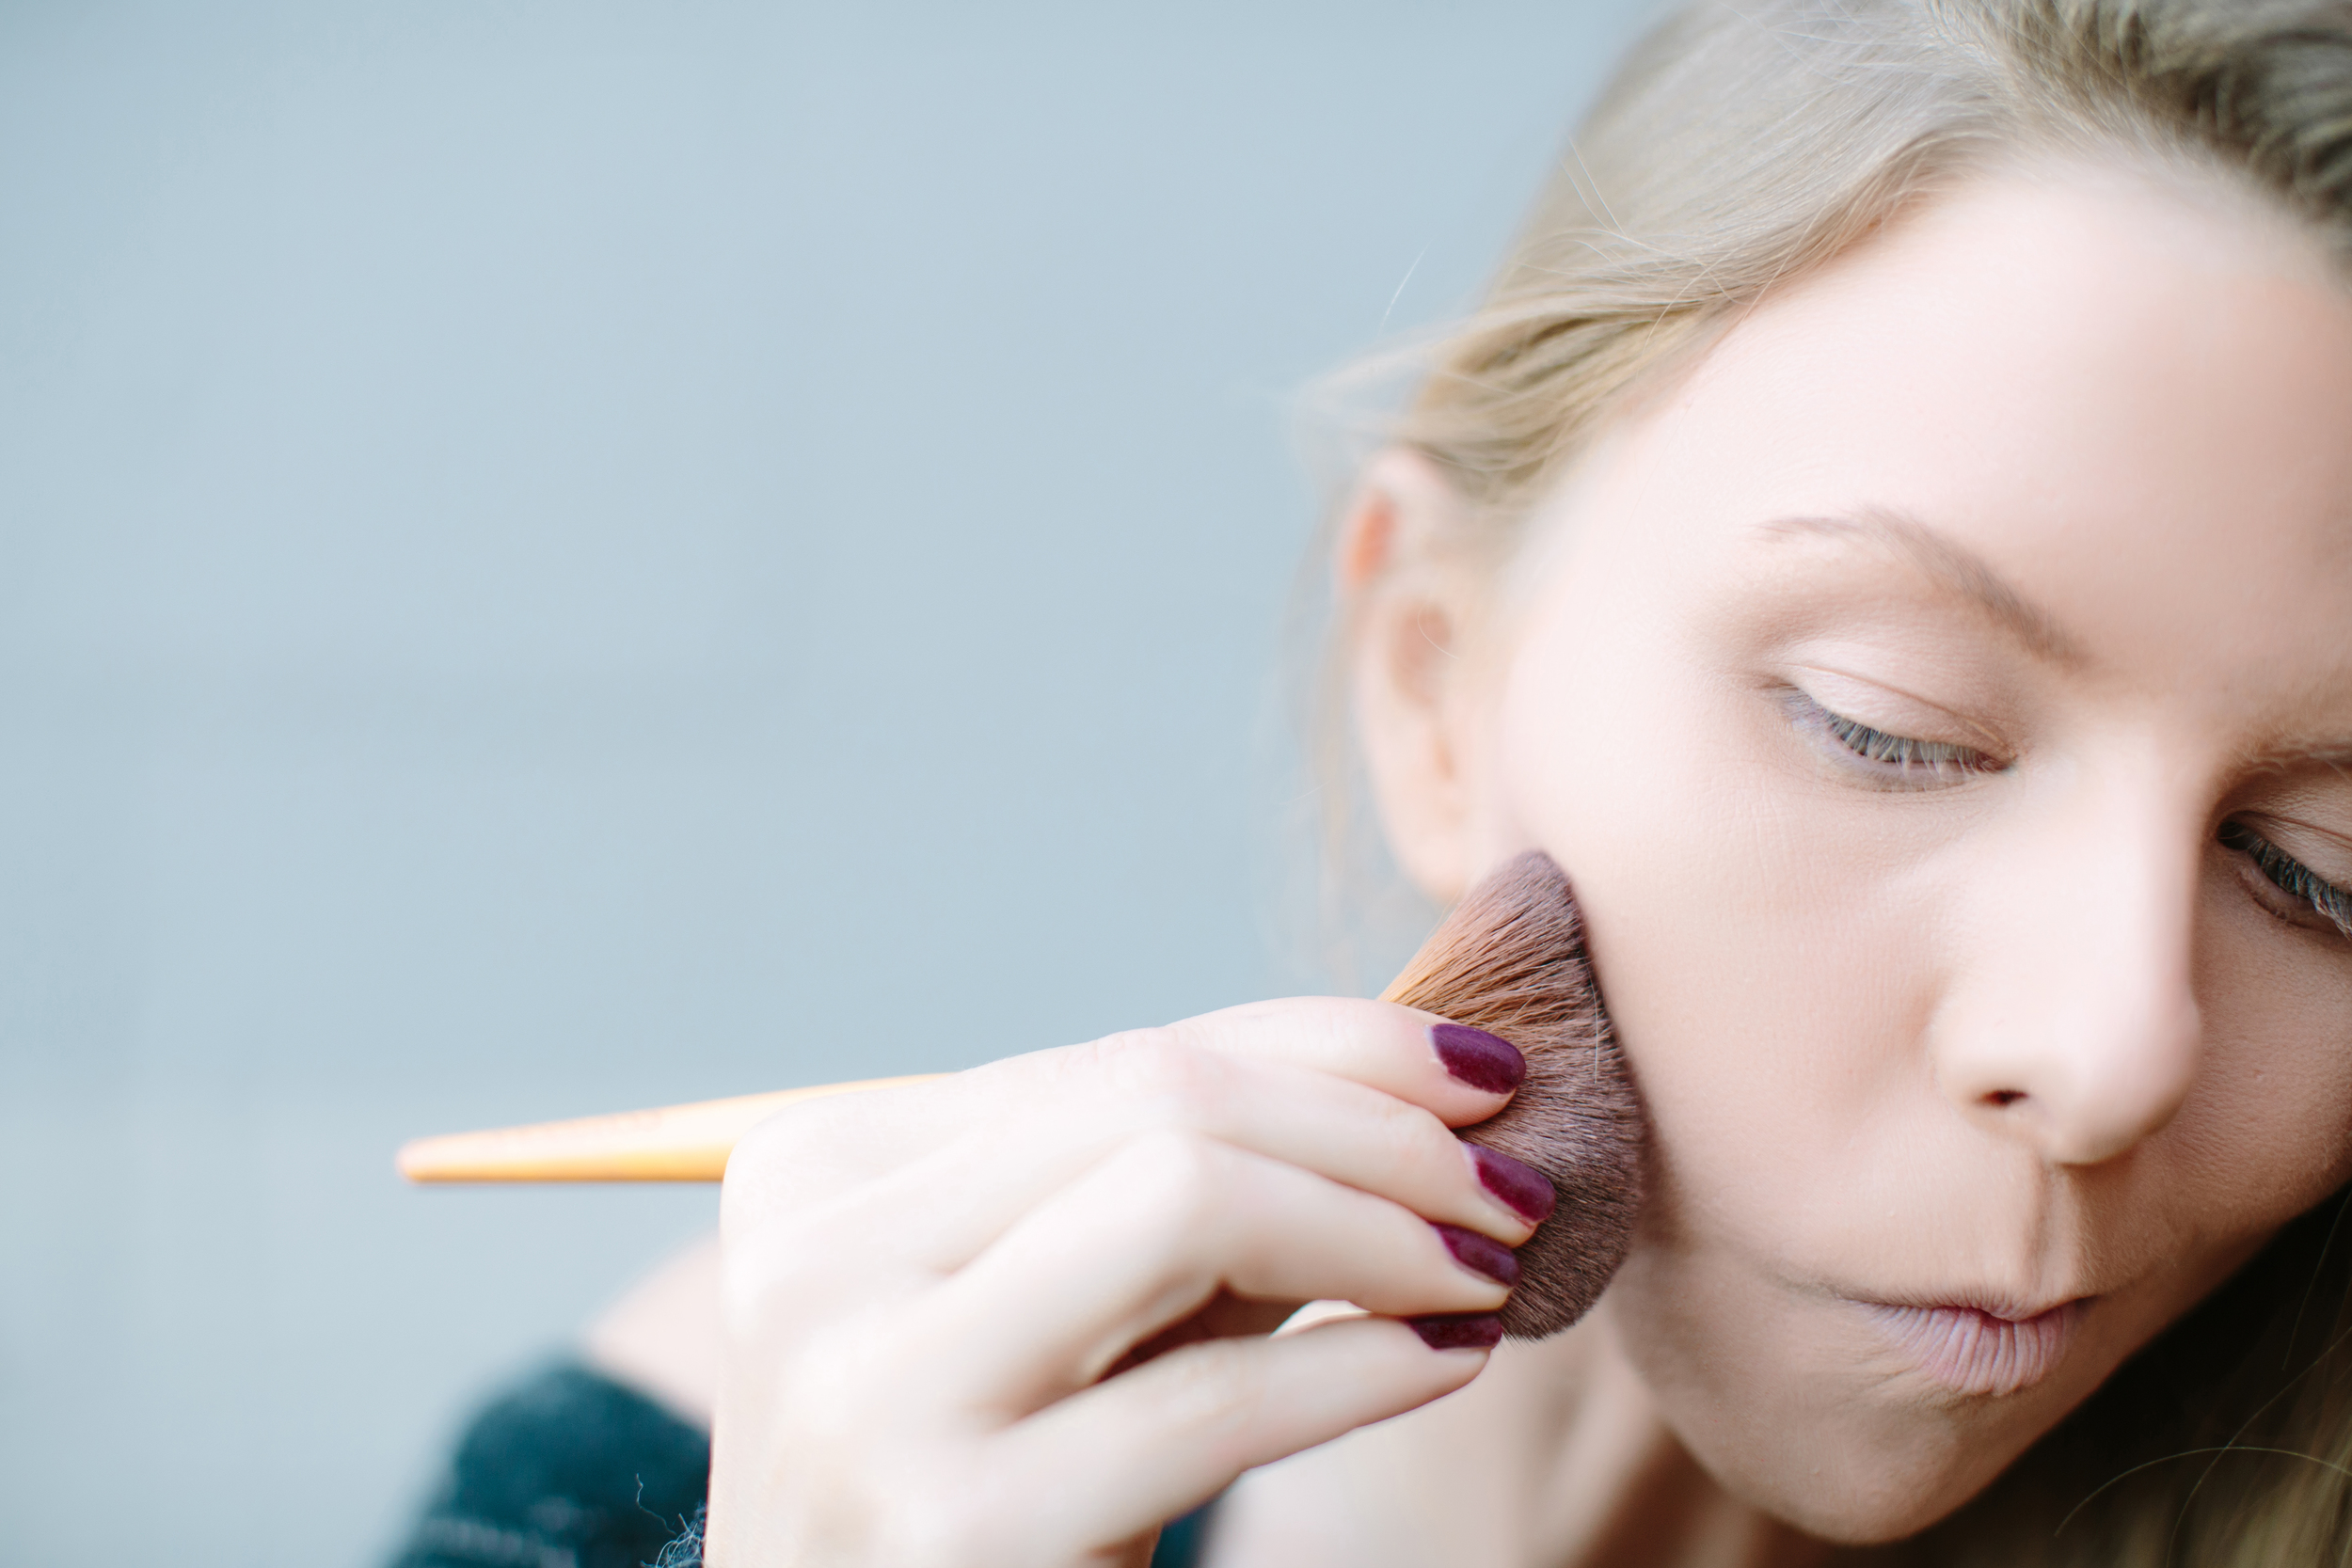
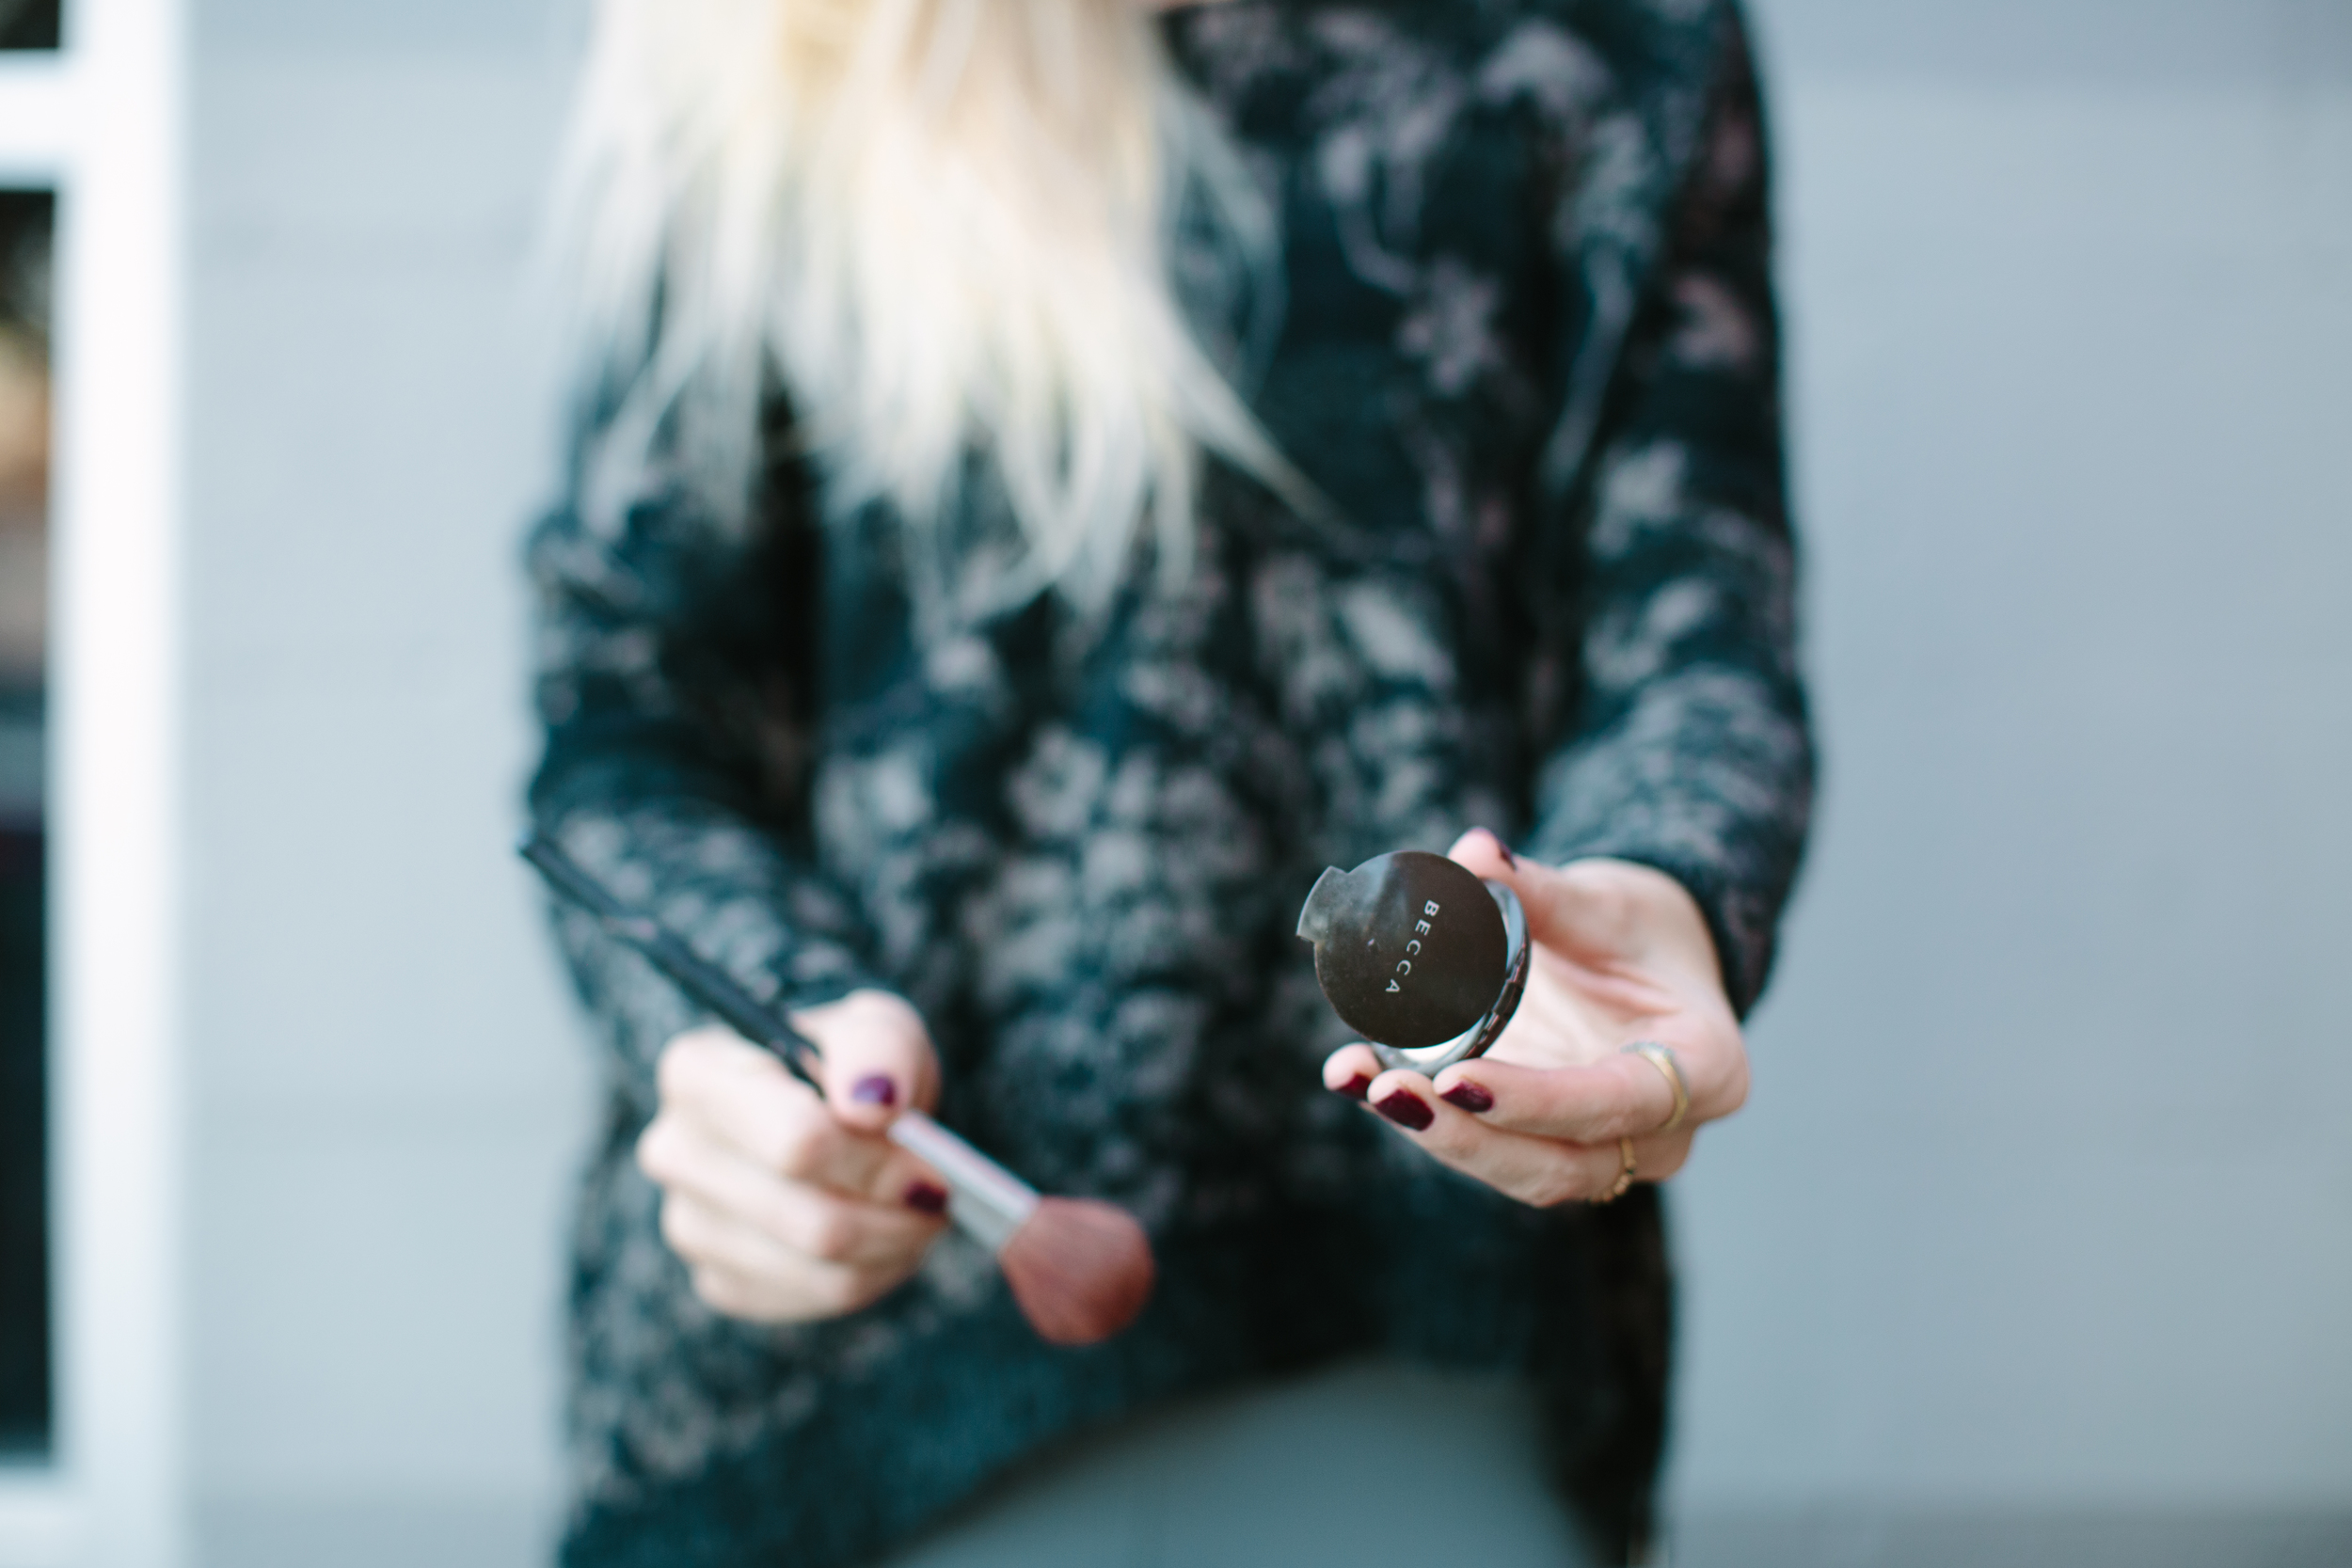
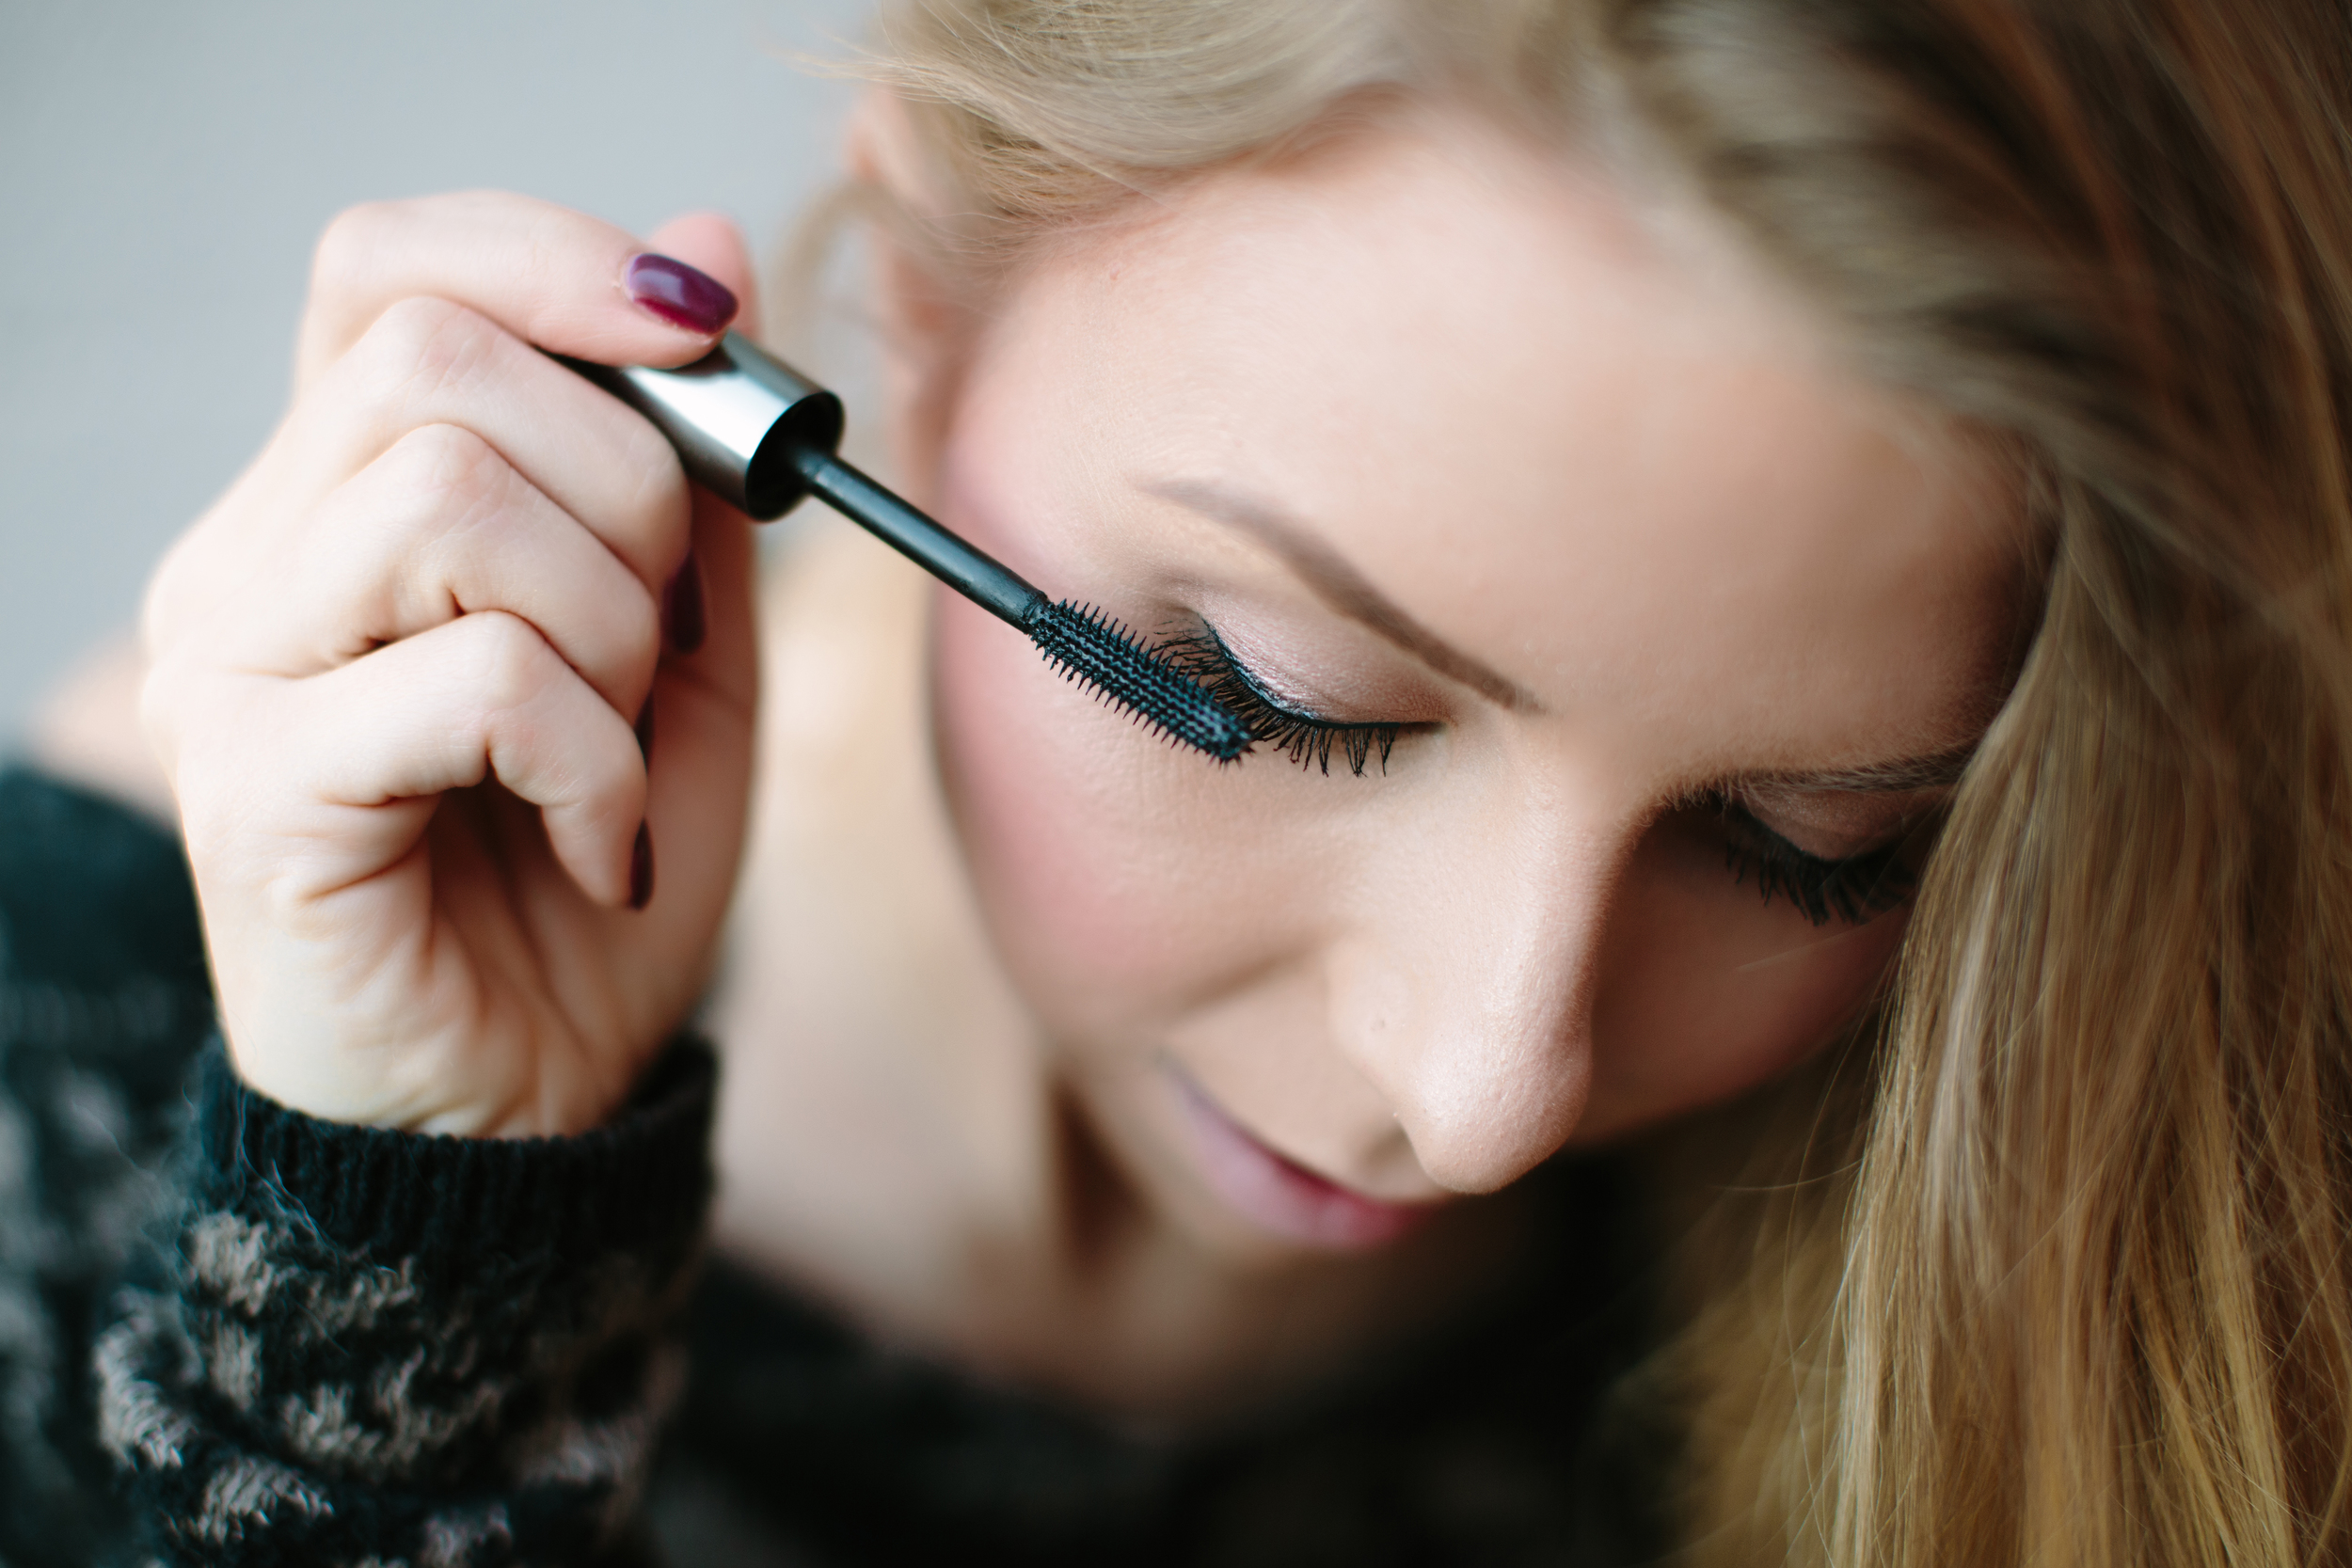
Daytime Look (with no foundation!)

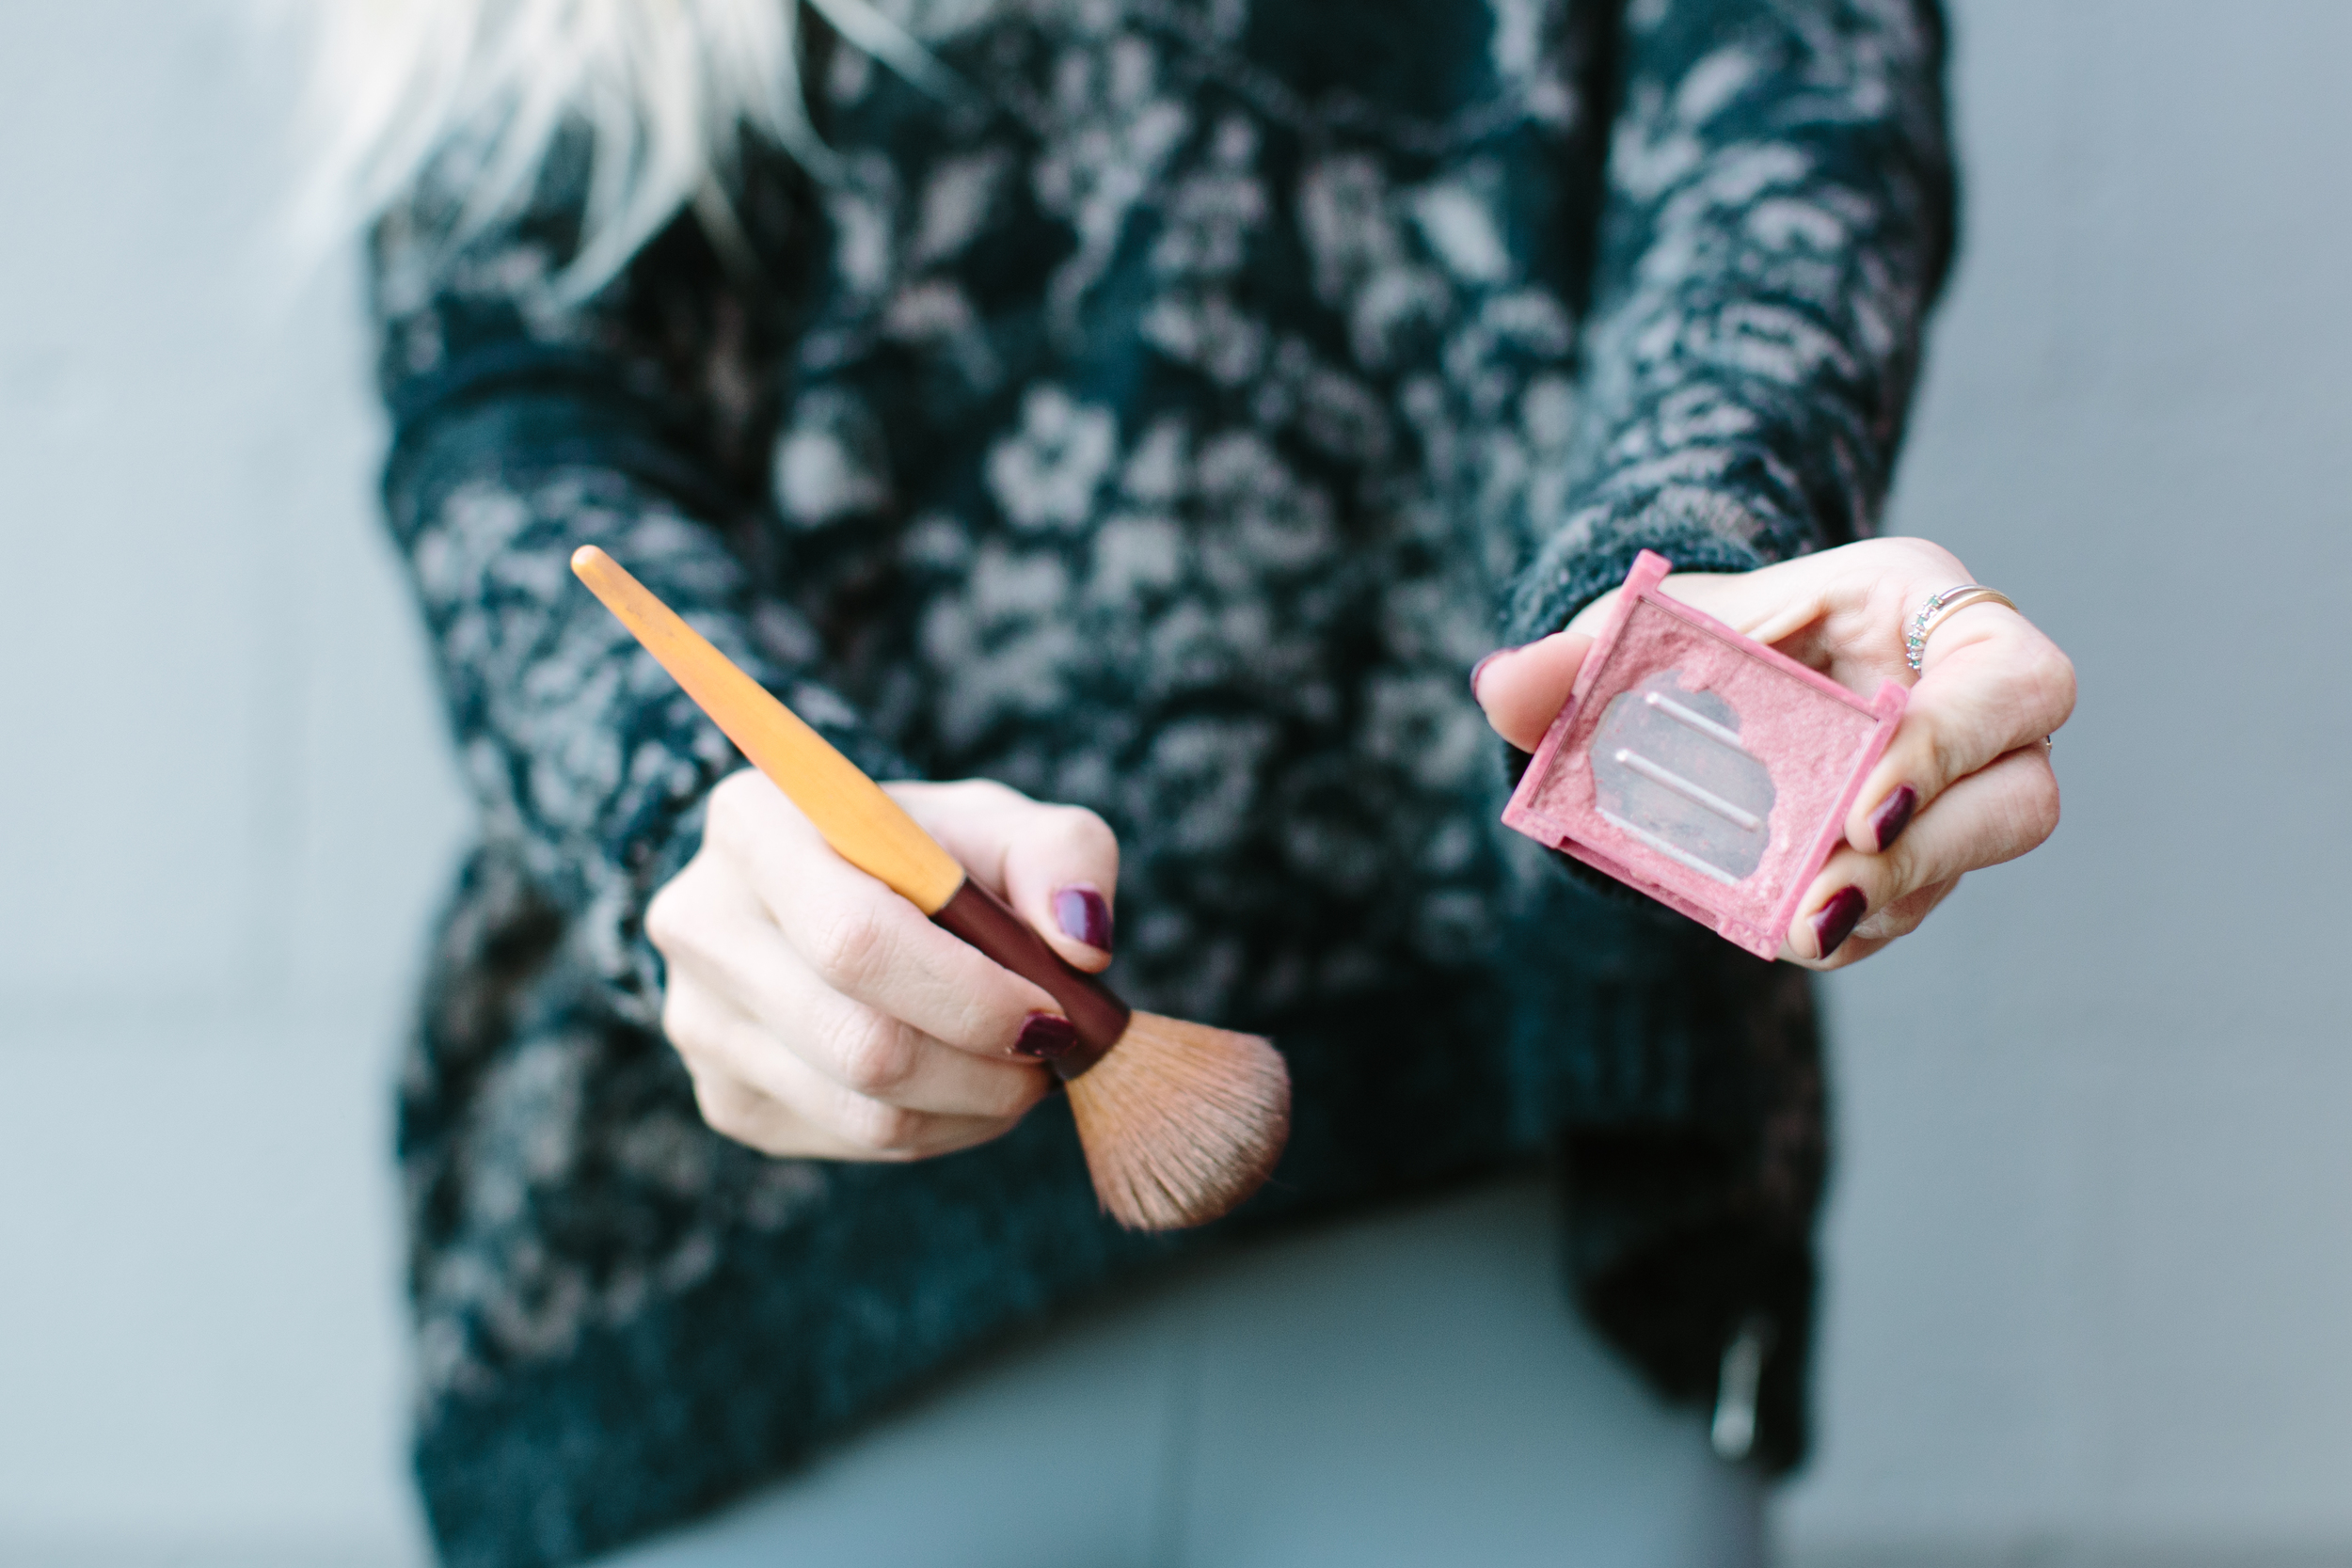
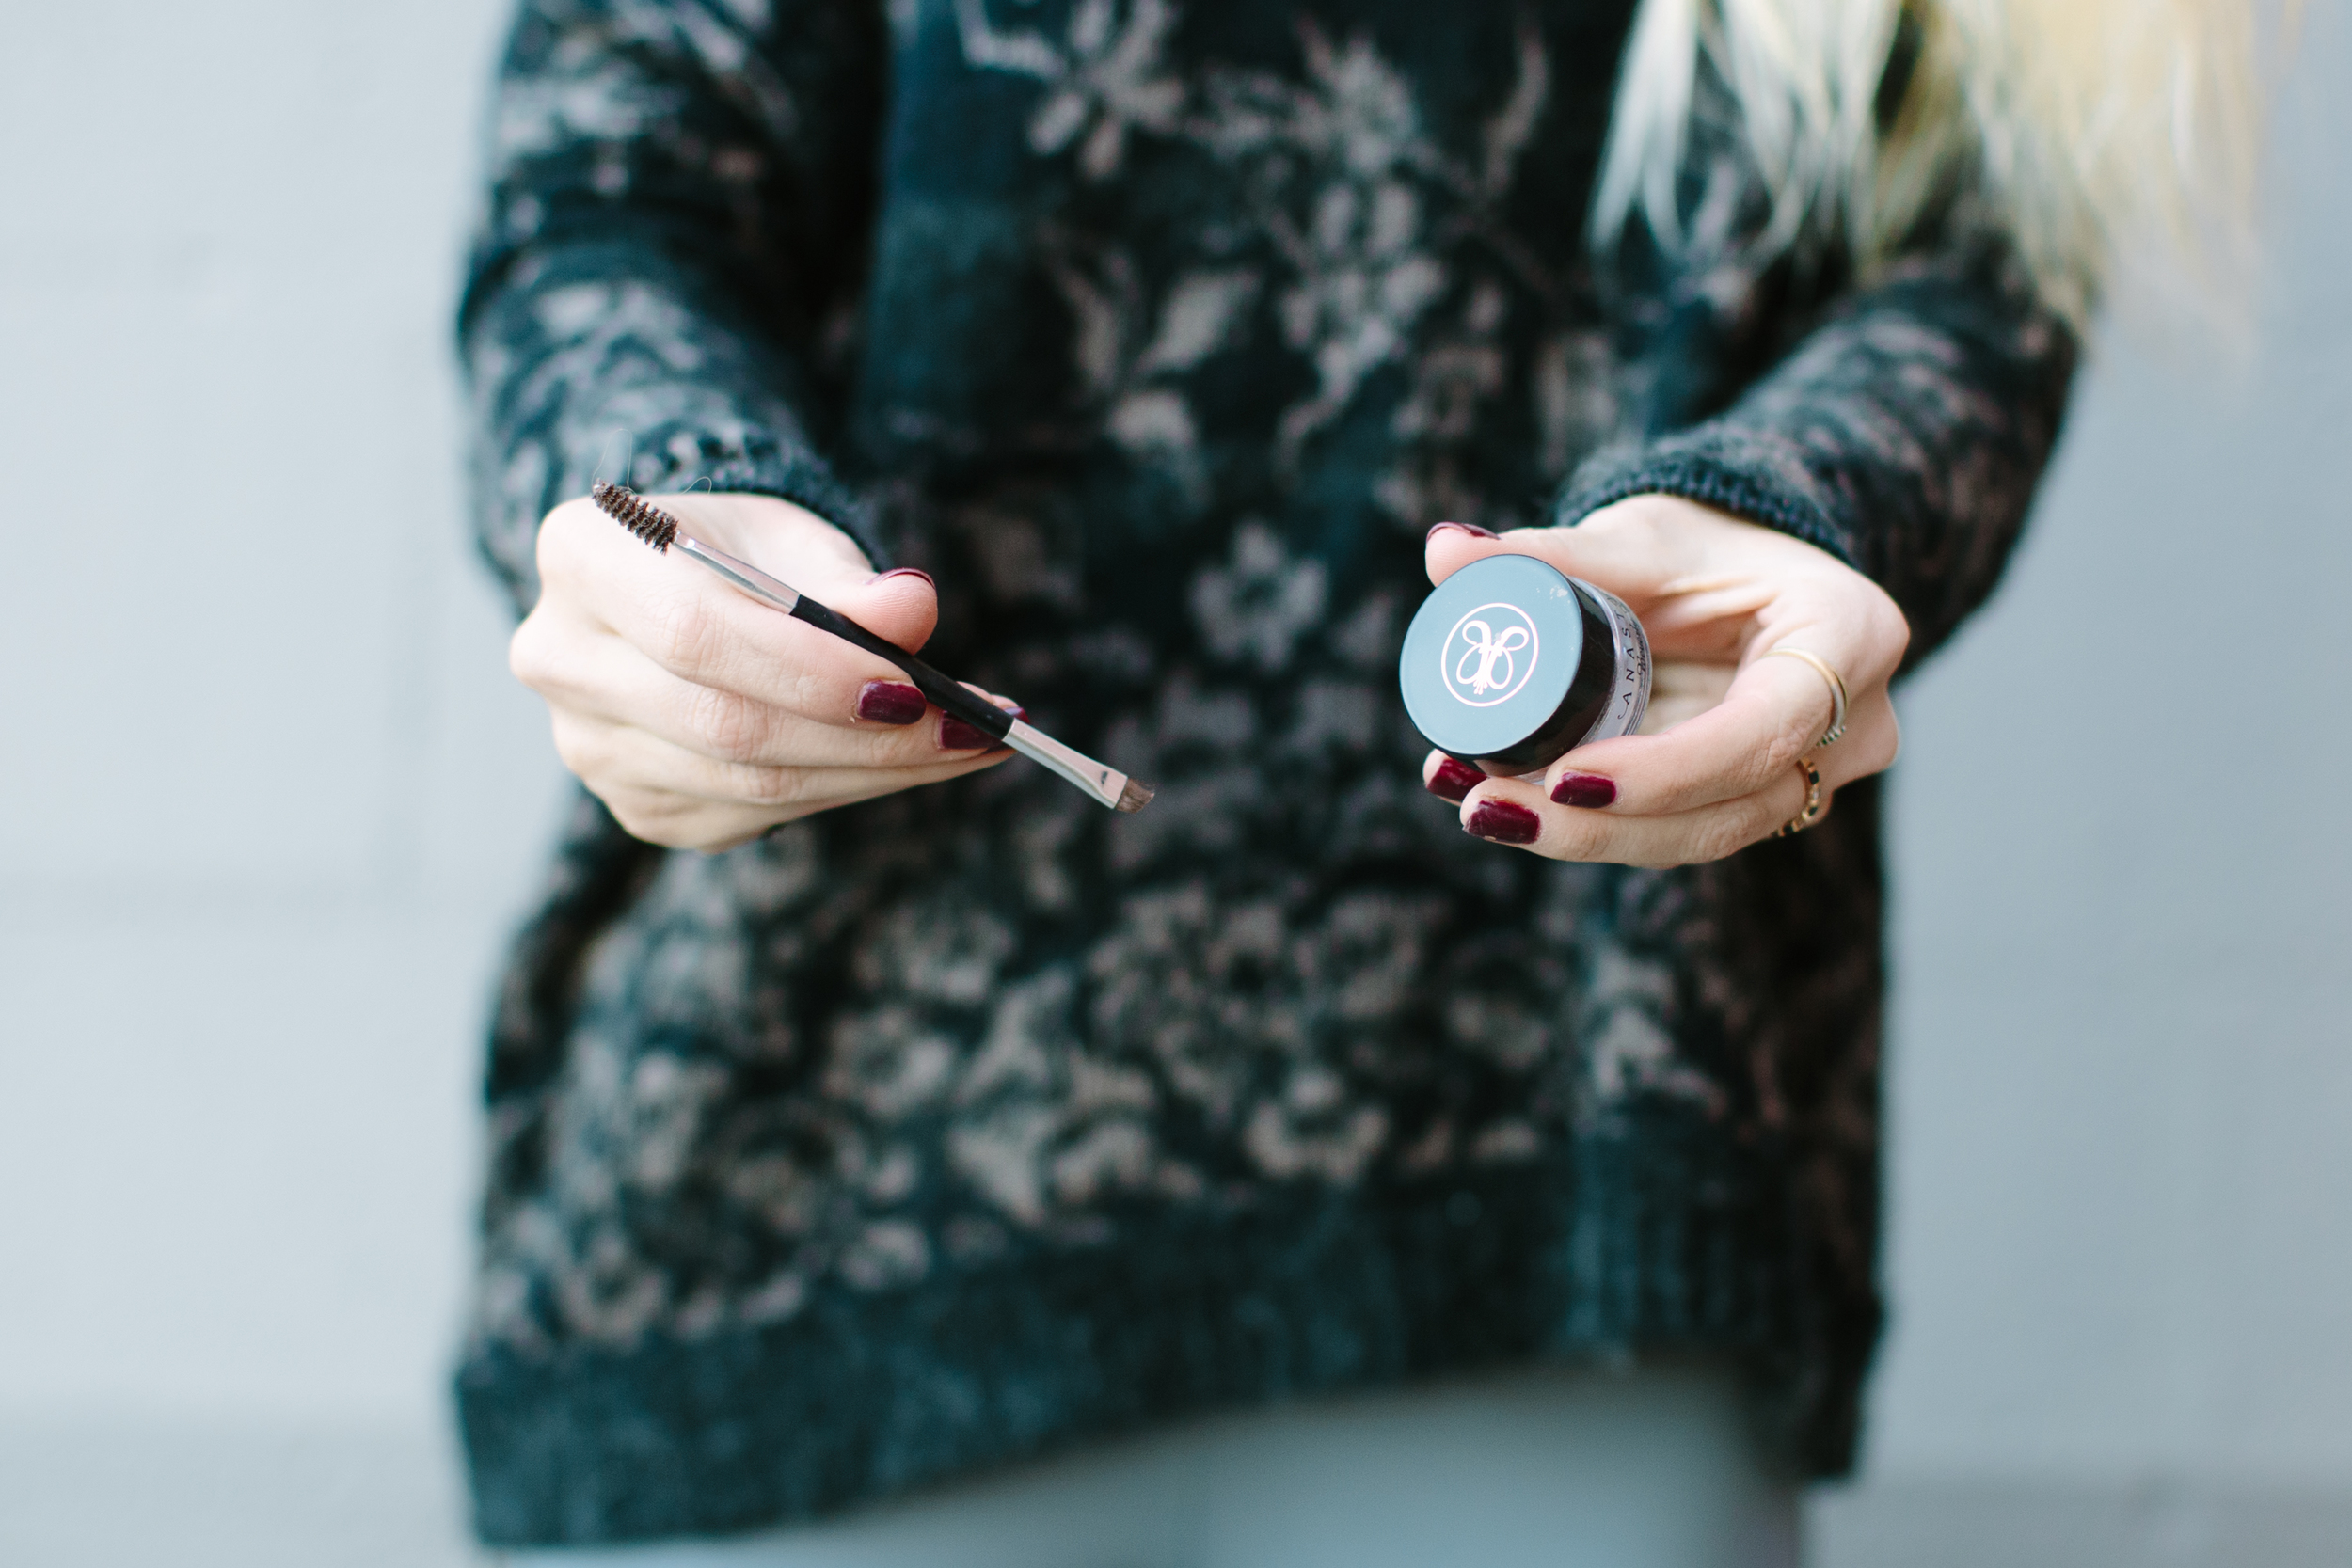
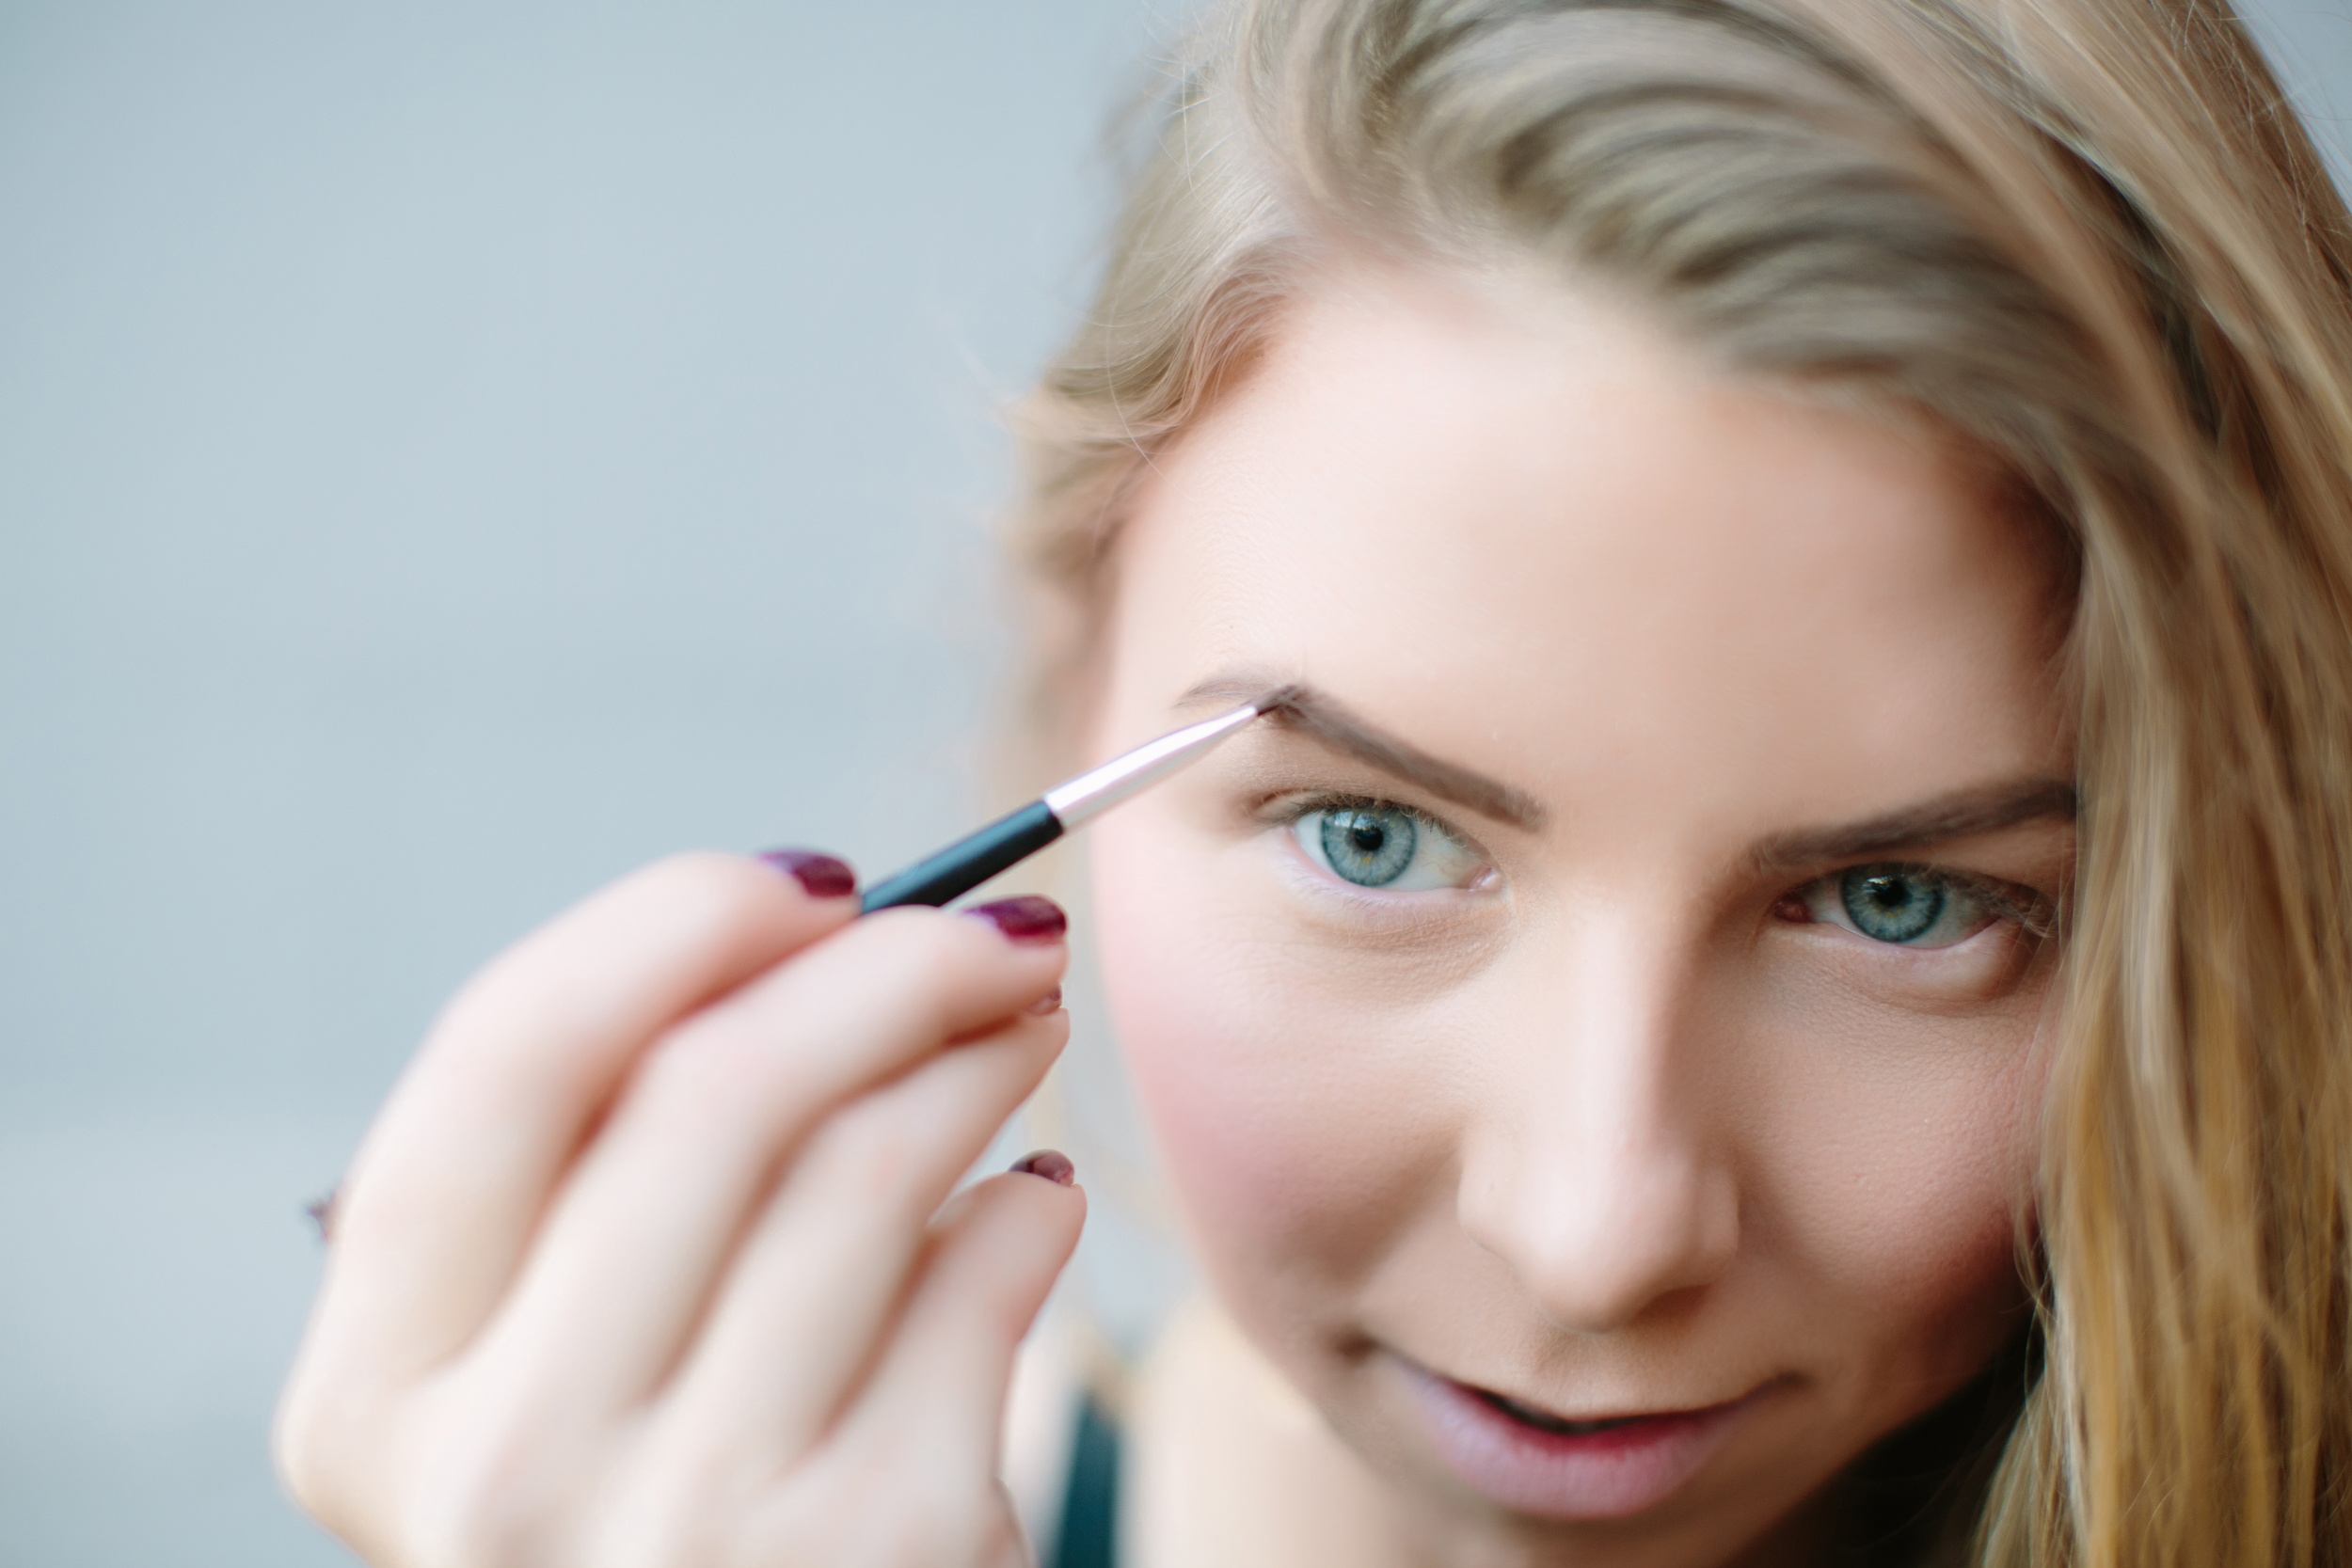
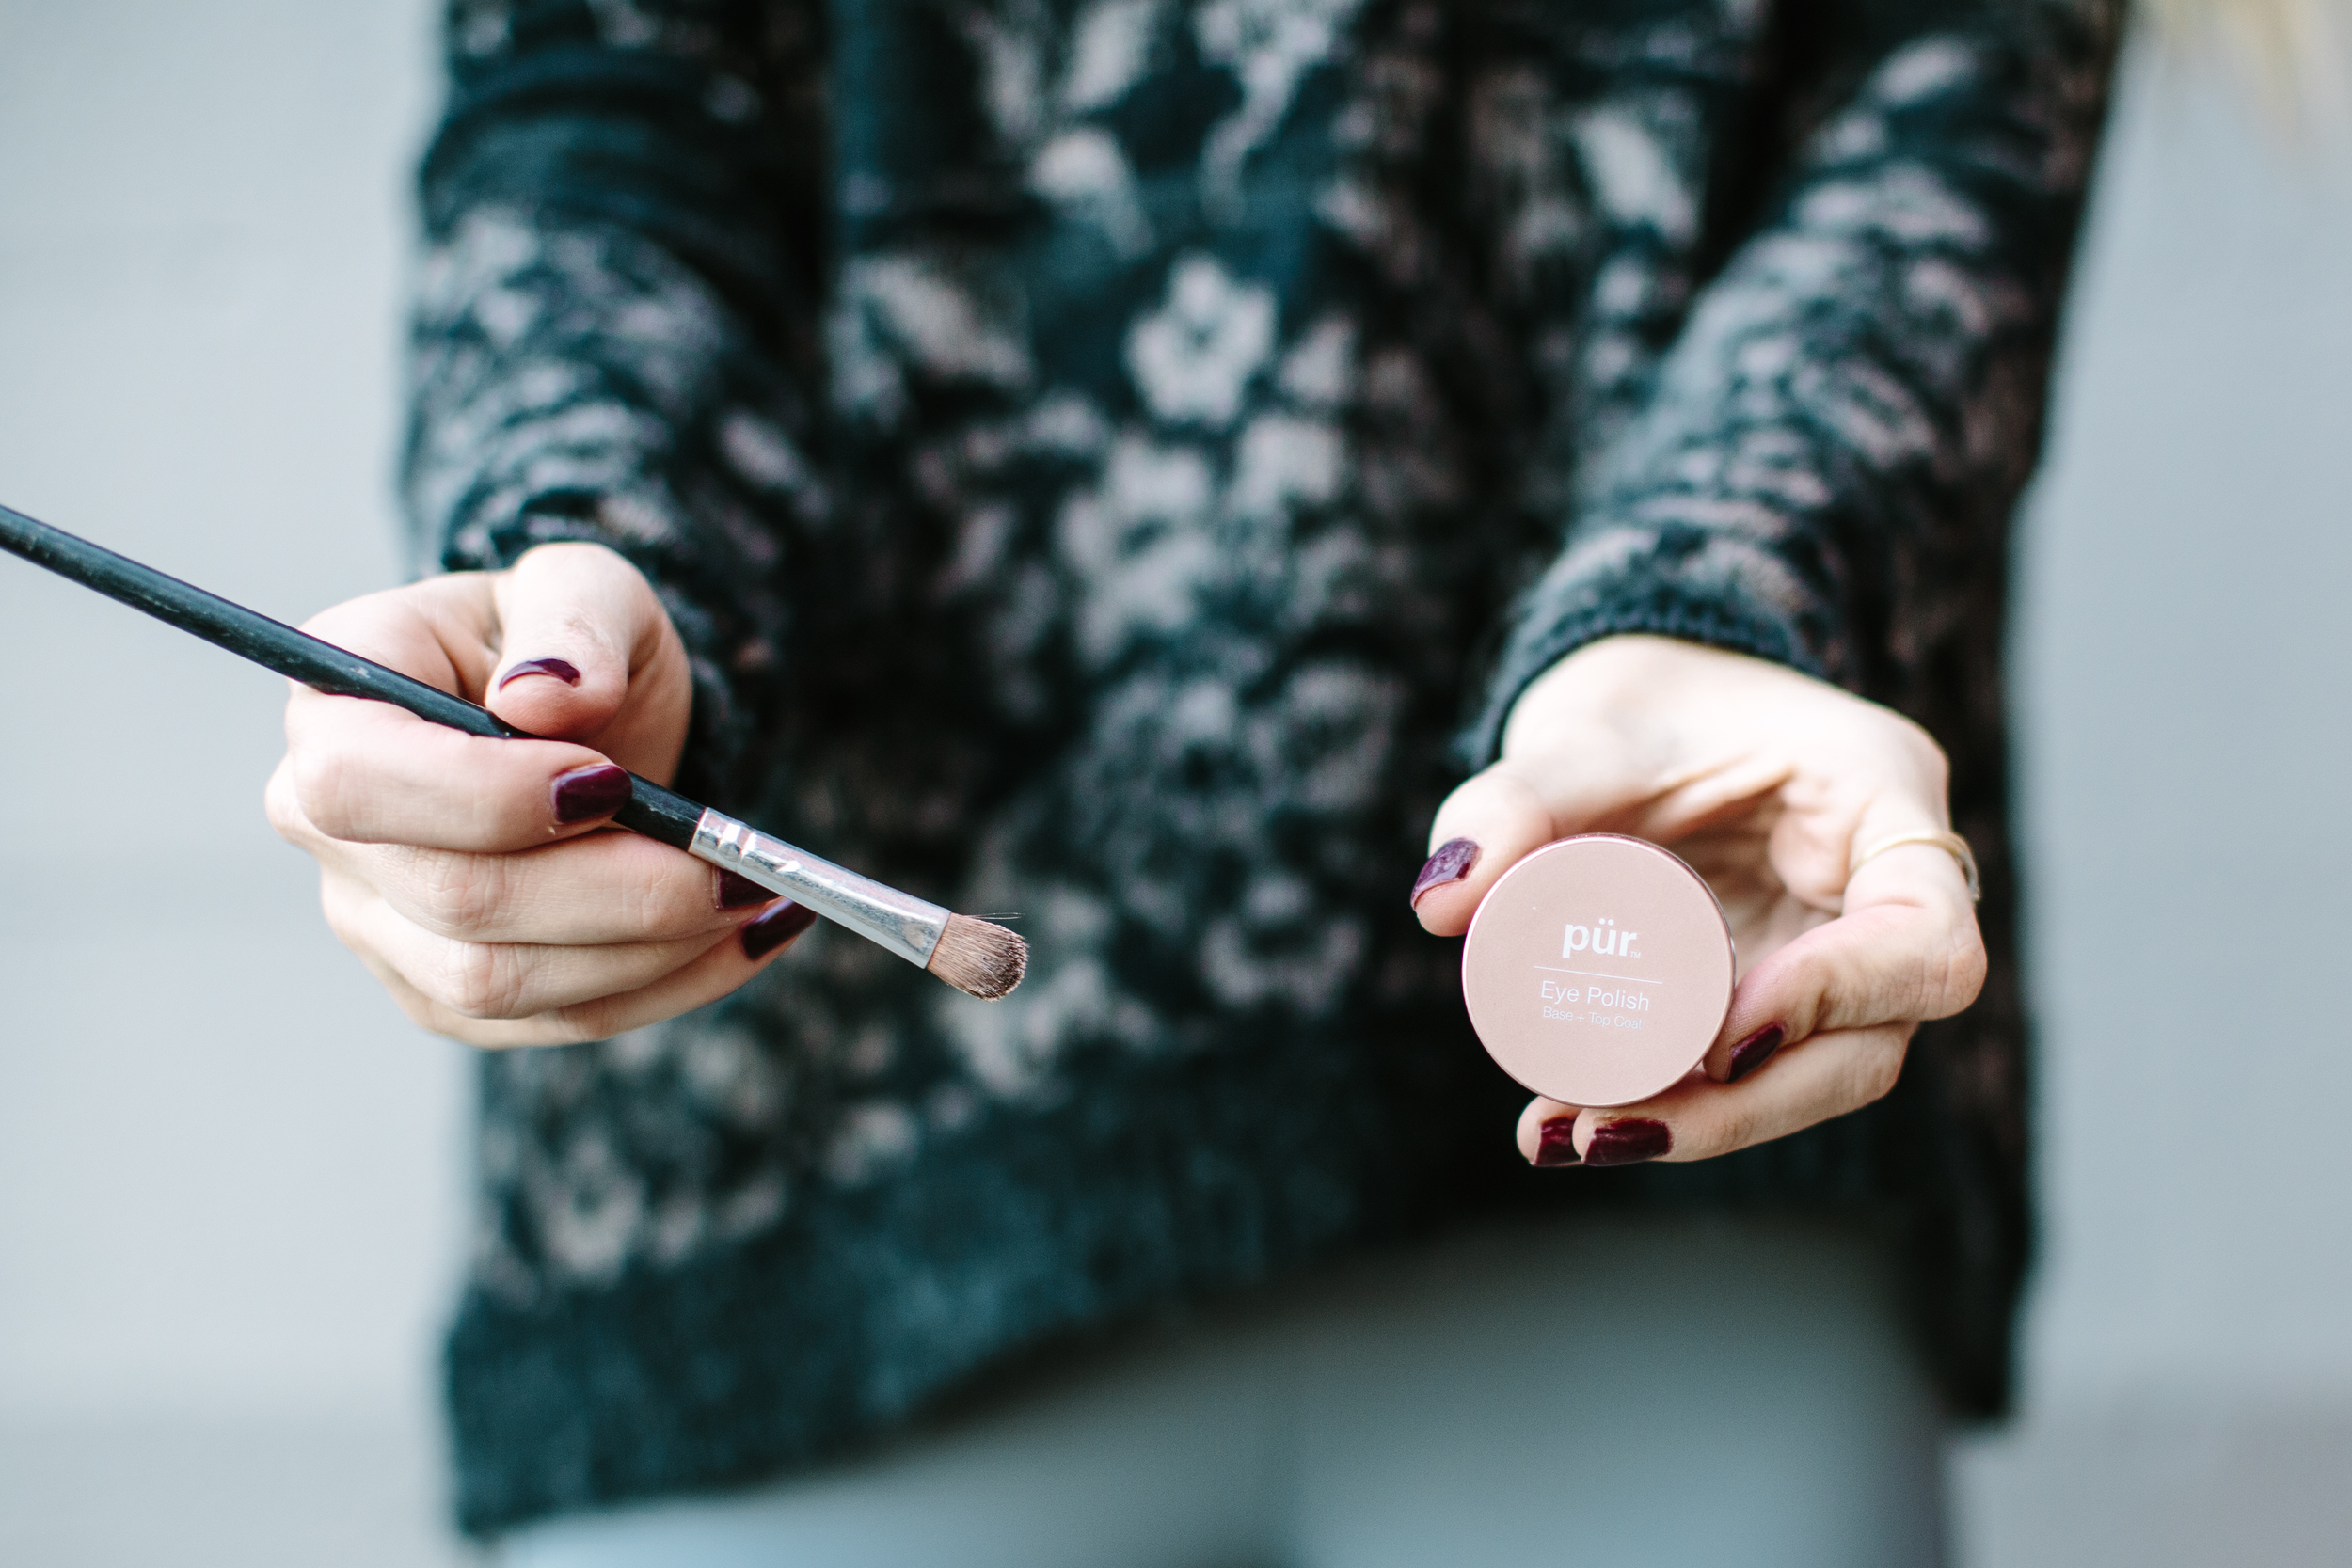
Some of you may have seen on snapchat or have heard me mention that I've been going through a skin care treatment for several months now. Although my acne has become significantly better, we are still working on it. During the week, I'm usually makeup free, but on the weekends I'll put it on when I'm out and about. That being said I've switched up my makeup, ditched the foundation and obtained a mineral powder. Although I'm still in the market for a new contour powder, my makeup routine has become a lot less of a pore clogging mega coverage mess, and I've introduced more products that help my skin breathe (at least a lot more than before). If you use mineral makeup or anything that's better for the skin, let me know! I'm always down to try new products (specifically contour, highlight and blush items).
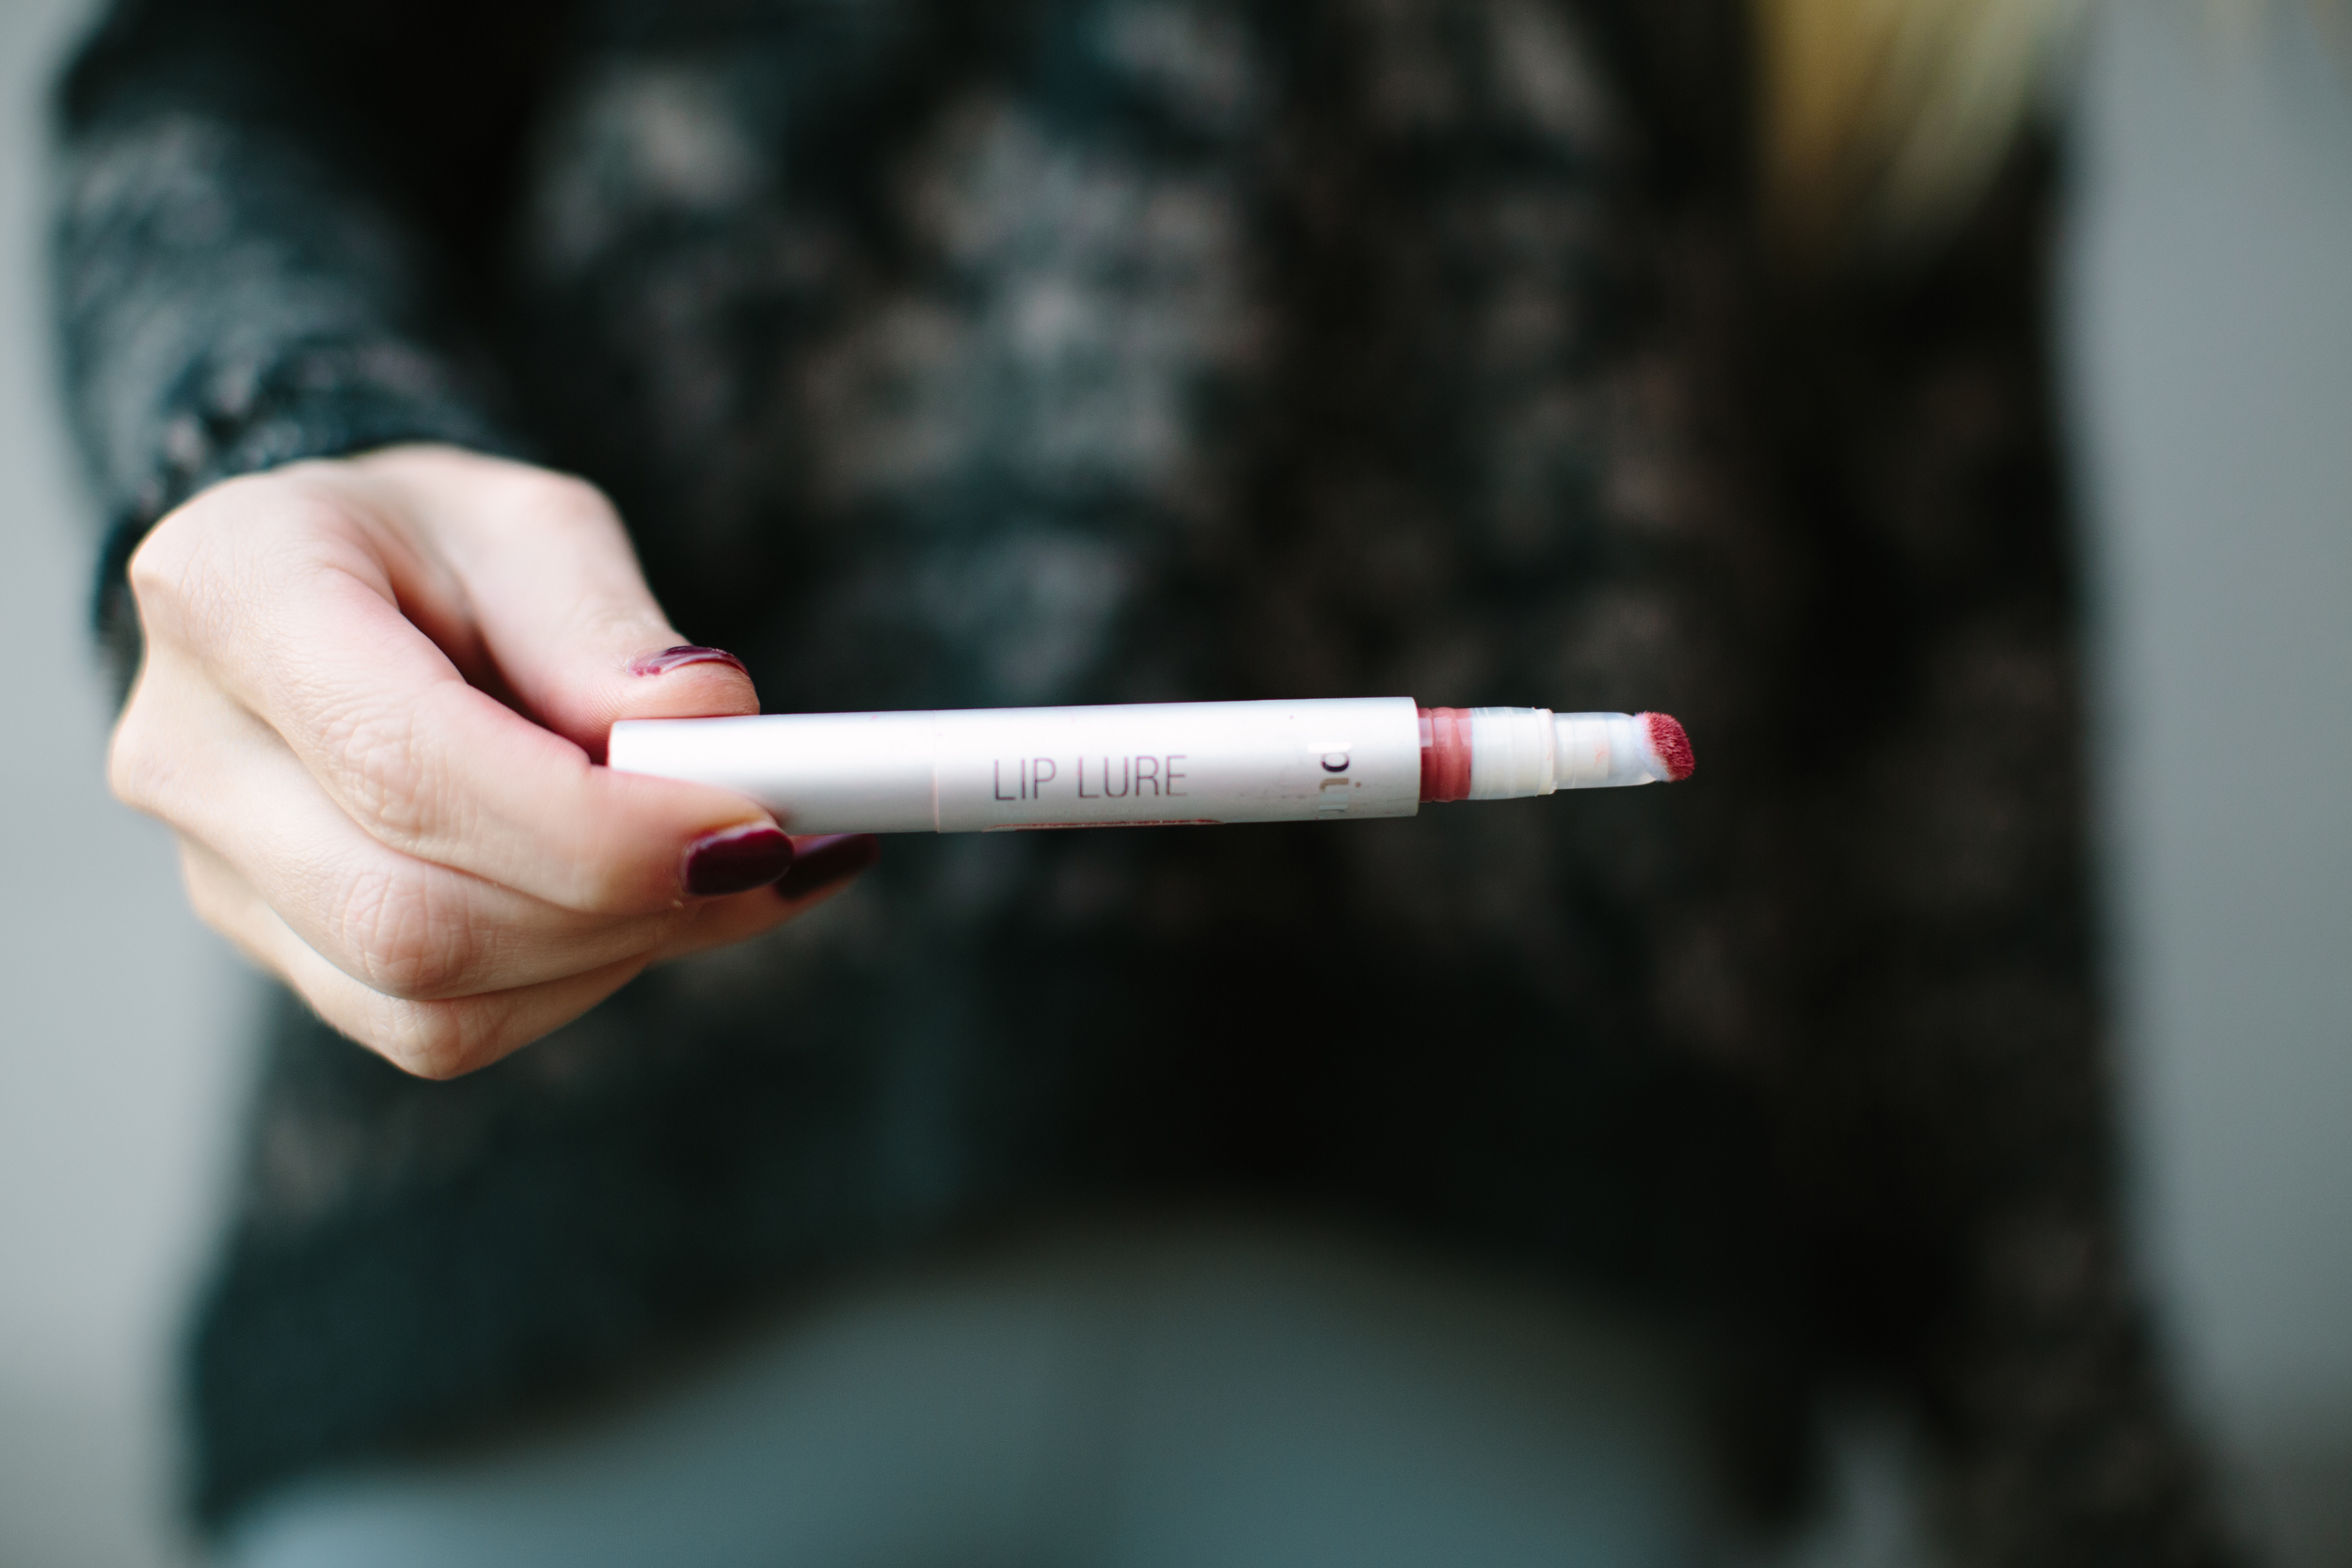
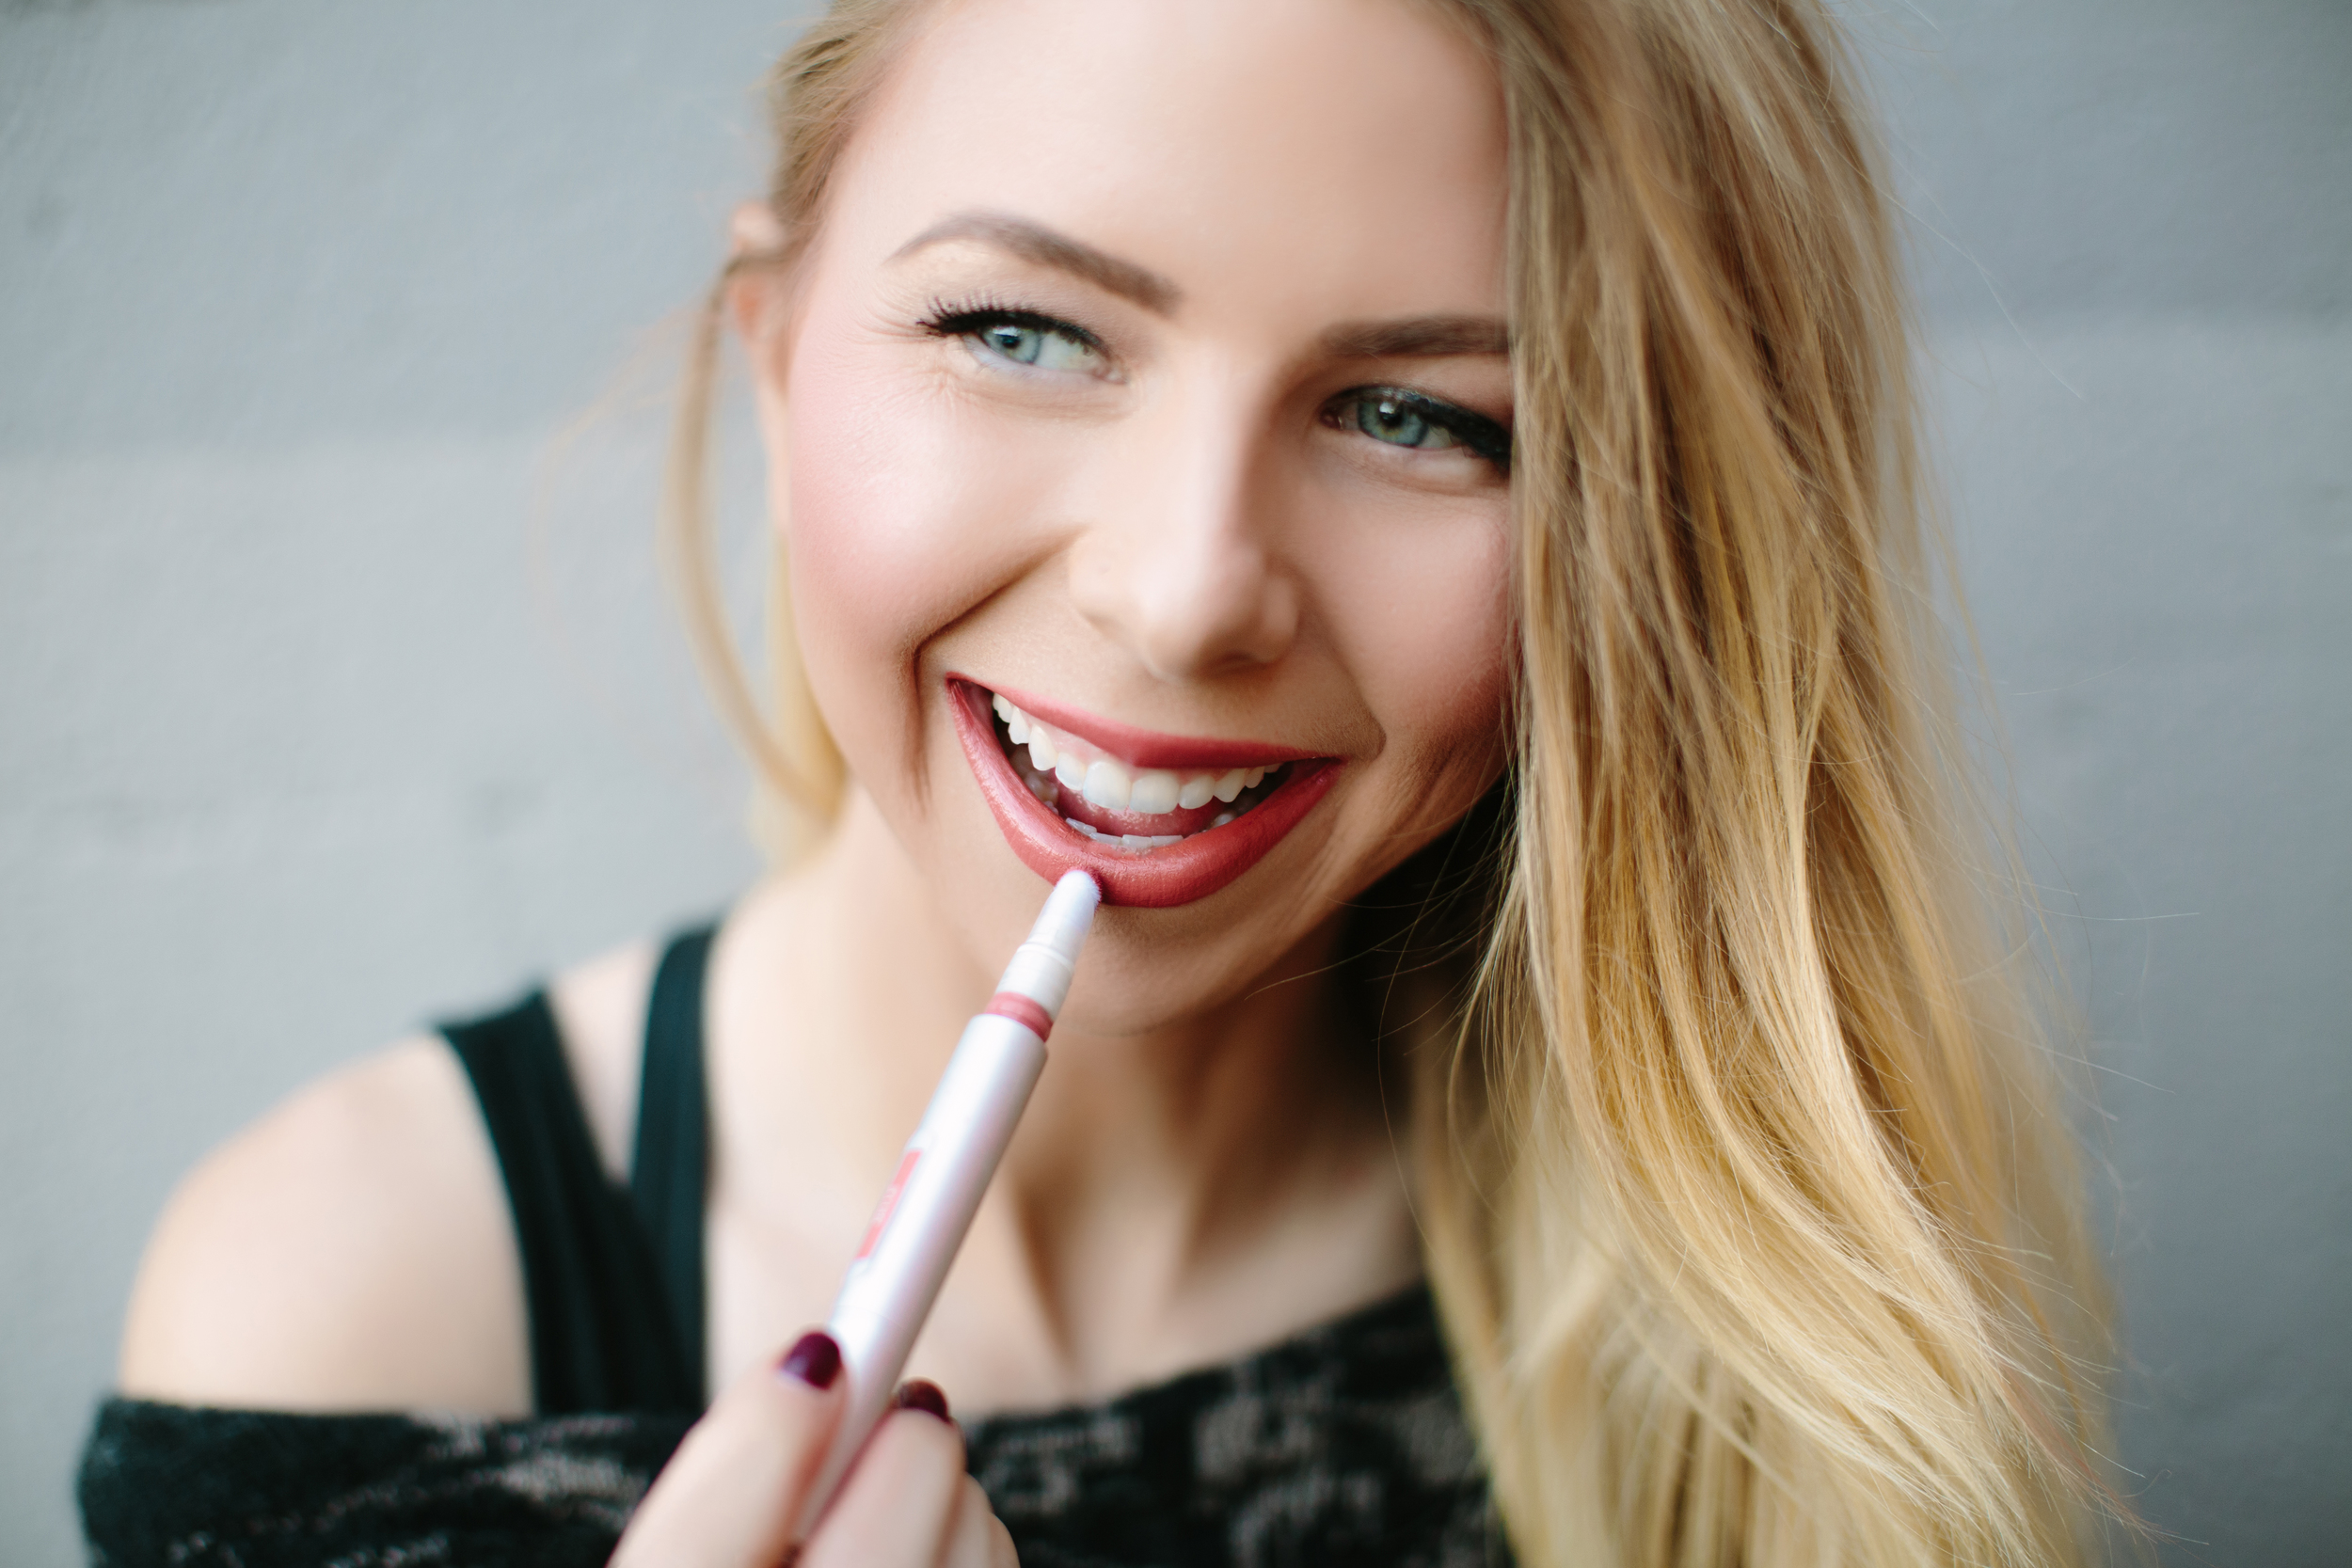
Here is what I'm currently using for a quick daytime look:
Revision Intellishade with Beauty Blender
Lorac PoreFection Concealer
Glo Minerals Pressed Base
Mac Blunt Powder Blush to contour (looking to upgrade this product)
BECCA Shimmering Skin Perfecter Pressed in Opal
So Susan Universal Blush
Anastasia Beverly Hills Dipbrow Pomade with Brush #12
Pur Minerals Eye Polish in Cashmere
Maybelline Ultra-Liner (always looking to try new waterproof eyeliner so let me know!)
Benefit They're Real! Mascara
Pur Lip Lure in Fiery


Remember to Trust the Process
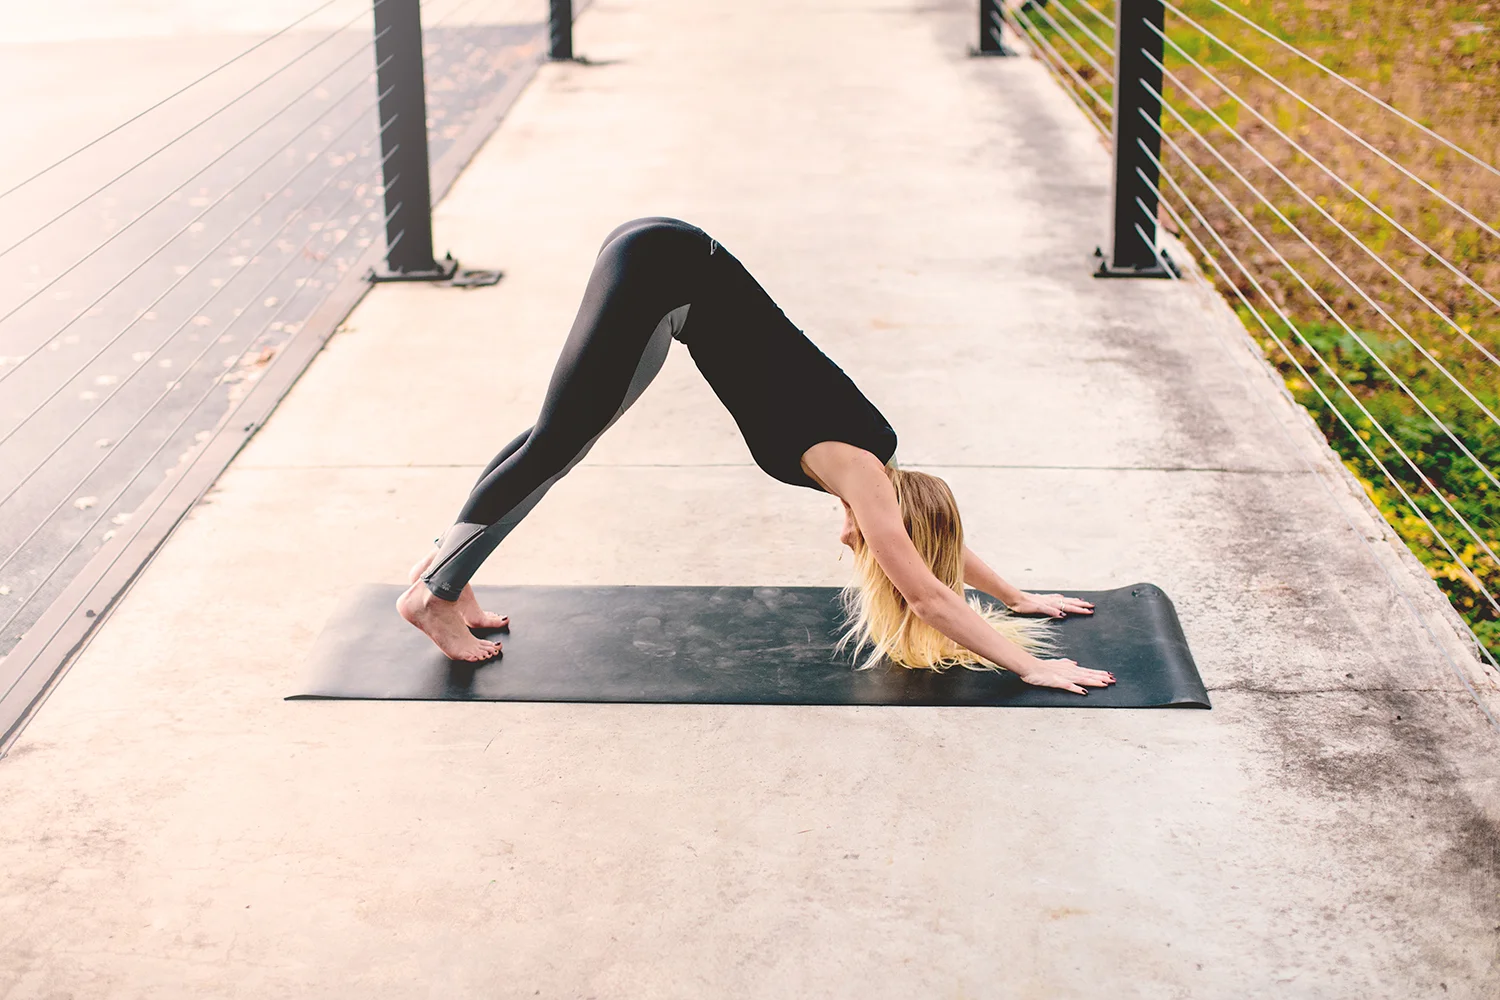
At one point in my life, before I was cycling competitively, I would go to yoga a few times a week - in fact, there was a point where I was going everyday. For whatever reason, I haven't been in months. I've barely been stretching and I've done at home yoga fewer times than I'd like to admit. I'm so tight, I've lost a lot of flexibility, and I can see how it has negatively affected my cycling.

So this week I took some time to myself and I got on the mat. I've remembered what I've been missing and now I have documentation of where I'm currently at. Maybe I can't stretch as far, hold poses or bend like I used to, but today is a new day to turn that around.


If you too have been neglecting a positive habit, remember that it's never too late to bring it back. Be good to your body, it's the only one you have.
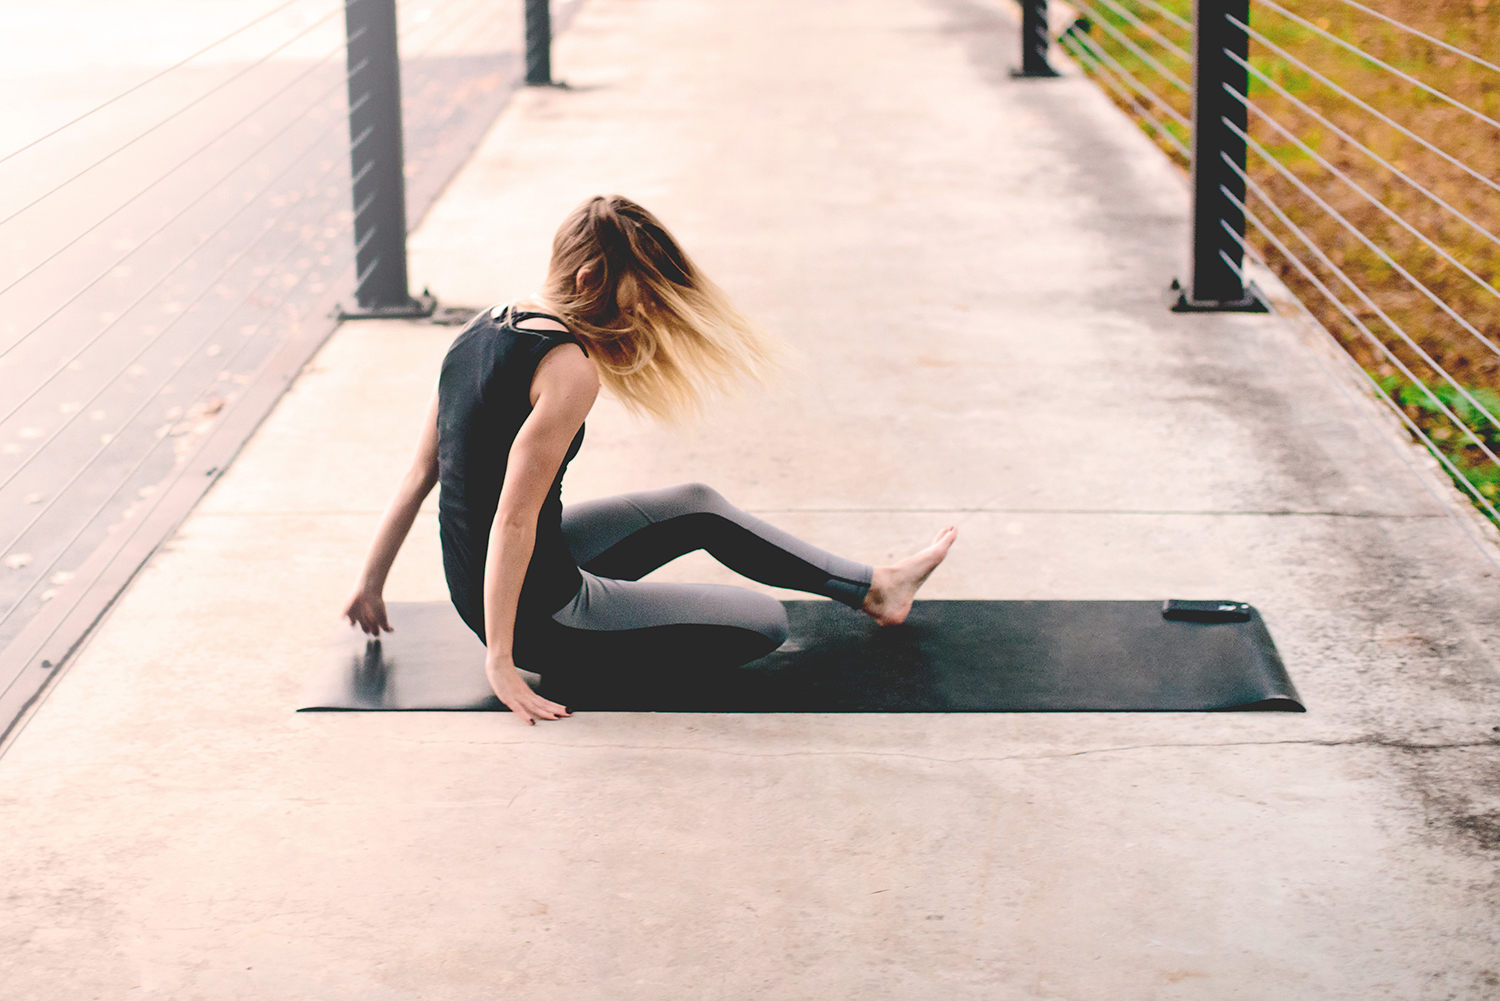
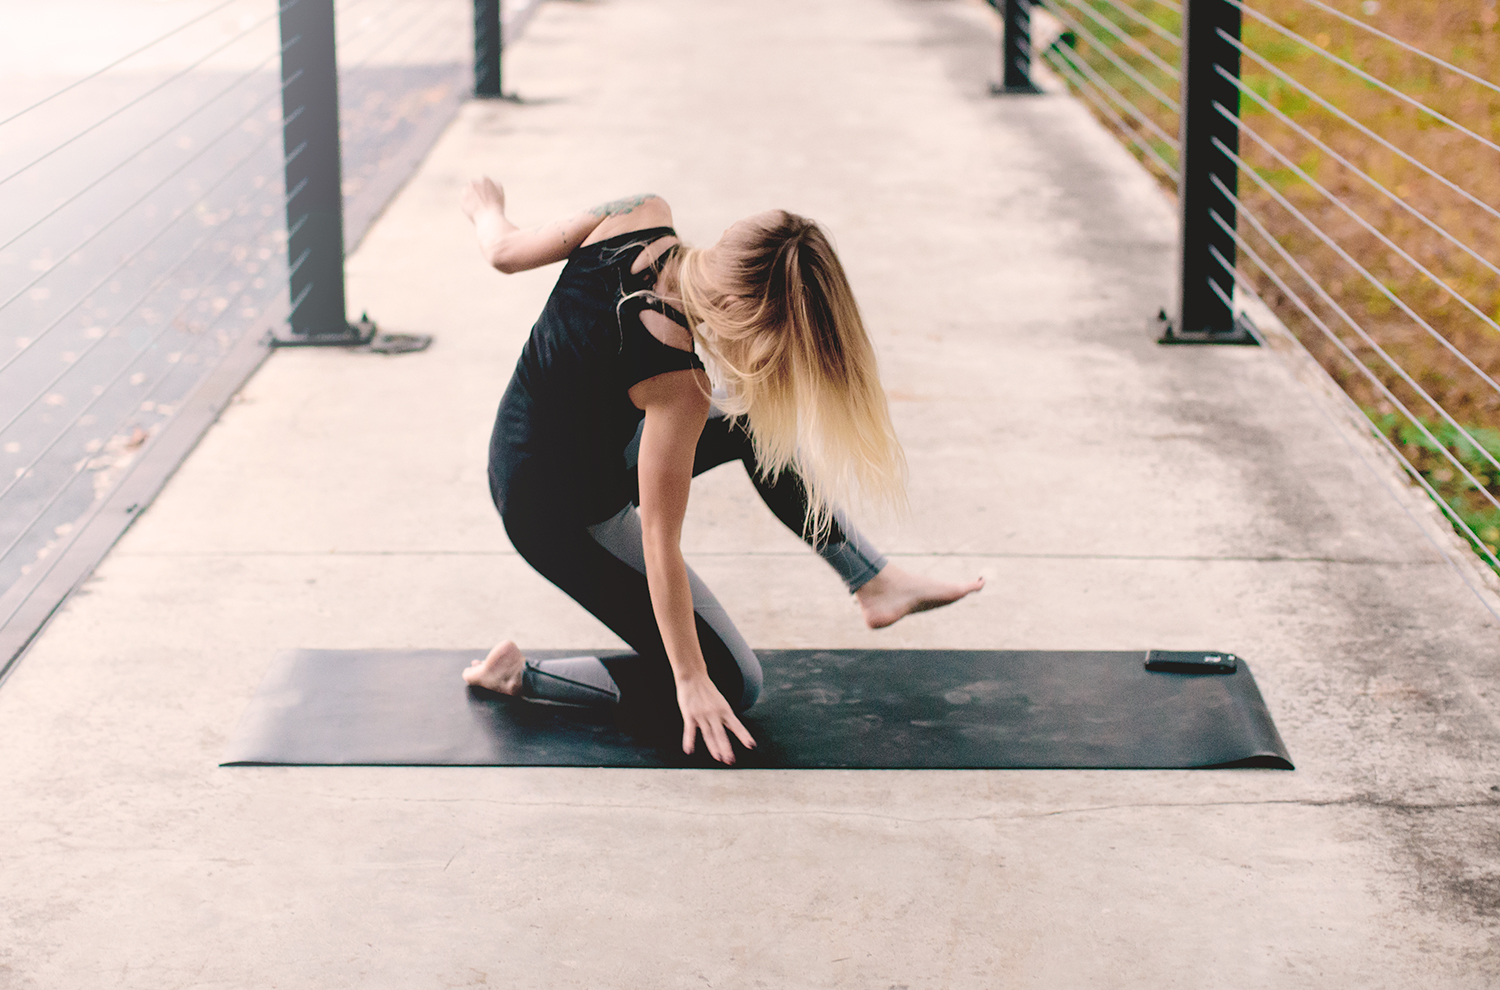
Oh, and don't be afraid to fail (or in my case - fall), figuring it out is the best part of the journey. Remember to trust the process. <3
Have a good weekend!
xoxo,
Mae

Weekend Playlist

Happy Friday! Seeing how it's the start to the weekend I thought I'd share some of my music with you! Below I've provided two playlists to suit two different moods. The first one, "Time to Unwind," is for a sleepy morning when you're taking your time to get up, or having a night in to yourself. (I highly suggest a scented candle too accompany you during this time). The second one, "Road Trip," is a little more upbeat and is the perfect driving music. I'll be using this play list during our travels to races this weekend. Enjoy!
Also, I hope this works in your web browsers. It's my first time trying out a playlist embedded into a blog. If you know of any other ideas to make this work better in the future, please let me know! :)
TIME TO UNWIND
ROAD TRIP

Low maintenance At-home gel Manicure
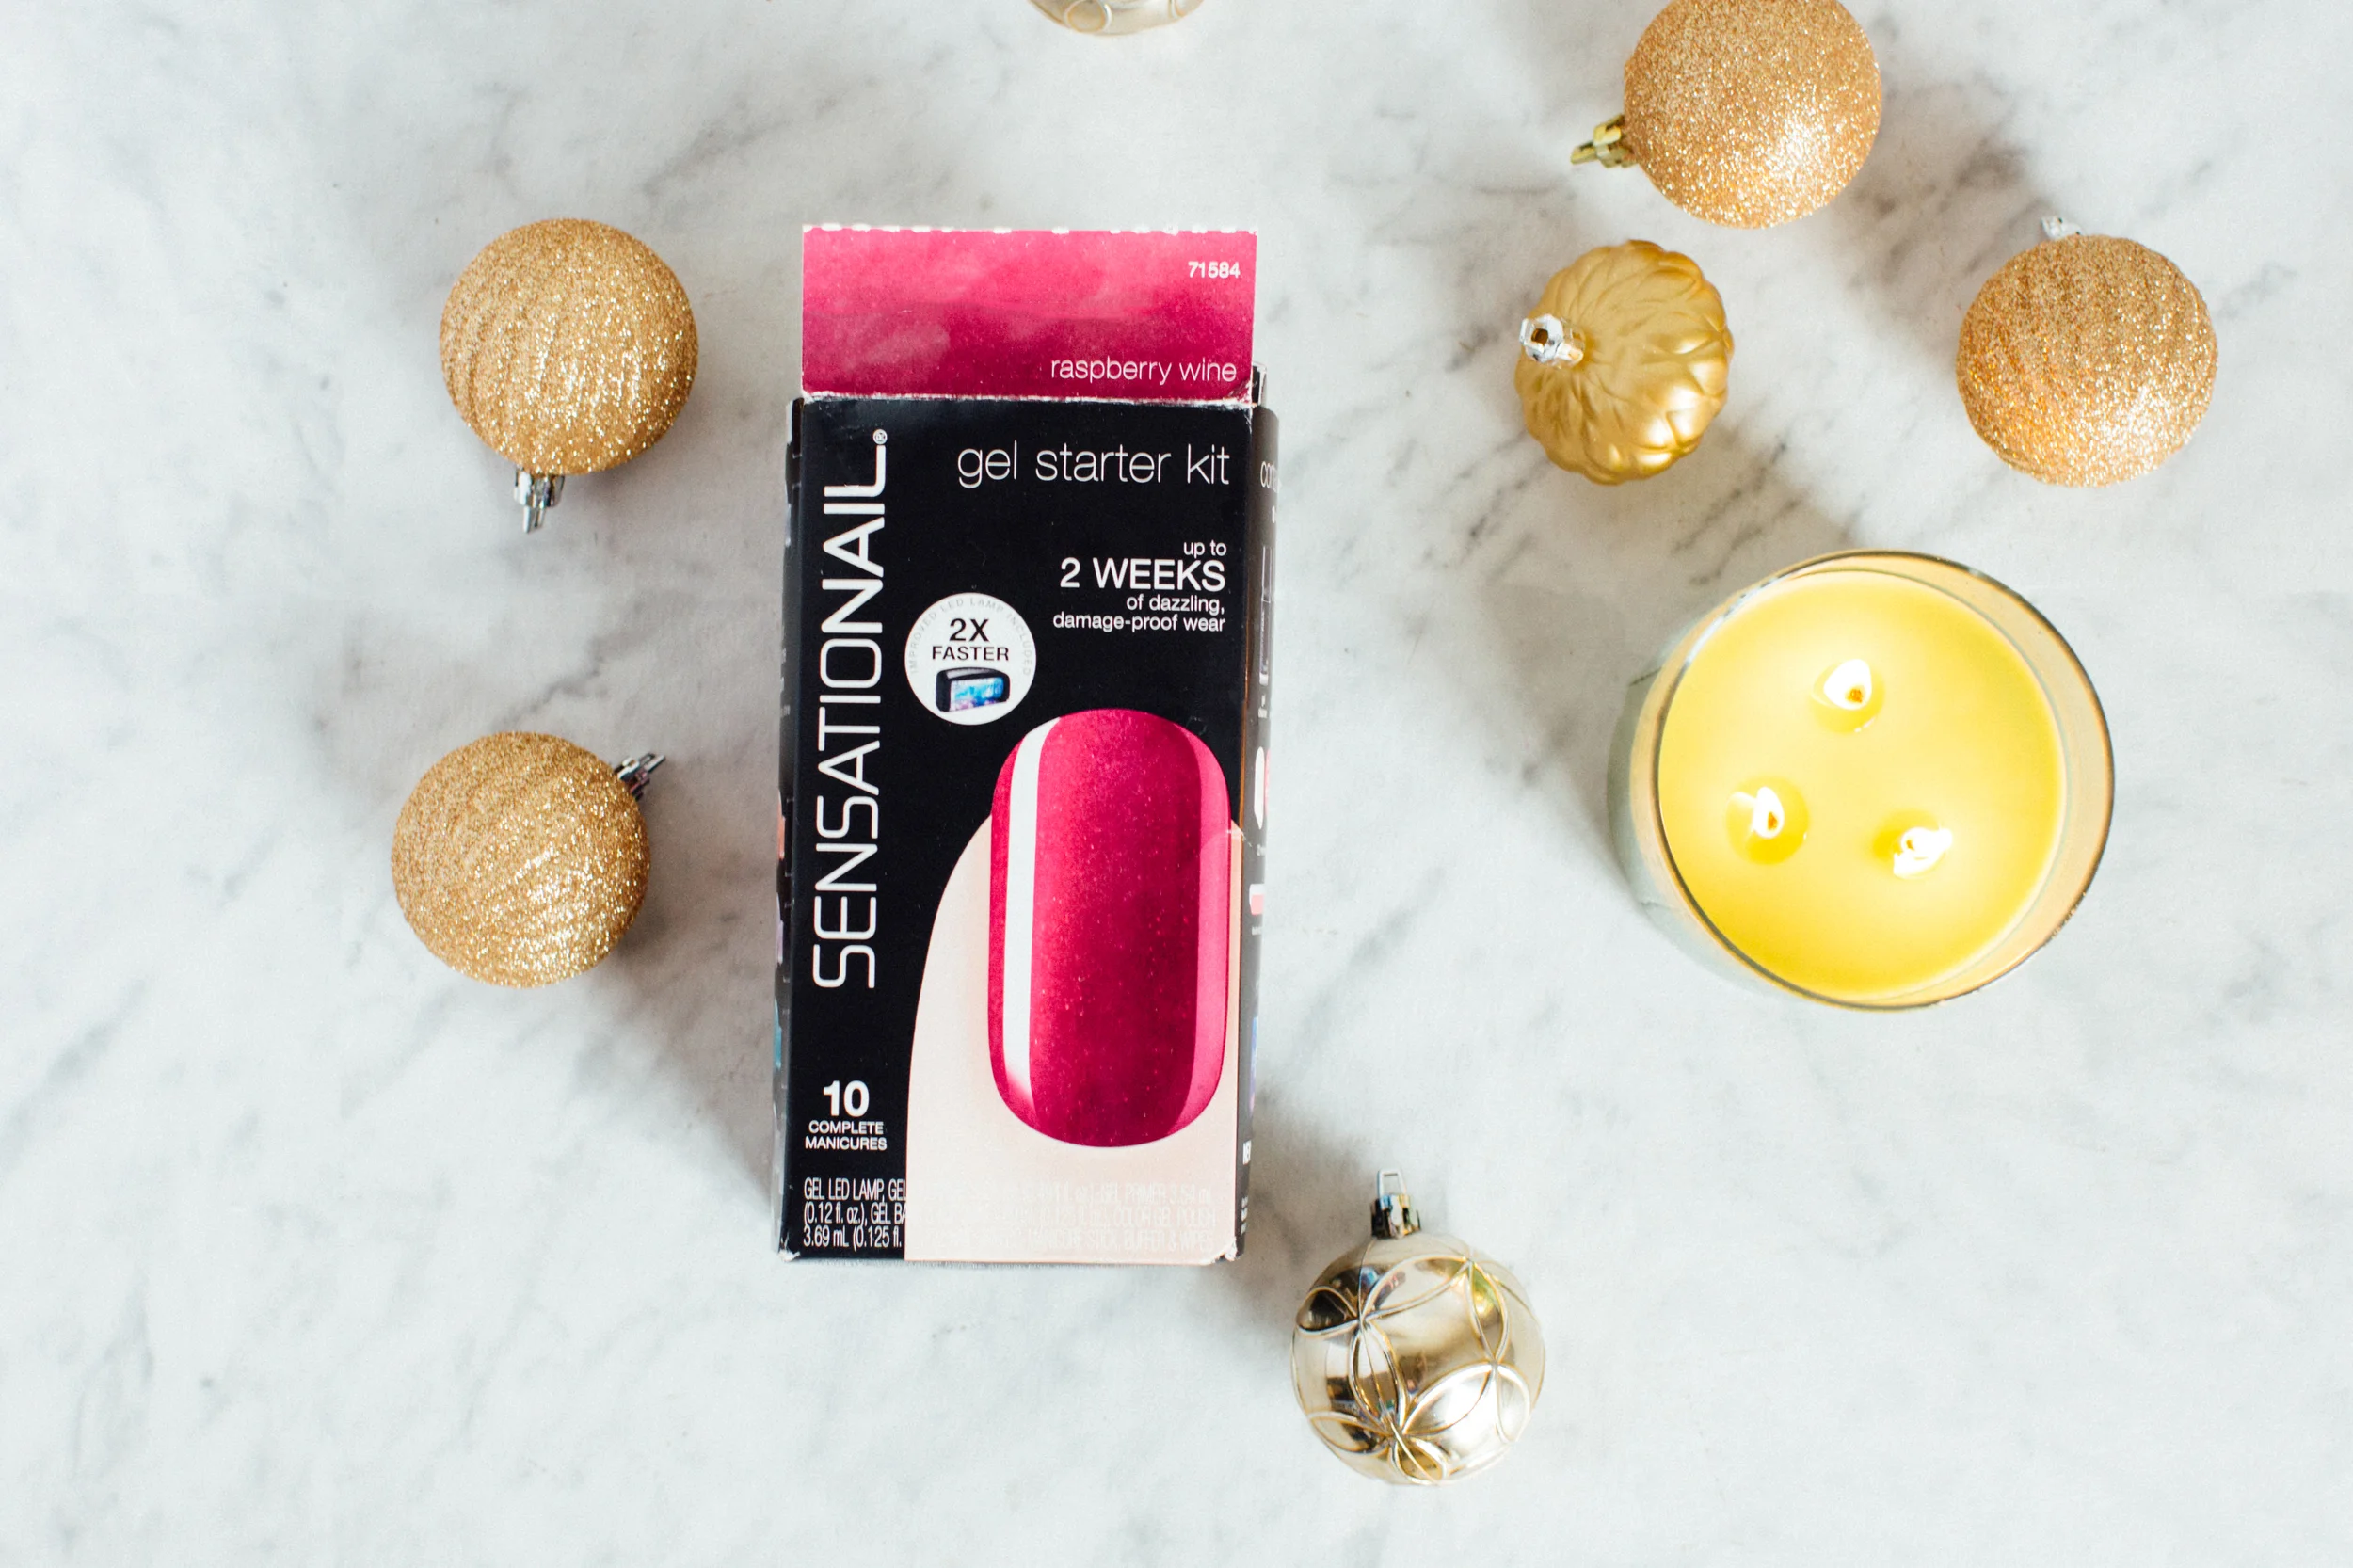
Let me start off by saying that I'm not really great at doing my nails, but I don't have much time to make it to the nail salon when they're open. Because of this, I usually end up painting my nails late at night which means they never dry enough to not smudge before bed. However, I have great news! I discovered Sally Hansen SensatioNAIL! The "Gel Starter Kit" comes with everything you need for your own at-home gel manicure. The only thing different here is that I purchased the color "Miss Behave" and used that instead of the "Raspberry Wine" color that came with the kit. I also want to note that these hold up SO well during cyclocross and my daily life. No chipping! Heck yes!
I purchased my kit from Amazon (link here) because it was cheaper than Target or Walmart, but shop around to make sure there hasn't been any price changes. The kit says you get 10 manicures from this kit and if that's so, I'll end up averaging $3.32 for each manicure. Um, yes please! That's way less expensive than going to the salon.
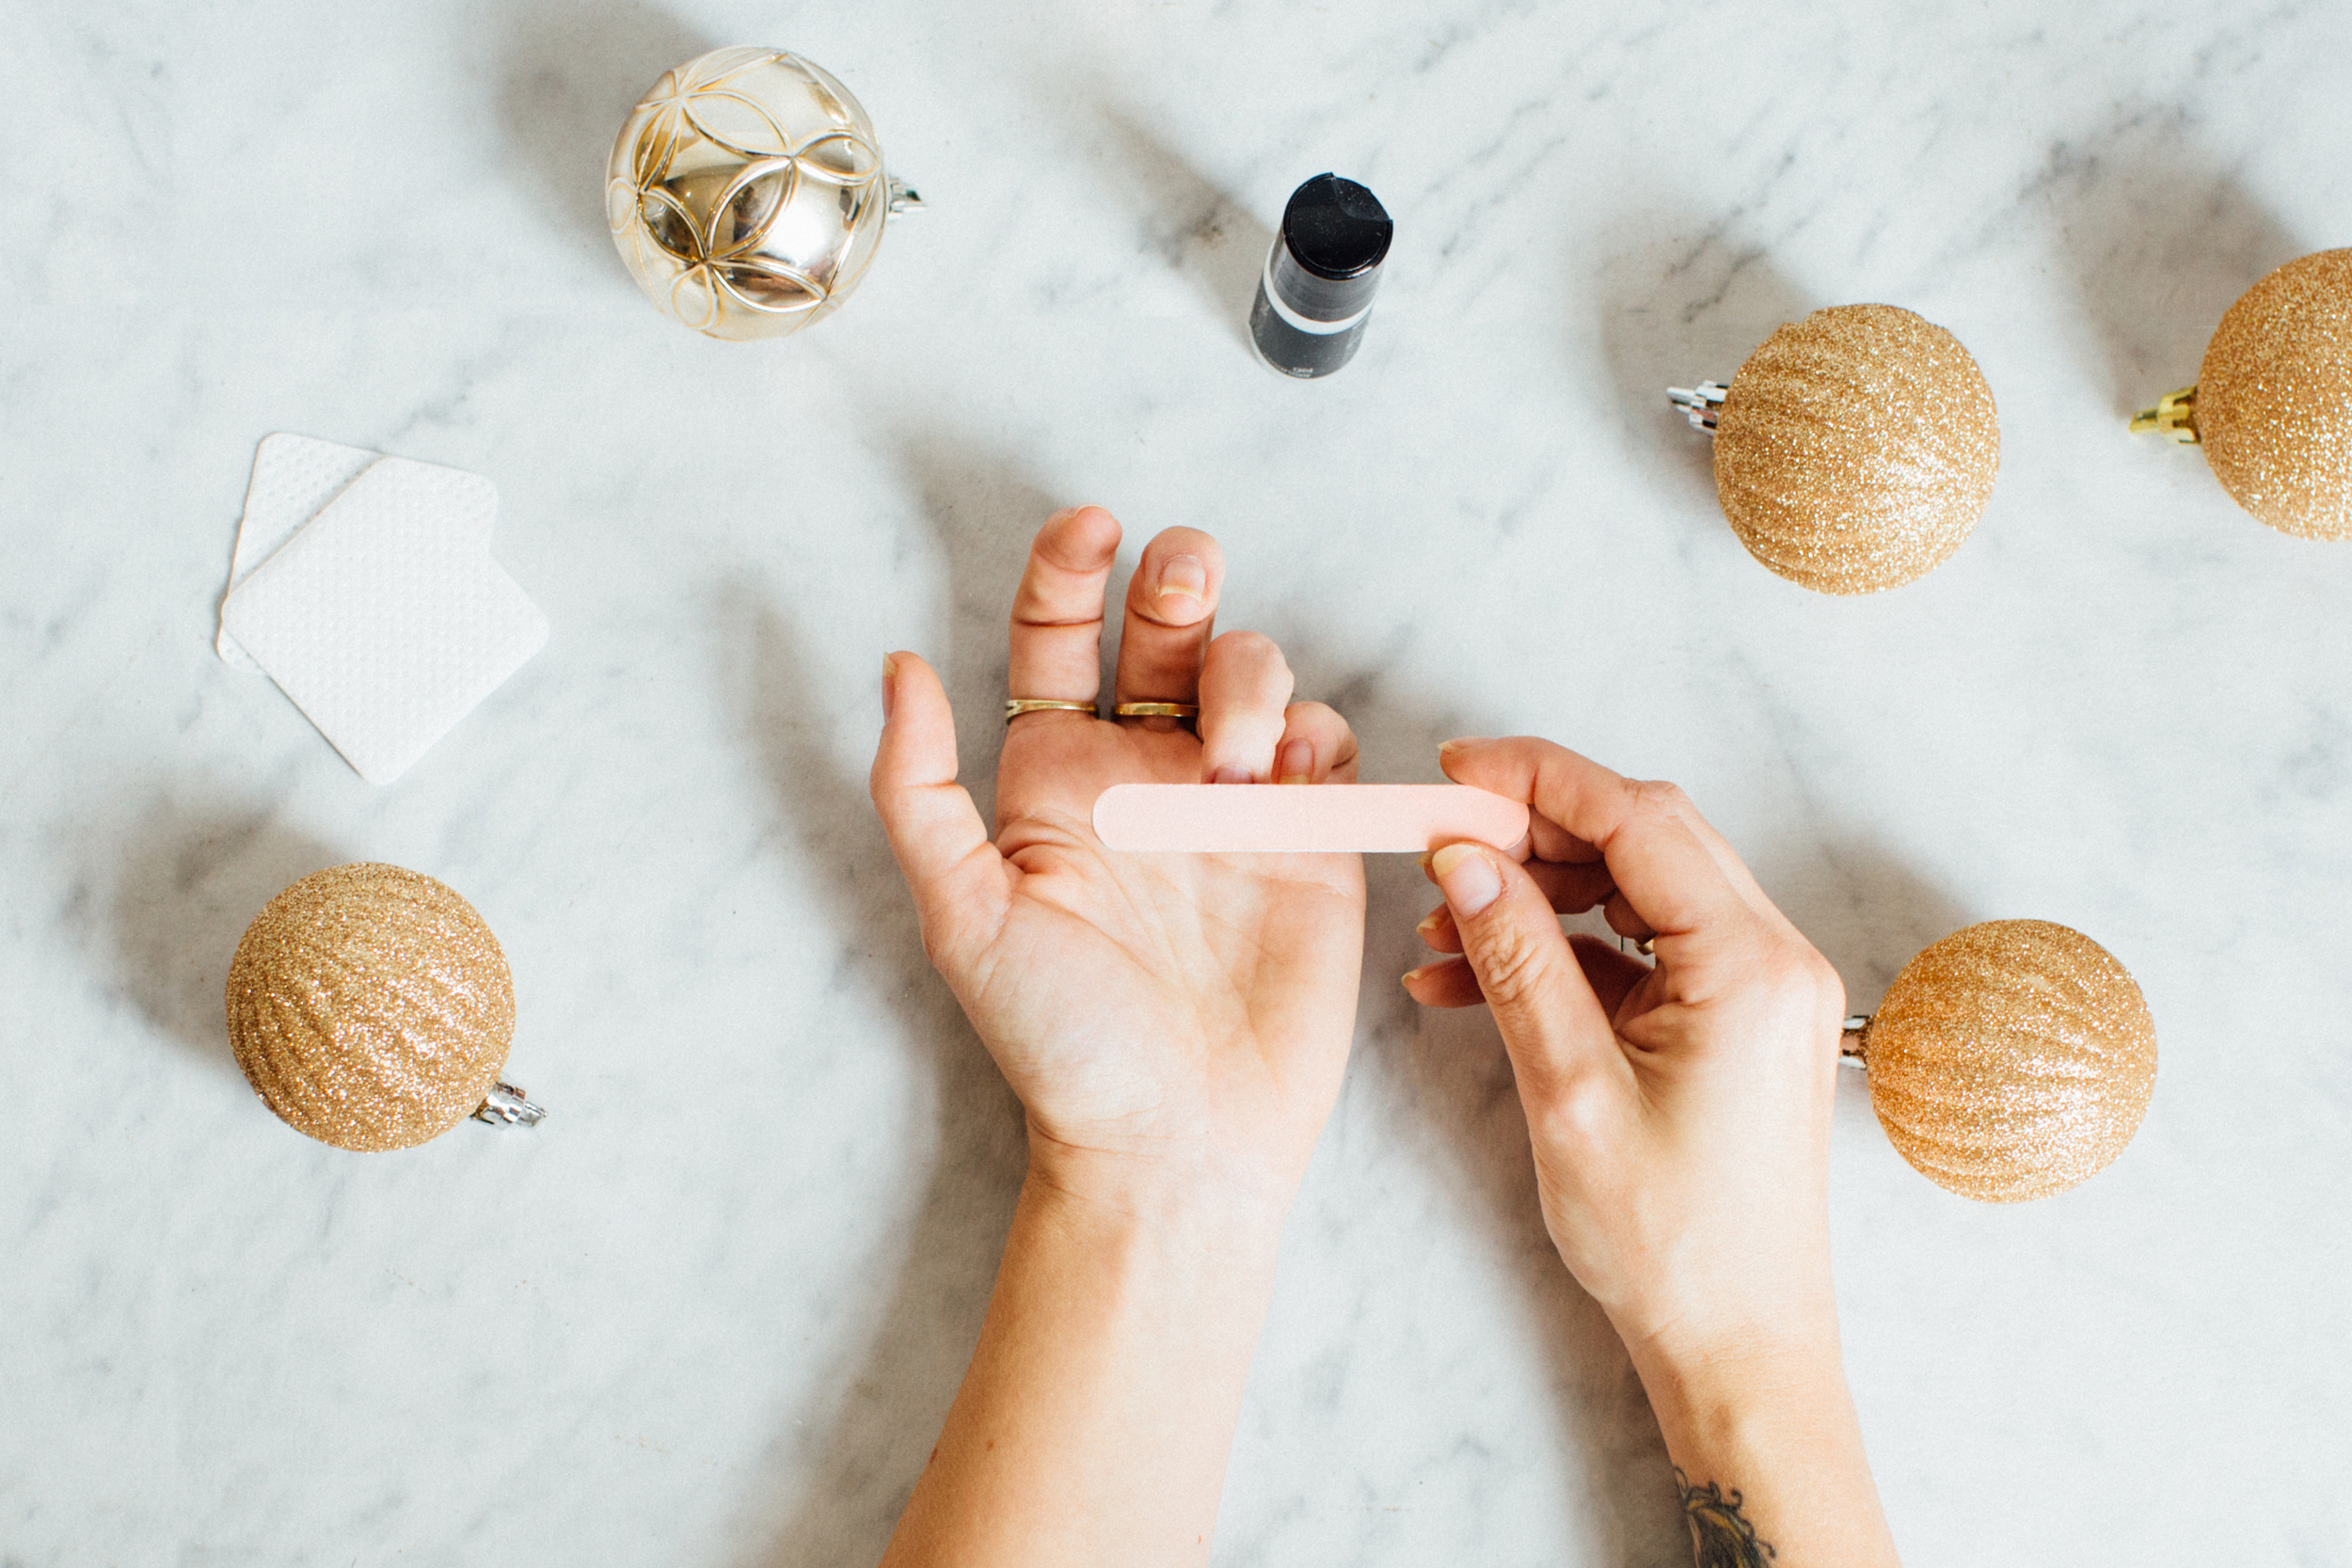
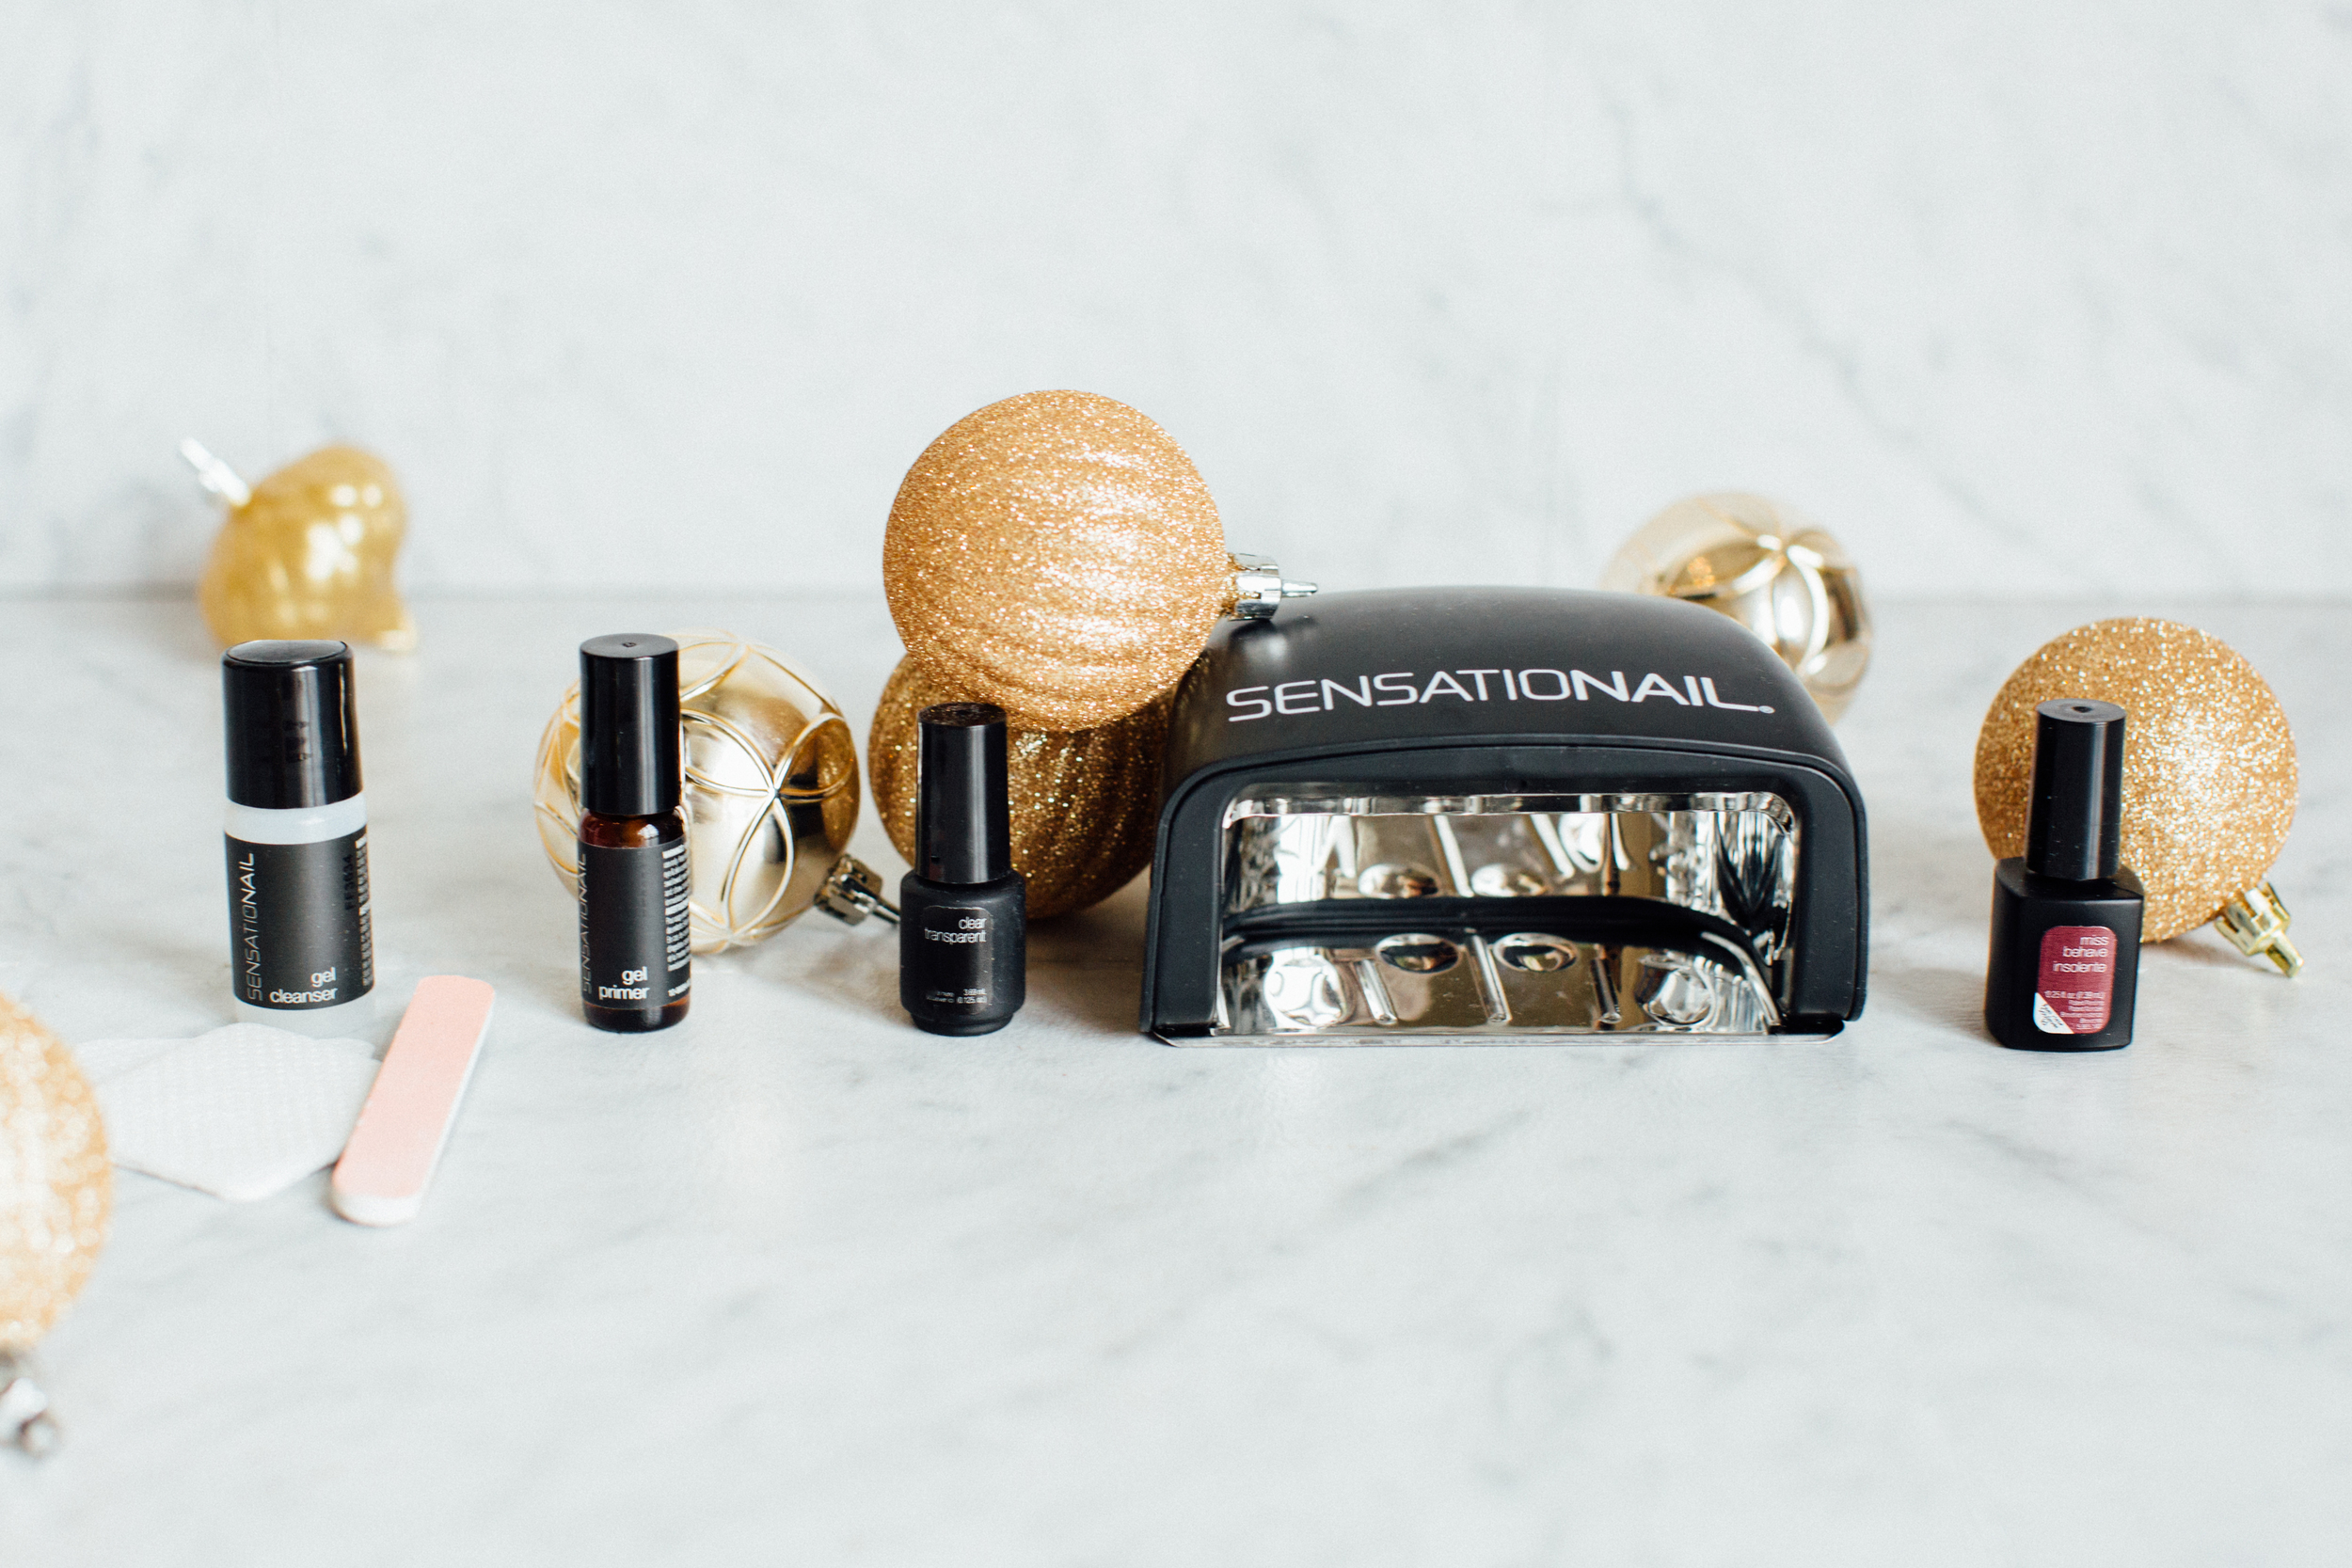
Step 1: Prepare your nails. File, buff, remove cuticles, etc

Step 2: Use the lint-free wipes and clean your nails with the "Gel Cleanser"

Step 3: Apply a layer of the "Gel Primer" to nails

Step 4: Apply a layer of the "Gel Base & Top Coat"

Step 5: Cure your base coat using the LED lamp for 15 seconds. The lamp will blink with 15 seconds is up. I usually have to do my thumb by itself because it doesn't fit in the lamp with my other four fingers

Step 6: Now it's time to apply your "Color Gel Polish"
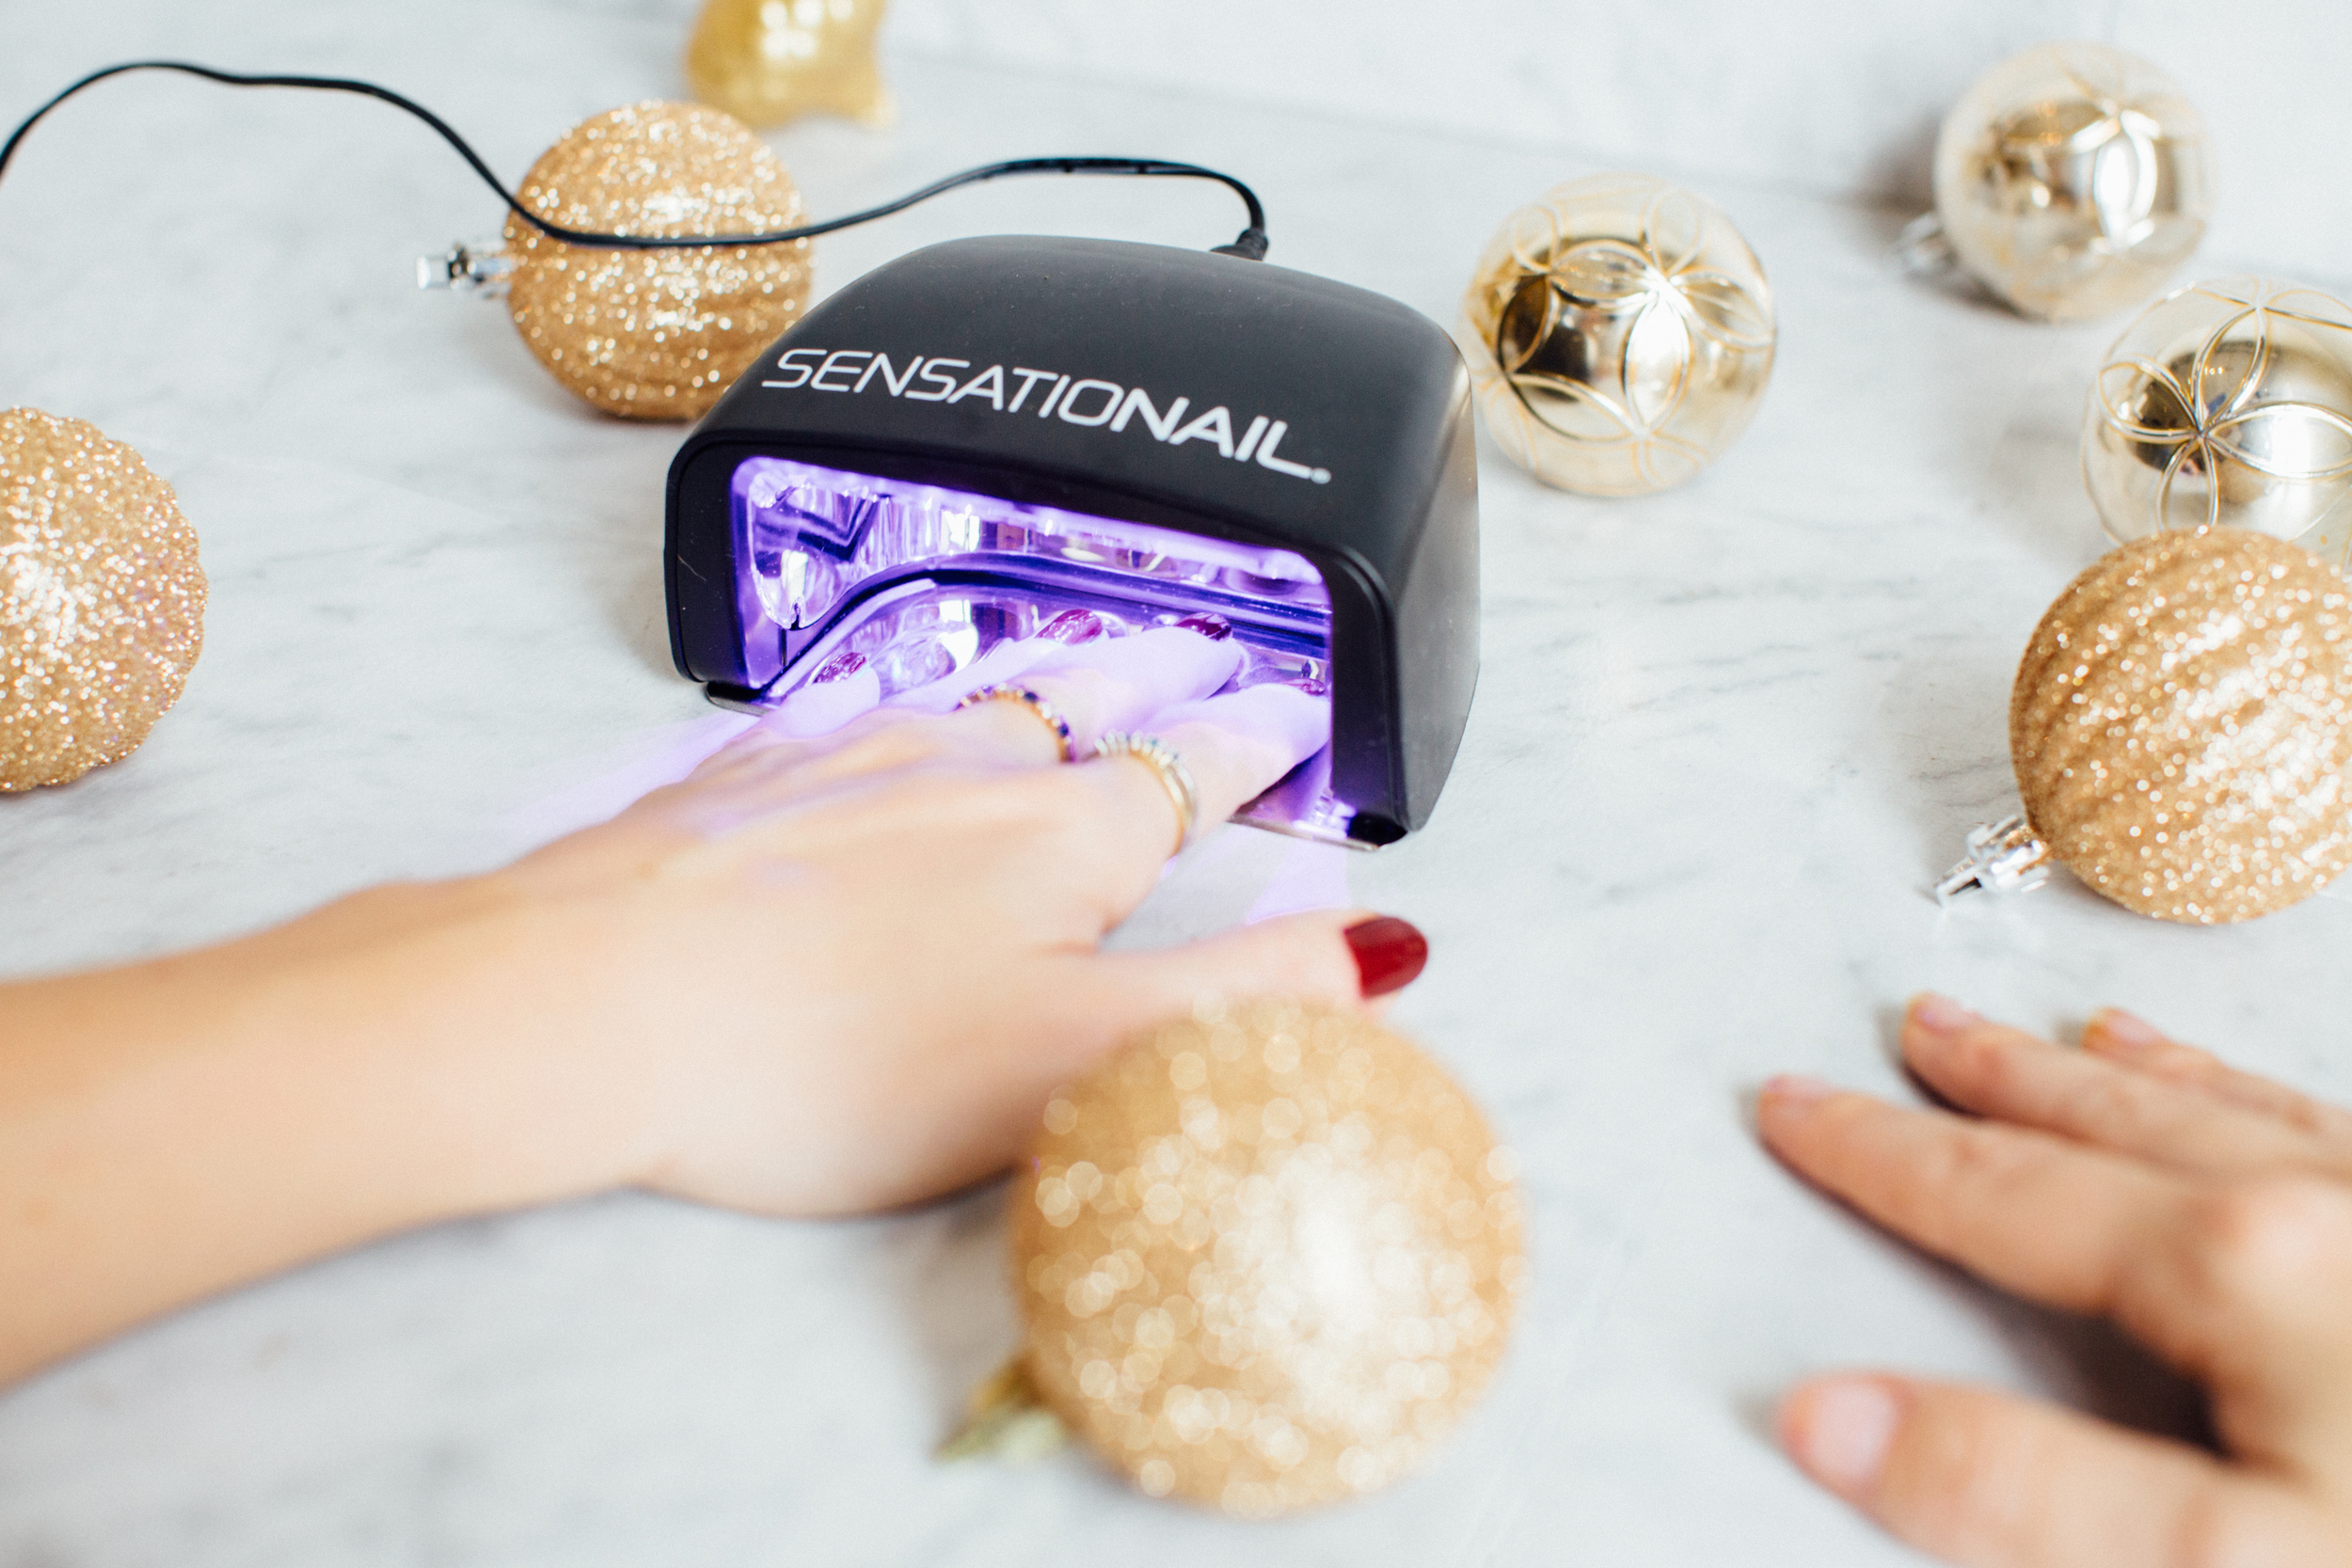
Step 7: Cure your "Color Gel Polish"
Step 8: Paint a second coat of the "Color Gel Polish" and then cure for another 30 seconds.
Step 9: Apply a layer of the "Gel Base & Top Coat" and cure for 15 seconds.

Step 10: Your nails will be a bit sticky at this point, so don't touch them yet. Use the "Gel Cleanser" and the lint-free wipe across all of your painted nails. This part seemed odd to me, but trust me, you're nails won't budge. They are totally hardened at this point!
Step 11: Unless you can do every step to all 10 nails at the same time, it's time to repeat all of the steps on your other hand.
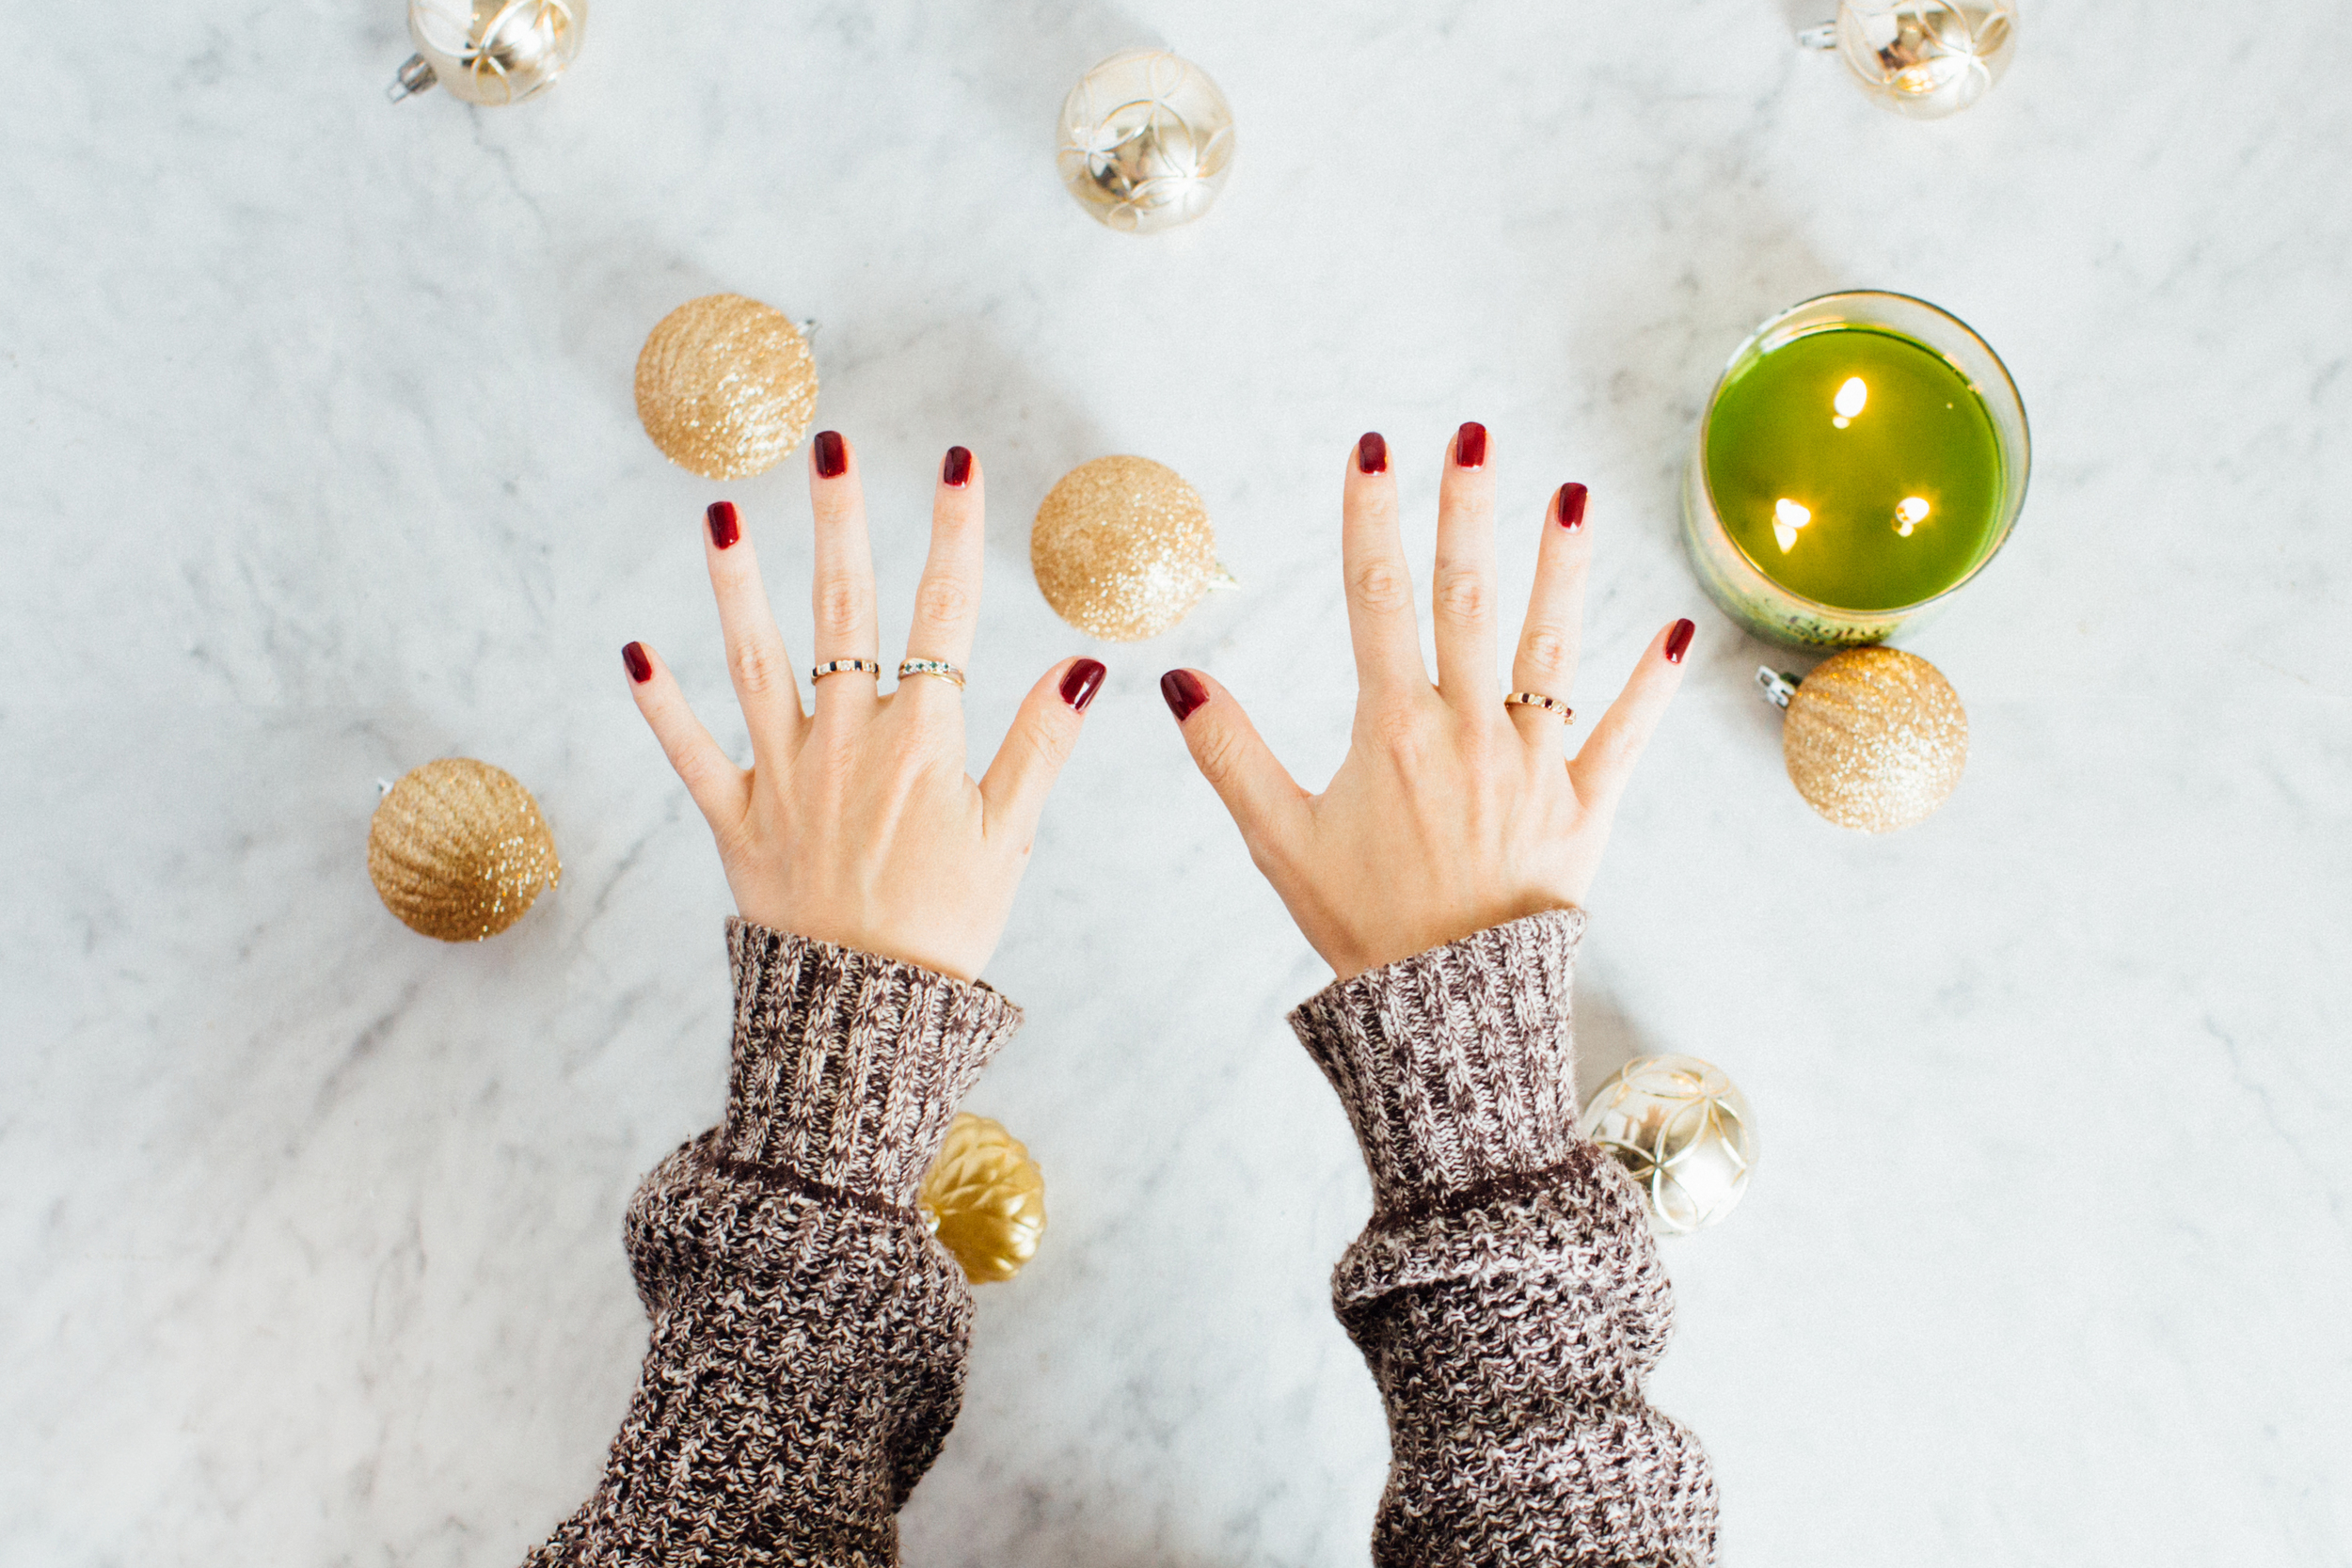
Now you're done! Perfectly dry and chip-free nails! You may proceed with your day without risking a mess up!
Tip for removing the polish. If you've ever had a gel manicure before you know how hard it is to remove the polish. Pure acetone alone will NOT work so I have three suggestions for removal. Method 1: Soak your nails in a bowl of pure acetone and buff the polish off with a file and manicure stick. The longer you can soak, the easier it will be to remove the polish. Method 2: Rip up a few paper towels and apply an acetone-soaked piece to each nail. Wrap each nail/soaked paper towel combo with foil. Let soak for a while or have a friend use a blow dryer on low to apply heat and speed up the process. Proceed to buff the polish off with a file. Method 3: Stop by your local cheap and quick nail salon and pay the $5 or so and have them remove the polish for you.
If you've used this kit or are planning on trying it out, let me know!

What's in My Cycling Bag?
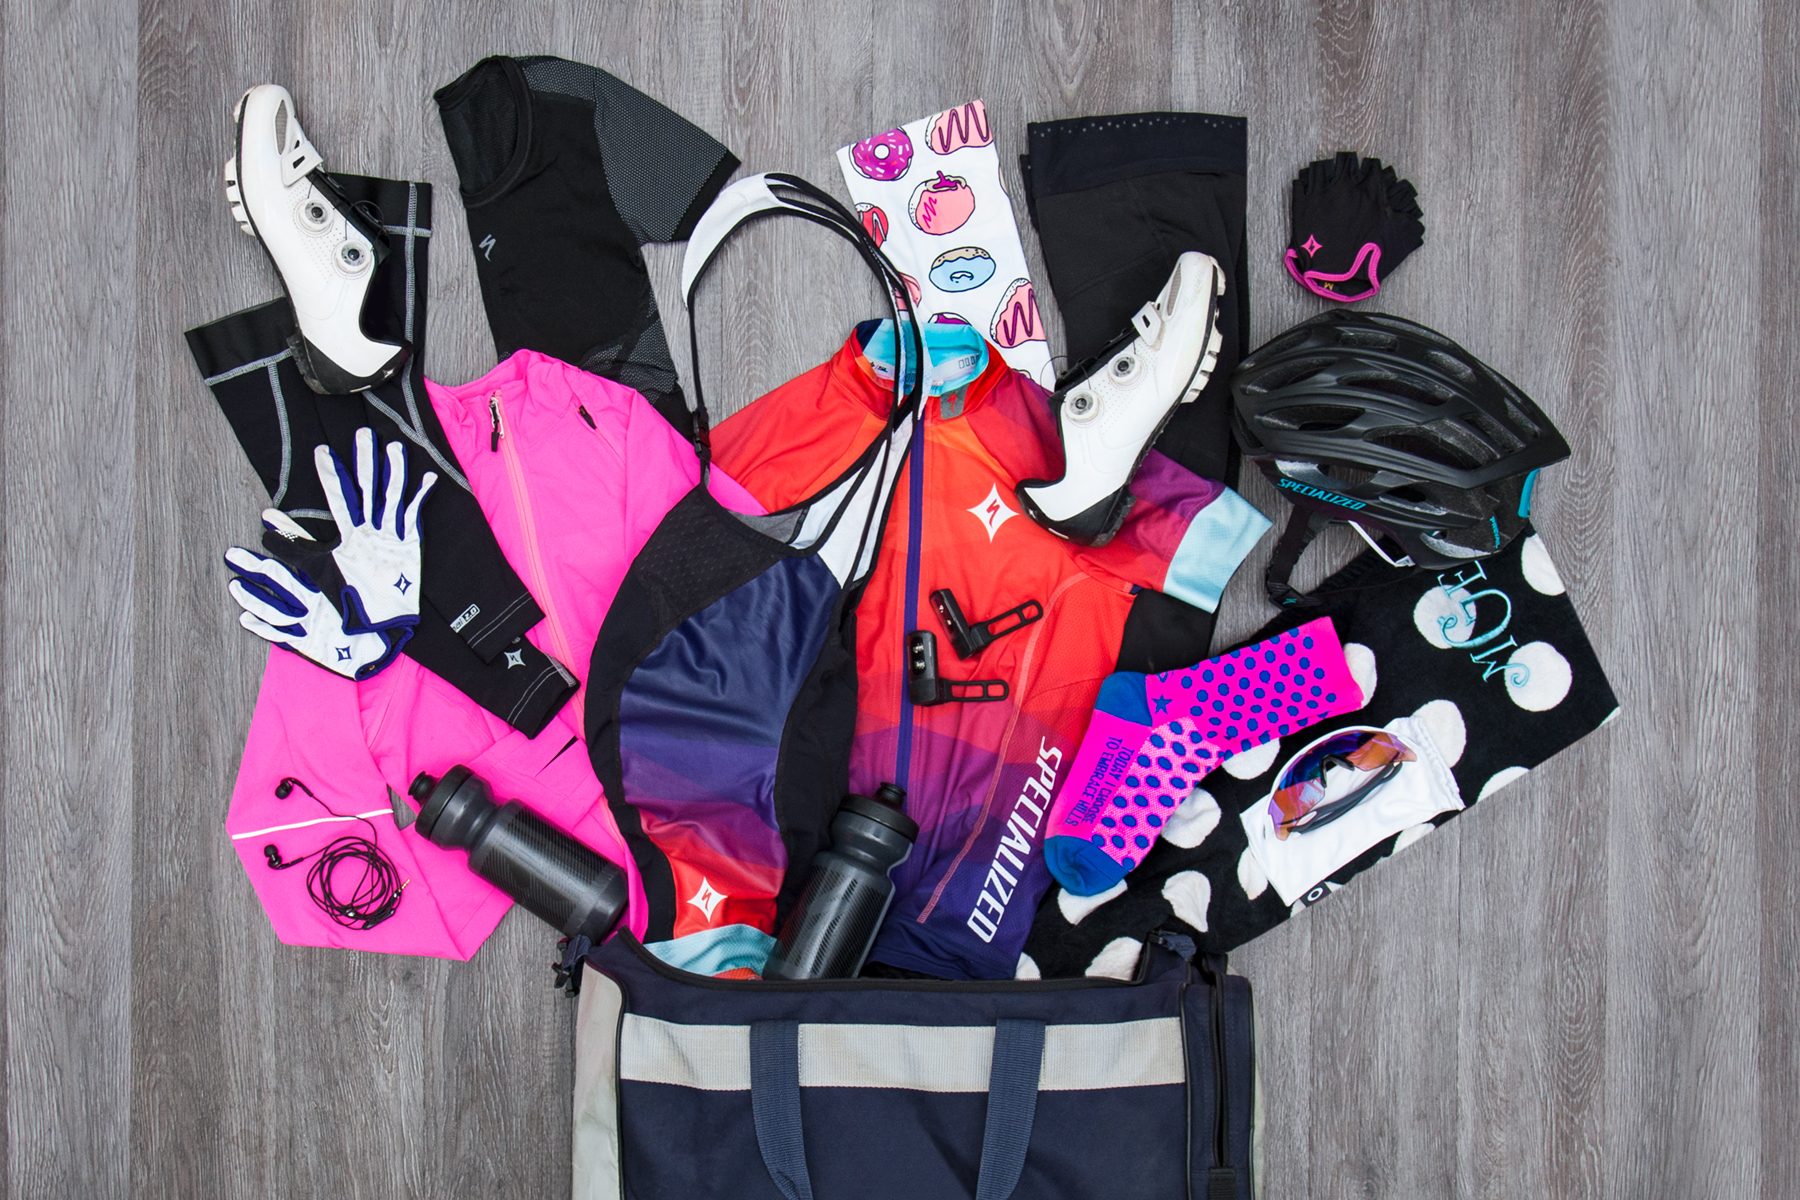
What's in my cycling bag depends on the weather, am I racing or training, am I traveling or staying local, cyclocross or road, etc. So here is my bag for a CX training ride. I can't get enough of Specialized which is why they make up 99% of my key items. I believe all of these items can be found on their site, except the pink jacket that turns into a vest (coming soon though, I believe). But let's take a moment to admire the gorgeous replica Boels/Dolmans kit. It's my favorite, and I always feel so pretty when I wear it. Their are only five items that aren't Specialized : my donut neck buff, headphones (I promise I'm being safe if I even wear them at all), Larga socks, monogrammed polka dot velcro changing towel (this never leaves my bag except to wash), and Oakley sunglasses.

Here is a closer look at some of the smaller items. Starting from the top left and going down : Baby wipes, Skratch hydration, heart rate monitor, donut buff, headache medicine, dry shampoo (to freshen up my sweaty hair after a ride), Rip Van Wafels (so yummy), deodorant, tube/air, Oakley sunglasses, Garmin 510, Clif Bar, Revision Intellishade with SPF (key item!), chapstick, Stix front/rear lights, socks, chamois cream, multi tool, tire levers, and glasses cleaner! A few needed items that aren't pictured are my bike (obviously), sports bra, tire pump, recovery drink, and my much needed first aid kit, hah! I hope I'm not forgetting anything, story of my life! :)
Read my official post on the Specialized Blog on Tuesday morning, here!
What are some of your key items that you pack for a ride? Anything that is an absolute must that most people don't use?
Fueling Your Body Before a Workout

A morning workout or race day calls for fueling my body with more than my normal bagel and cc. When I first started racing, I'd eat whatever I wanted for breakfast and would pay for it during the race. I'd cramp and feel awful, so I learned my lesson and figured out what worked best for me. This includes a healthy serving of espresso and a big bowl of oatmeal.

Quick Oatmeal with fruit, makes one serving.
1/2 cup quick 1-minute oats
1 cup unsweetened vanilla almond milk
1 tablespoon agave (more or less depending on your taste)
1/2 teaspoon cinnamon (again, more or less according to your taste)
1 teaspoon chia seeds
1/2 kiwi
1 cup berries
Combine oats and milk and heat either in the microwave or on your stovetop for 1 minute. Stir in agave, cinnamon and chia seeds. Top with fruit! Super easy.


I'm not a fancy cook and I'm definitely no barista. For my espresso, I just use whatever my local grocery store has, sorry to all of you coffee snobs out there who are cringing at me. Insert your favorite bean here. :)

And that's it! A quick bowl of oatmeal and as much caffeine as I can handle. What breakfast combo works for your workout?
p.s. I have to share with you what my shirt is about. It's from This Team Saves Lives, a women's cycling team that provides life-staving therapeutic food to aid children suffering from malnutrition. For every bar you purchase from This Bar Saves Lives, their sponsor, they send a packet of life-saving food to a child in need, This year, for each top 10 placement achieved by a rider on the This Team Saves Lives team, they donate enough food aid to help save one child's life. Seriously, this is amazing and is my favorite CX team of 2015. I'm in no way associated with their team, I just think they are rad so I had to share. You can buy this "Supporter" crew that I'm wearing here.

25 Days of Blogmas!
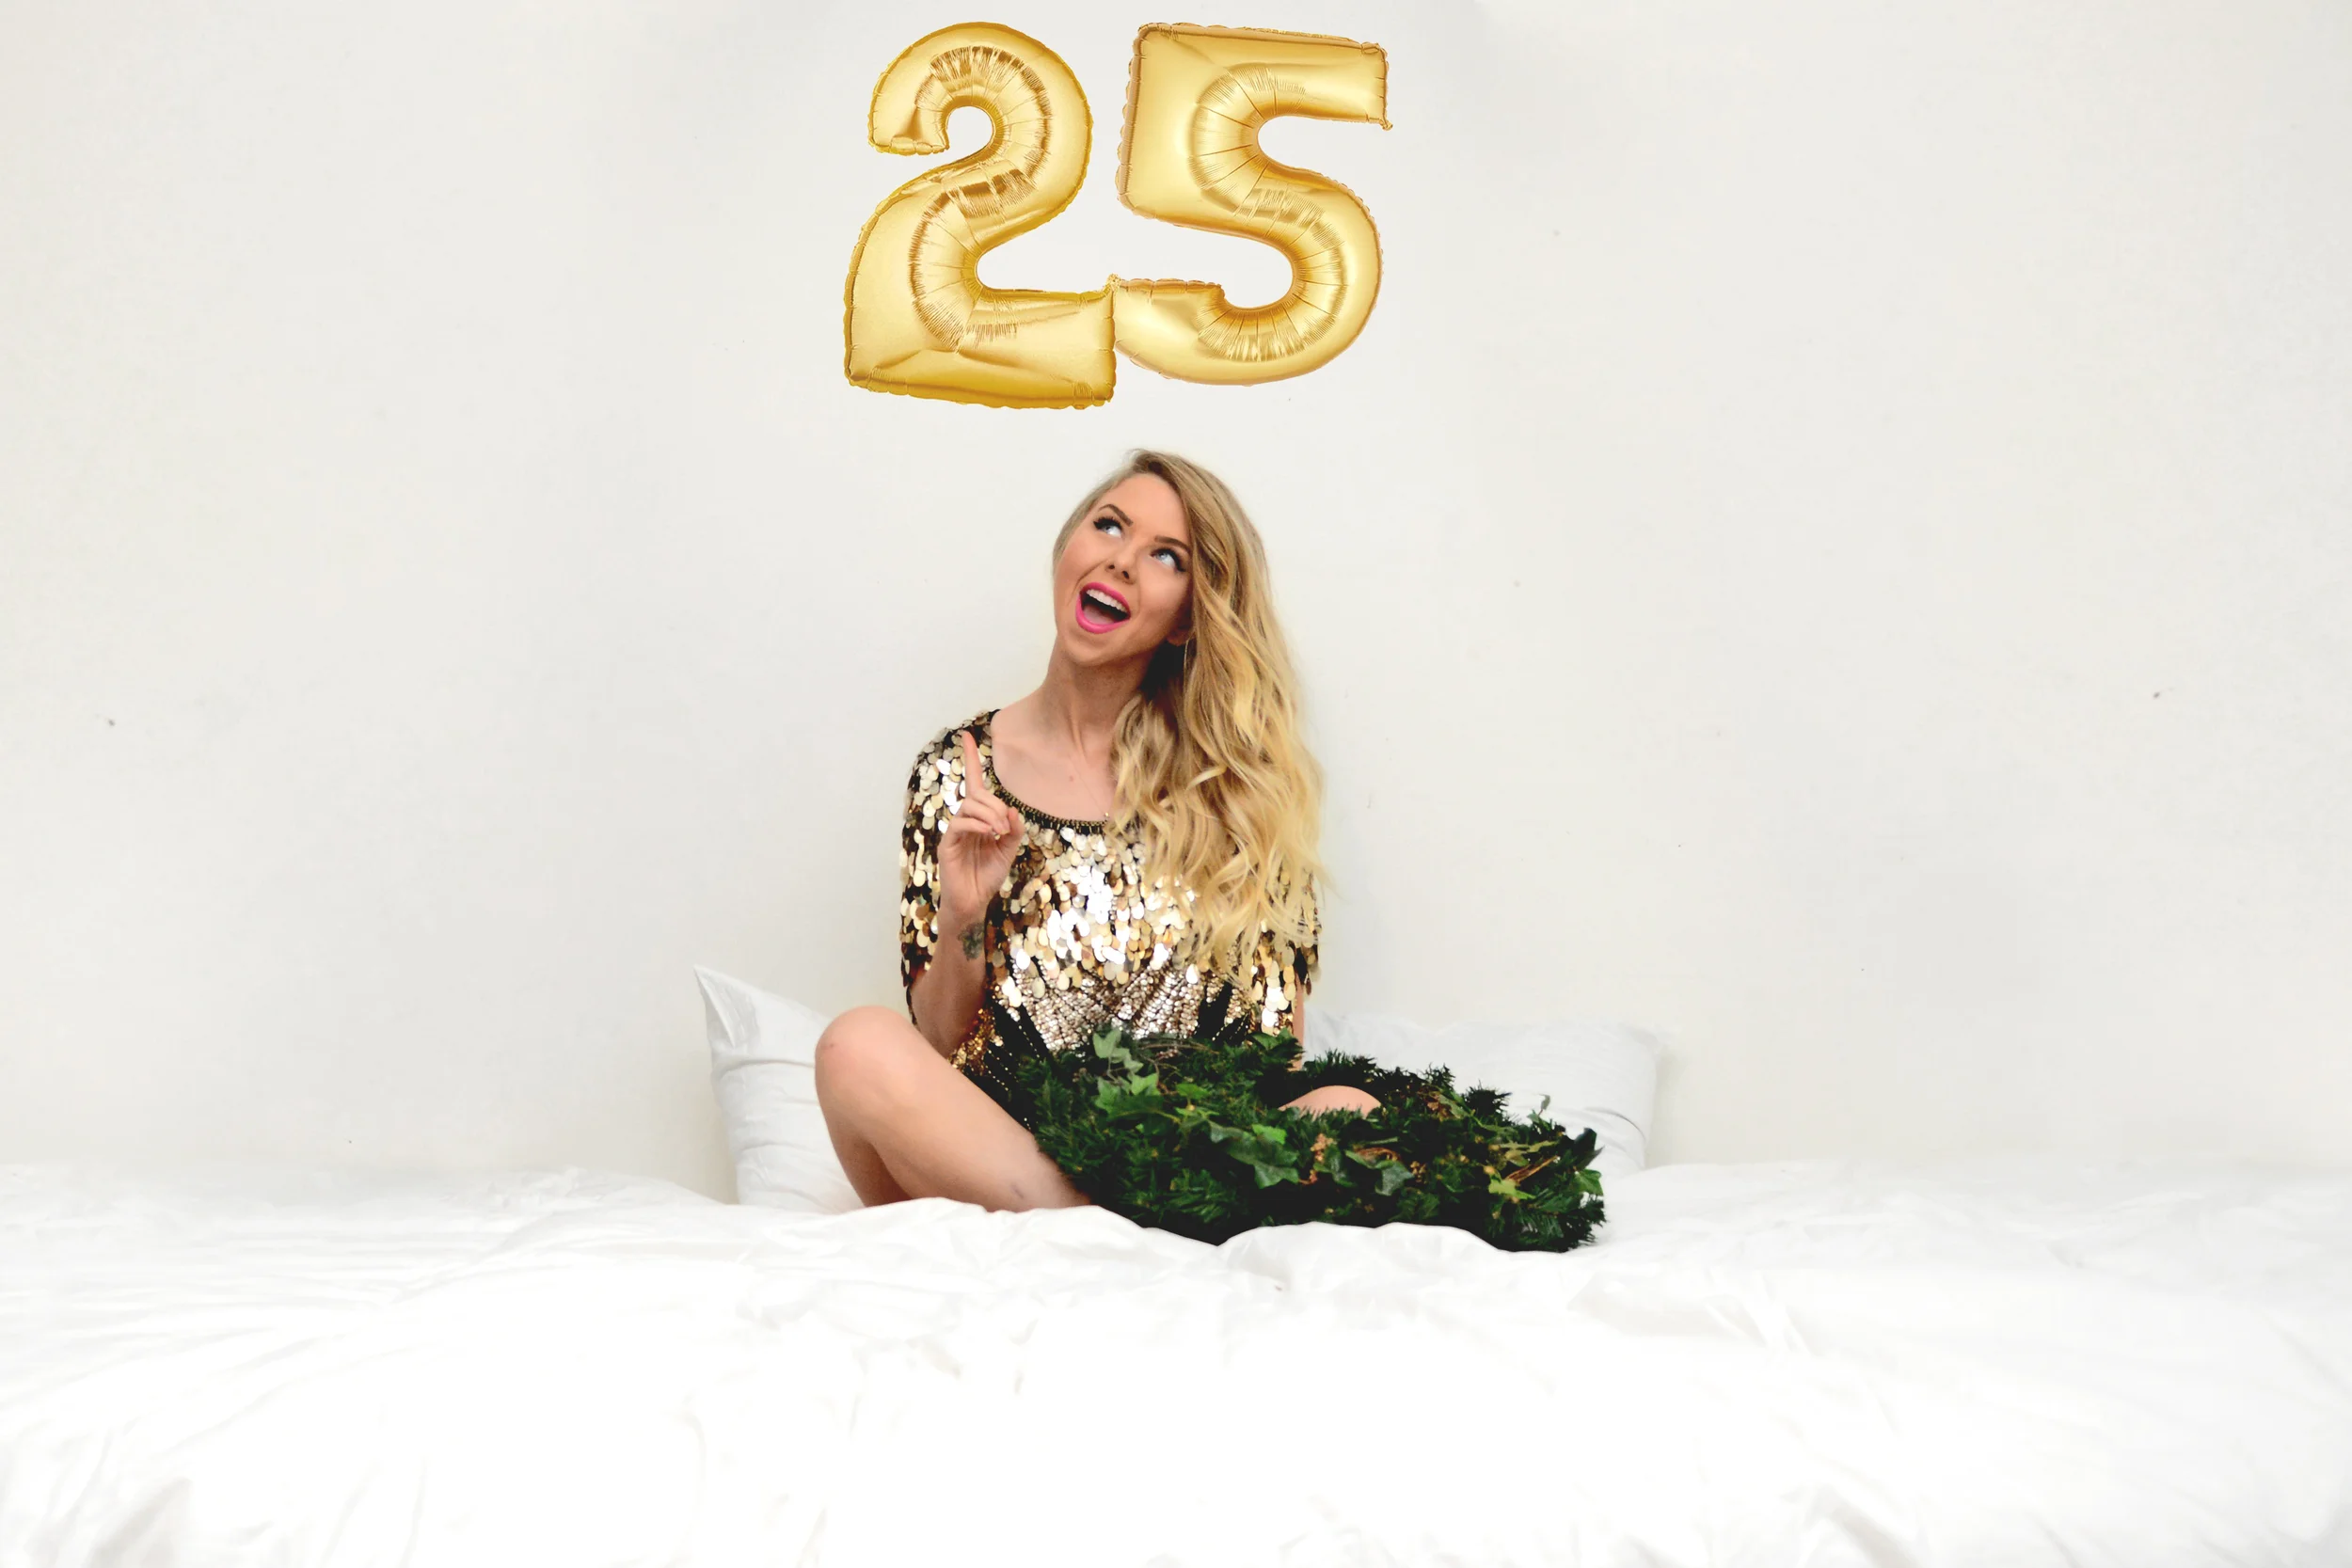
I'm so excited that I will be doing 25 Days of Blogmas for the first time this year. Each day you'll be able to check back and see a new post on the blog. Topics will range from cycling, general fitness, food, beauty, and more!

