
Vegan Oreo Fruit Tarts

This easy vegan fruit tart recipe is perfect for summer. As you guys know, my husband is vegan but I’m not so everything I make has to be tasty for the both of us. This is perfect for anyone who can’t have dairy, but craves a sweet treat. You can find vegan butter and vegan cream cheese at most grocery stores and it’s amazing. I made 4 small tarts instead of one big one because let’s be honest, it’s just the two of us and we can’t eat a whole tart by ourselves. Feel free to double the recipe for a larger amount. I hope you guys enjoy!
Vegan Oreo Fruit Tarts
Makes 4 small tarts
INGREDIENTS:
Cookie Crust:
- 14 Oreos
- 2 Tbsp + 2tsp of vegan butter, melted
Vanilla Filling:
- 8oz vegan cream cheese
- 1 can full-fat coconut milk (use the solid part only)
- 1/3c powdered sugar
- 1tsp vanilla extract
- Berries and fruit of your choice for topping
To make crust:
Combine Oreos and butter in food processor until well combined. Press mixture into tart trays and place in fridge while you make the filling.
To make the filling:
Combine vegan cream cheese, the solids from the coconut milk can, powdered sugar, and vanilla extract in food processor. Cover and cool in fridge for at least an hour.
Finish it off:
When both the crust and filling are chilled, add filling to the mini tart pans, and top with the fruit of your choice. Enjoy!


PLANT-BASED BREAKFAST, LUNCH, AND DINNER

Hi guys! Today I’m giving you three super easy plant-based recipes. For those of you who don’t know, my husband is vegan and has been for about five or so years, and I’ve been pescatarian for almost a year. We are no strangers to plant-based food, but I totally understand that it can be really intimidating when you’re first starting out. I’ll be honest, some plant-based options are YUCK, but that’s the case with ANY food, right? I mean even the meat-eaters out there can agree that you’ve had an amazing burger and you’ve also had a really terrible one. The good news is, plant-based brands have come a LONG way and some options out there are IDENTICAL to the “real” thing - it’s crazy!
I’m here to tell you about 3 recipes that you’ll love. Full disclosure, this blog post is NOT sponsored, but I did work with Kroger on some Instagram content. So if you’re in the south you can find all of these ingredients there. I genuinely just want these recipes to be easily available to you guys whether you’re dipping your toes into the plant-based world or just doing meatless Fridays because of lent.

PLANT-BASED BERRY SMOOTHIE:
Serving Size: 1 Smoothie
Ingredients:
1 banana
1 cup mixed frozen berries
3/4 cup oat milk
Hand full of spinach
1/2 tbsp cinnamon
2 tbsp PB2
Blend until smooth and serve with a reusable straw. :)


PLANT-BASED DELI SANDWICH
Serving Size: 1 Sandwich
Ingredients:
Whole wheat bread
Simple Truth Plant Based Ham Deli Slices
Field Roast Chao “cheese” slices
Hand full of spinach
Half an avocado
Cucumber slices
Mustard of your choice
Put it together and enjoy! This one is great for the kids lunches or in our case, we always take sandwiches when we go on the boat in the summer time. The deli “meat” and the “cheese” slices are A+ and if you don’t live in the south, I highly recommend anything you see from the brand “Field Roast” because it’s available all over the country.

Plant-Based Alfredo Pasta with Broccoli and Savory Smoky Crunchies
Serving Size: 2
Ingredients:
8 oz of pasta (we used rigatoni)
1 head of Broccoli
1 tbsp or less of Vegetable Oil or Olive Oil
1 cup Coconut
2 tsp Liquid Aminos (Tamari or soy sauce would work as well)
1/2 tsp Liquid Smoke
4 tsp Maple Syrup
Salt and Pepper to taste
Directions:
Preheat oven to 425 degrees. Bring a large pot of salted water to a boil. Have large non-stick skillet on stand by.
Cut head of broccoli into bite size pieces. Toss in olive oil (or vegetable oil), salt, and pepper. Place on baking tray and bake for 8-10min or until lightly browned.
While broccoli is cooking, add pasta to the boiling water and cook according to the directions on package. Most likely it will be around 8-10 minutes until al dente. When pasta is finished cooking, reserve 1/2 cup of pasta water and put to the side, drain the remaining pasta water, return pasta back to the large pot and keep off heat.
To make the savory crispy bits, place a large non-stick skillet over low heat. Add coconut flakes, Liquid Aminos, liquid smoke, maple syrup, and a pinch of salt and pepper. Toss consistently until the coconut is evenly coated and the coconut is cooked until slightly browned. This should take 5-7 minutes. Transfer to a plate or bowl when done.
Add the Alfredo sauce and 1/2 cup of pasta water to the cooked pasta. Reduce over low-medium heat.
Divide the saucy pasta into two dishes. Top with broccoli and crunchies. Salt and pepper if needed. Enjoy!
If you guys have any plant-based brands that you love, please drop them in the comments below. I also love the No Evil Pulled Pork, JUST egg, Miyoko’s Mozzarella, Earth Balance butter, Nasoya Kimcbhi, Field Roast Apple Sage Sausages, FIeld Road Choa slices (used in recipe above), and Treeline French-style nut cheese (SO GOOD with crackers) to name a few!

HOW TO MAKE A HOT CHOCOLATE BAR
The holidays are here and the weather is colder. Set up this amazing hot chocolate bar at your next party complete with multiple flavors, toppings, servingware, and decor.

With Christmas coming and the Winter season here for several more months, I thought it would be a great idea to share my hot chocolate bar with you! I sourced my goodies from all over (mostly Home Goods and Kroger) but I will link as many similar items as I can find.
This was a hit at our annual Christmas party, but the only other recommendation I have to add to the list below is to get some Kahlua or Bailey’s to add some alcohol to the mix!


ITEMS USED:
SERVINGWARE:
Two Tiered Marble Server is from Crate and Barrel
Bonavita Electric Kettle (ours has a traditional spout and I can’t find it, but the linked one is similar
The little plastic bowl for the chocolate spoons is from the Dollar Tree
Small serving tongs are from the Dollar Tree
Measuring spoon to measure the hot chocolate powder, these are similar
Napkins are from Home Goods, but these are cute and so are these.
Cups with lips and sleeves are from Home Goods, but these are similar and cute
INGREDIENTS:
The multi-flavor chocolates are from Home Goods, but these are similar
Chocolate spoons are from Home Goods but Amazon has them as well (linked)
Sprinkles from the grocery Store
Cinnamon Sugar from the grocery Store
Marshmallows from the grocery Store
Candy Canes from the grocery Store
Creme Filled Stick Cookies from the grocery store or Home Goods
Whipped Cream from the grocery Store
Optional Kahlua or Bailey’s
DECOR:
Gold tree is from Target and they sell two sizes


I hope you guys love this as much as we did! I will for sure be setting up another one of these are our next party this winter season!

Epic Overnight Oats - Vegan (Blueberry, PB2, cinnamon)
This EPIC overnight oats recipe is perfect for anyone on the go. It’s packed with protein, tastes AMAZING, and is ridiculously easy to make. It’s plant-based for all of my dairy-free, vegetarian, and vegan babes out there! Blueberries, cinnamon, peanut butter - HECK YES!

Hi guys! How are you? I hope you’re having an amazing day wherever you are!
This is my first blog post since being a married woman - woohoo! Will I ever get used to saying “my husband” or my new last name? Only time will tell!
Anyhoo! I am back with a new quick and easy plant-based breakfast recipe. This time I’ve teamed up with PB2 (who are wonderfully sponsoring todays post - you rock!) to use their new Performance Almond Protein Plant Powder. After a bit of testing with various ingredients and amounts of each, I came up with this delicioussss fall inspired overnight oats recipe that you have to try! It’s perfect for anyone on the go and is packed with 17g of protein!

This is now my ideal overnight oats breakfast. If you guys aren’t familiar with overnight oats (don’t worry my husband wasn’t either and thought it was weird that I was making cold oatmeal), but I promise you this is SO GOOD and now he is a believer. It’s a few simple ingredients that you toss into a jar, mix together, put on the lid, and put in the fridge overnight. The next morning you can add some extra milk if you want and you’re ready to go - it’s seriously that easy.


That face below is 100% a reflection of my feelings towards this food.

The Most Epic Overnight Oats:
Serving: 1
Ingredients:
1/2 cup unsweetened vanilla almond milk
1/2 cup old fashioned or “rolled” oats
2 tbsp (or use the container scoop, once and leveled) of PB2 Performance Almond Protein Plant Powder
1 tsp chia seeds
1 tbsp agave
1 pinch of cinnamon
3/4 cup fresh blueberries
Instructions:
In a mason jar or something similar, add almond milk, oats, PB2 Almond Protein Plant Powder, chai seeds, agave, and cinnamon.
Stir these ingredients until they are well combined and then stir in your blueberries.
Place the lid on your jar and pop it into the fridge overnight or for about 6+ hours.
The next morning you can eat exactly as is, or splash a bit of milk for a creamier texture - your choice!
Enjoy!
Nutrition Per One Serving:
Calories: 393 // Fat: 7g // Saturated Fat: 0g // Cholesterol: 0mg // Sodium: 67mg // Potassium: 35mg // Total Carbohydrates: 68g // Dietary Fiber: 8g // Sugar: 28g // Protein: 17g
If you guys make this, PLEASE tag me on IG because that will make my day! Also, if you have any questions or just want to say hey, please use the comments section and I will 100% write back. Also, make sure you follow me on Instagram @MaeElizabethG as I post on there almost every day. Bye and see you next time!

Bonus photo for all of you who love my dogs! Sweetpea says hi!
Growing food indoors with Miracle-Gro

*This post is sponsored by Miracle-Gro but all opinions and obsessions are my own. :)
Hey guys! Today I’m going to show you how we have been growing kale inside of our living room for the past month with the Miracle-Gro Twelve Indoor Growing System. You’re going to see how we started with four tiny seedlings (pictured above) and in four weeks how they have EXPLODED with growth! We already use Miracle-Gro soil for our house plants so it was a no brainer to give the indoor growing system a try. Spoiler alert, we are obsessed!
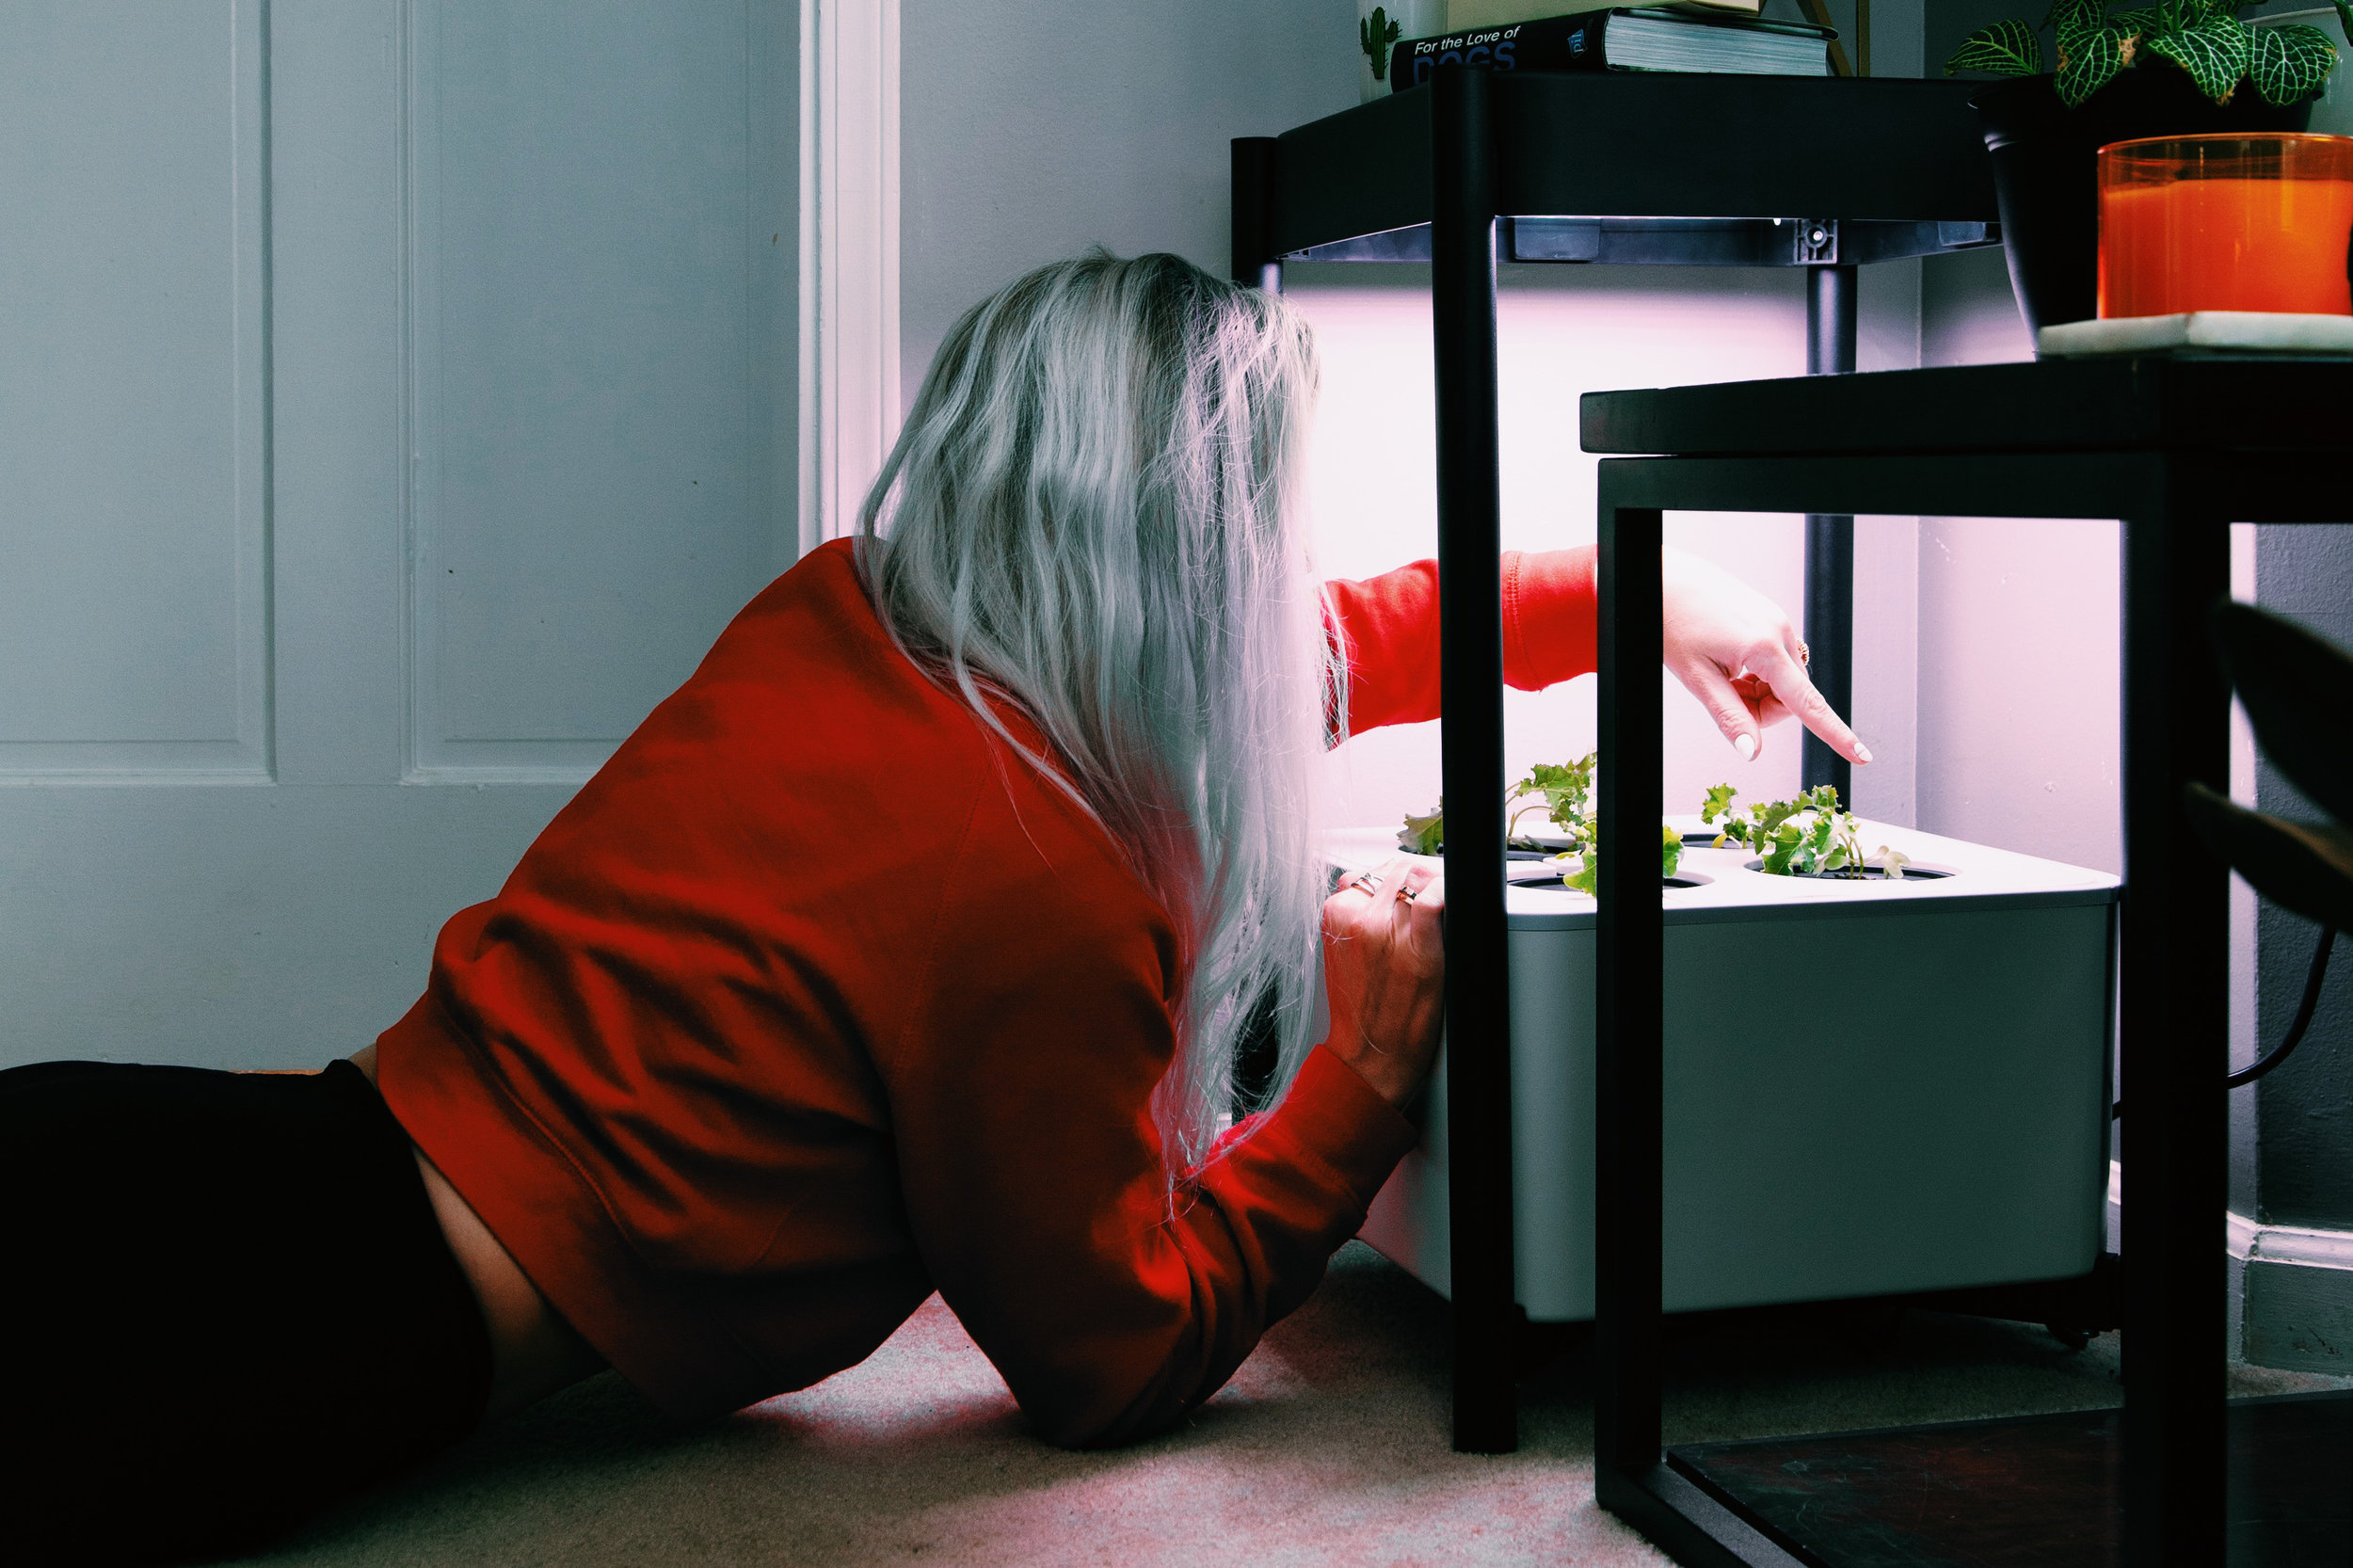
The Miracle-Gro Twelve Indoor Growing System allows you to grow fresh food year round. It’s a hydroponic based system which means the plants actually grow in water allowing them to grow faster than plants grown in soil. Growing our own food is perfect for us since we cook from home several times a week and because Zach is vegan, leafy greens are a big hit in our house. You can grow arugula, kale, swiss chard, leaf lettuce, mustard greens, parsley, cilantro, mint, basil, oregano, dill and sage - yum!

Putting the unit together is super easy and took less than 15 minutes. The box comes with everything you need and includes a book with step by step directions. You can either grow from a seed, a seedling (like we did!) or from a plant that’s already been started for you, like a Bonnie Plant you can pick up from the store. You just add the plant nutrition directly to the water and it’s good to go for four weeks. The most convenient part of all is the app. It allows you to change the light schedule (ours is 6am-8pm), reminds you when it’s time to add more plant food, tells you the water level and the light will gently blink on the unit if you need more water, and it tells you what date you can start harvesting.

Step 1 : Fill with water.

The day we started the system.

Step 2: Add plants. Step 3: Add plant food.

3 weeks later.
Not only are you growing food inside of your house, but the unit also doubles as furniture. Another option would be to purchase the stacking kit which lets you put two growing system on top of one another so you can grow even more! What would you grow in your Miracle-Gro Twelve Indoor Growing system?


A weekend vacation to Jekyll Island

This is a sponsored post, but all opinions are my own. :)
Only a five hour drive from Atlanta, Zach and I hopped in the car with the dogs and headed to Jekyll Island for a long weekend getaway. Being our first time there, we used the Jekyll Island website to plan our trip. Although the island is small, it’s packed with plenty to do that will keep you going the whole time. It’s extremely clean, quiet (perhaps because we went before school let out for the summer), and one of the most dog friendly places I’ve ever been - woohoo!


We stayed in a spacious suite at the ocean-front Holiday Inn Resort. Our balcony overlooked the ocean so every morning we spent some time waking up to the sound of waves hitting the shore. The room came with two queen sized beds, a kitchenette (full-sized fridge, microwave, stove top, and sink), two tv’s, and the living room had pull-out couch. If cooking is more your vibe, this is the way to go. You won’t find any big-box grocery stores on the island, so you may want to bring some groceries with you. You can also pick up a variety of groceries and local provisions at the nearby Jekyll Market or hit a larger grocery story right before the entrance to the island. Parking was easy, and the property featured several gas fire pits, a kids’ playground, a gorgeous pool, cabana sitting areas, a coffee and martini bar, fitness center, several beach access points, bike rentals, and a dog-friendly restaurant called “Beach House” on site.

We are the type of people who like to stay active on vacation and bring our dogs as much as possible so we tried to fit in as much in as possible and adjusted as necessary considering there was a bit of rain for a few days while we were there. First on the list was taking our dogs to the beach! It was drizzling when we got in on Friday afternoon but after we settled in we took the dogs out to the beach right outside of our hotel. They LOVED it and we ran up and down the beach with them. This was also the day we realized the tides change quite noticeably on the island which was unique to see.


Saturday was filled with sunshine so we hit up the Summer Waves Waterpark first thing in the morning and checked out all of the slides! That afternoon we ventured around Beach Village which is a small shopping center featuring several restaurants, shops, and Jekyll Market. Lastly we caught the beautiful sunset while exploring Driftwood Beach. This beach is dog-friendly and filled with the remains of fallen trees due to many years of erosion. It’s one of the most photogenic places we went and was voted one of America’s “Ten Most Romantic Beaches.”


Sunday stormed so our hotel lost power a few times so it was PERFECT that we had tickets to go behind- the- scenes at the Georgia Sea Turtle Center. Because they take care of animals, they have generators to continuously power the hospital. Although the general entry gives you an inside look at turtle care and is open rain or shine, I HIGHLY recommend the behind-the-scenes tour. We happened to be in the vet area when they brought in a turtle who needed blood work done which was incredible to witness! You also get to see where the food is kept, see the other turtles not out on public view, and ask all of the questions you want - it was truly an incredible thing to experience. During the lighter drizzle times, we walked around the Historic District admiring the beautiful historic buildings and large trees covered in Spanish Moss. That evening, when the weather had cleared up, we took a spontaneous sunset dolphin tour with hilarious husband-and-wife duo tour guides. We saw a ton of birds, learned all about the ecosystem of the island, learned a little history, and of course saw dolphins at sunset!


Knowing the weather on Monday was going to be incredibly sunny, but we had to check out by 11, we woke up early to take full advantage of the time we had left. We finally rented bikes and took advantage of the islands 25 miles of paved bike paths. These paths almost always keep you separate from the road allowing for you to venture out on a bike with the family in a very safe way. This made for a unique and beautiful way to see the island! Of course, we ended our trip with one last visit to the beach with the pups and said goodbye to a wonderful weekend getaway.


Below are a few bullet lists for dog friendly places, activities we did and didn’t do, and a few extra tips!
Although not a full list, here are a few dog friendly places that we visited while on Jekyll Island:
The Holiday Inn Resort
Oceanview Beach Park of the Holiday Inn Resort
Driftwood Beach
Walking through the beautiful Historic District
The expansive bike path is also shared by dog walkers and runners alike
Sunrise Grille Restaurant
Beach House Restaurant
Tortuga Jacks Mexican Restaurant
To note, there are plenty of other places to eat that have outside seating, but because they aren’t full service restaurants it would require you to either tie up your dog outside while you go in, or have an additional person to wait outside while you go inside to order. To name a few: all of the places inside of the Jekyll Market including Hibiscus Cafe, Boardwalk Deli, The Love Shack BBQ, and A Sweet Shop Named Sprinkles. Fuse for froyo, The Westin Cafe for Starbucks coffee, and Red Bug Motors Pizza and Pub. My recommendation is to call ahead if you aren’t sure.
Activities that kept us moving and a few others we didn’t get to:
Summer Waves Waterpark
Driftwood Beach
Biking
Georgia Sea Turtle Center
Dolphin tours
Stand-up Paddle Boarding/Kayaking
Mini golf and/or regular golf
Tennis
Mosaic, the Jekyll Island Museum
Horseback riding
A few extra tips:
Heads up, there is a parking pass that you must purchase when you first arrive.
Bring bug spray or purchase the local spray called “No Natz” found at several local stores.
Dogs must be leashed at all times and the leashes can’t be longer than 16ft. So happy about this so other people’s dogs can’t just come up to yours and cause a potentially dangerous situation.
Dogs are allowed on beaches except South Beach between South Dunes Picnic Area and 2,000' northeast of St. Andrews Sound Picnic Area, to protect nesting shore birds..
Be careful about walking out to the sand bars on the beach as the tide rolls in and out 8 feet every six and a half hours. Also, plan your beach visits accordingly as I had no clue about the tide and there are times when the water completely covers the sand. Mother Nature is so cool!
The water is not clear, but it’s not because of pollution. In fact, the water is very nutrient dense which allows for all of the thriving wildlife!
If you’re a fellow lover of Jekyll Island and have any recommendations that we missed, please leave them in the comments below so myself and others can enjoy during their next trip!

Hosting a stress-free holiday party

This year was our Second Annual Christmas Sweater and Ornament Exchange Party. I don’t know how you are, but I very much get stressed out when it comes to hosting. I love it, but I definitely let it overwhelm me. I can honestly say this past Saturday was the most relaxed I’ve ever been leading up to a party at our house.
Here are a few tips, and even a holiday punch recipe, that I recommend:
Party Invite and Theme:

The invite was so easy. I found a wallpaper on Google and added text over it using the app called WordSwag.

The theme every year is for everyone to come wearing a Christmas sweater and bring a wrapped ornament for the ornament exchange. I love the sweater idea because people can either wear something they already own making it a no pressure situation, get creative with DIY, or buy one that really shows their personality. My sweater is from Missed Calls on Etsy!

Holiday Cocktail Recipe:
(Super alcoholic, but you cannot taste the alcohol. You’ve been warned.)
Everything was purchased from Kroger (thanks, Kroger!)
Ingredients:
2 - 750ml bottles of Prosecco (I bought Menage a Trois brand because it’s $10/bottle)
1/2-2/3 - 750ml bottle of Vodka (you can add more or less)
1 - 24 fl oz Pomegranate Juice
1 - 52 fl oz Orange Juice pulp free
1 - 64 fl oz Cran-raspberry Juice Cocktail
1 - 12oz bag of cranberries (frozen or fresh)
2 Oranges sliced into rounds
2 limes sliced into rounds
0.5 oz Mint to garnish
Ice (only need if you bought everything last minute and didn’t have time to chill your ingredients)
Directions:
Combine everything (except the mint) into a beverage dispenser or massive punch bowl. Stir. The oranges, limes, and cranberries will all float to the top making it very pretty and festive to serve. Garnish with mint.

Party Activities:
Ornament Exchange - we ask everyone (or every couple) to bring a wrapped ornament to the party. We play white elephant style by having everyone select a number from a jar. Whoever draws #1 goes first, #2 can either steal their ornament or open a new one, and so on. We made the rule that once an ornament got stolen twice, it couldn’t be stolen anymore. Some people play where they allow more than two chances to steal so that’s up to you. At the end, everyone who brought an ornament ends up with a new one!

Bon Fire - last year we had a fire pit put in our backyard and it’s always a hit. It gives the smokers a place to go, keeps everyone warm, plus, s’mores are always a good idea!
Puzzle - this was perfect for the people who weren’t really drinking and wanted to be more low key. I put out a 400 piece Christmas puzzle of a dog sitting by a fireplace and Christmas tree and it was finished in 2hrs and 10min.
Christmas Music started it all, but we ended up with rap music by the end of the night.

Food (no cooking required):
All food was purchased from Kroger and this part made my life SO easy! I was in and out with everything I needed in no time.
chicken tenders party platter ordered from the deli about a day before and picked up a few hours before the party
Tostitos chips and everything needed to make homemade guacamole.
a few other dips for the chips including refried beans, pico, and salsa.
Pita chips and hummus
Doritos because we are big spicy sweet chili fans
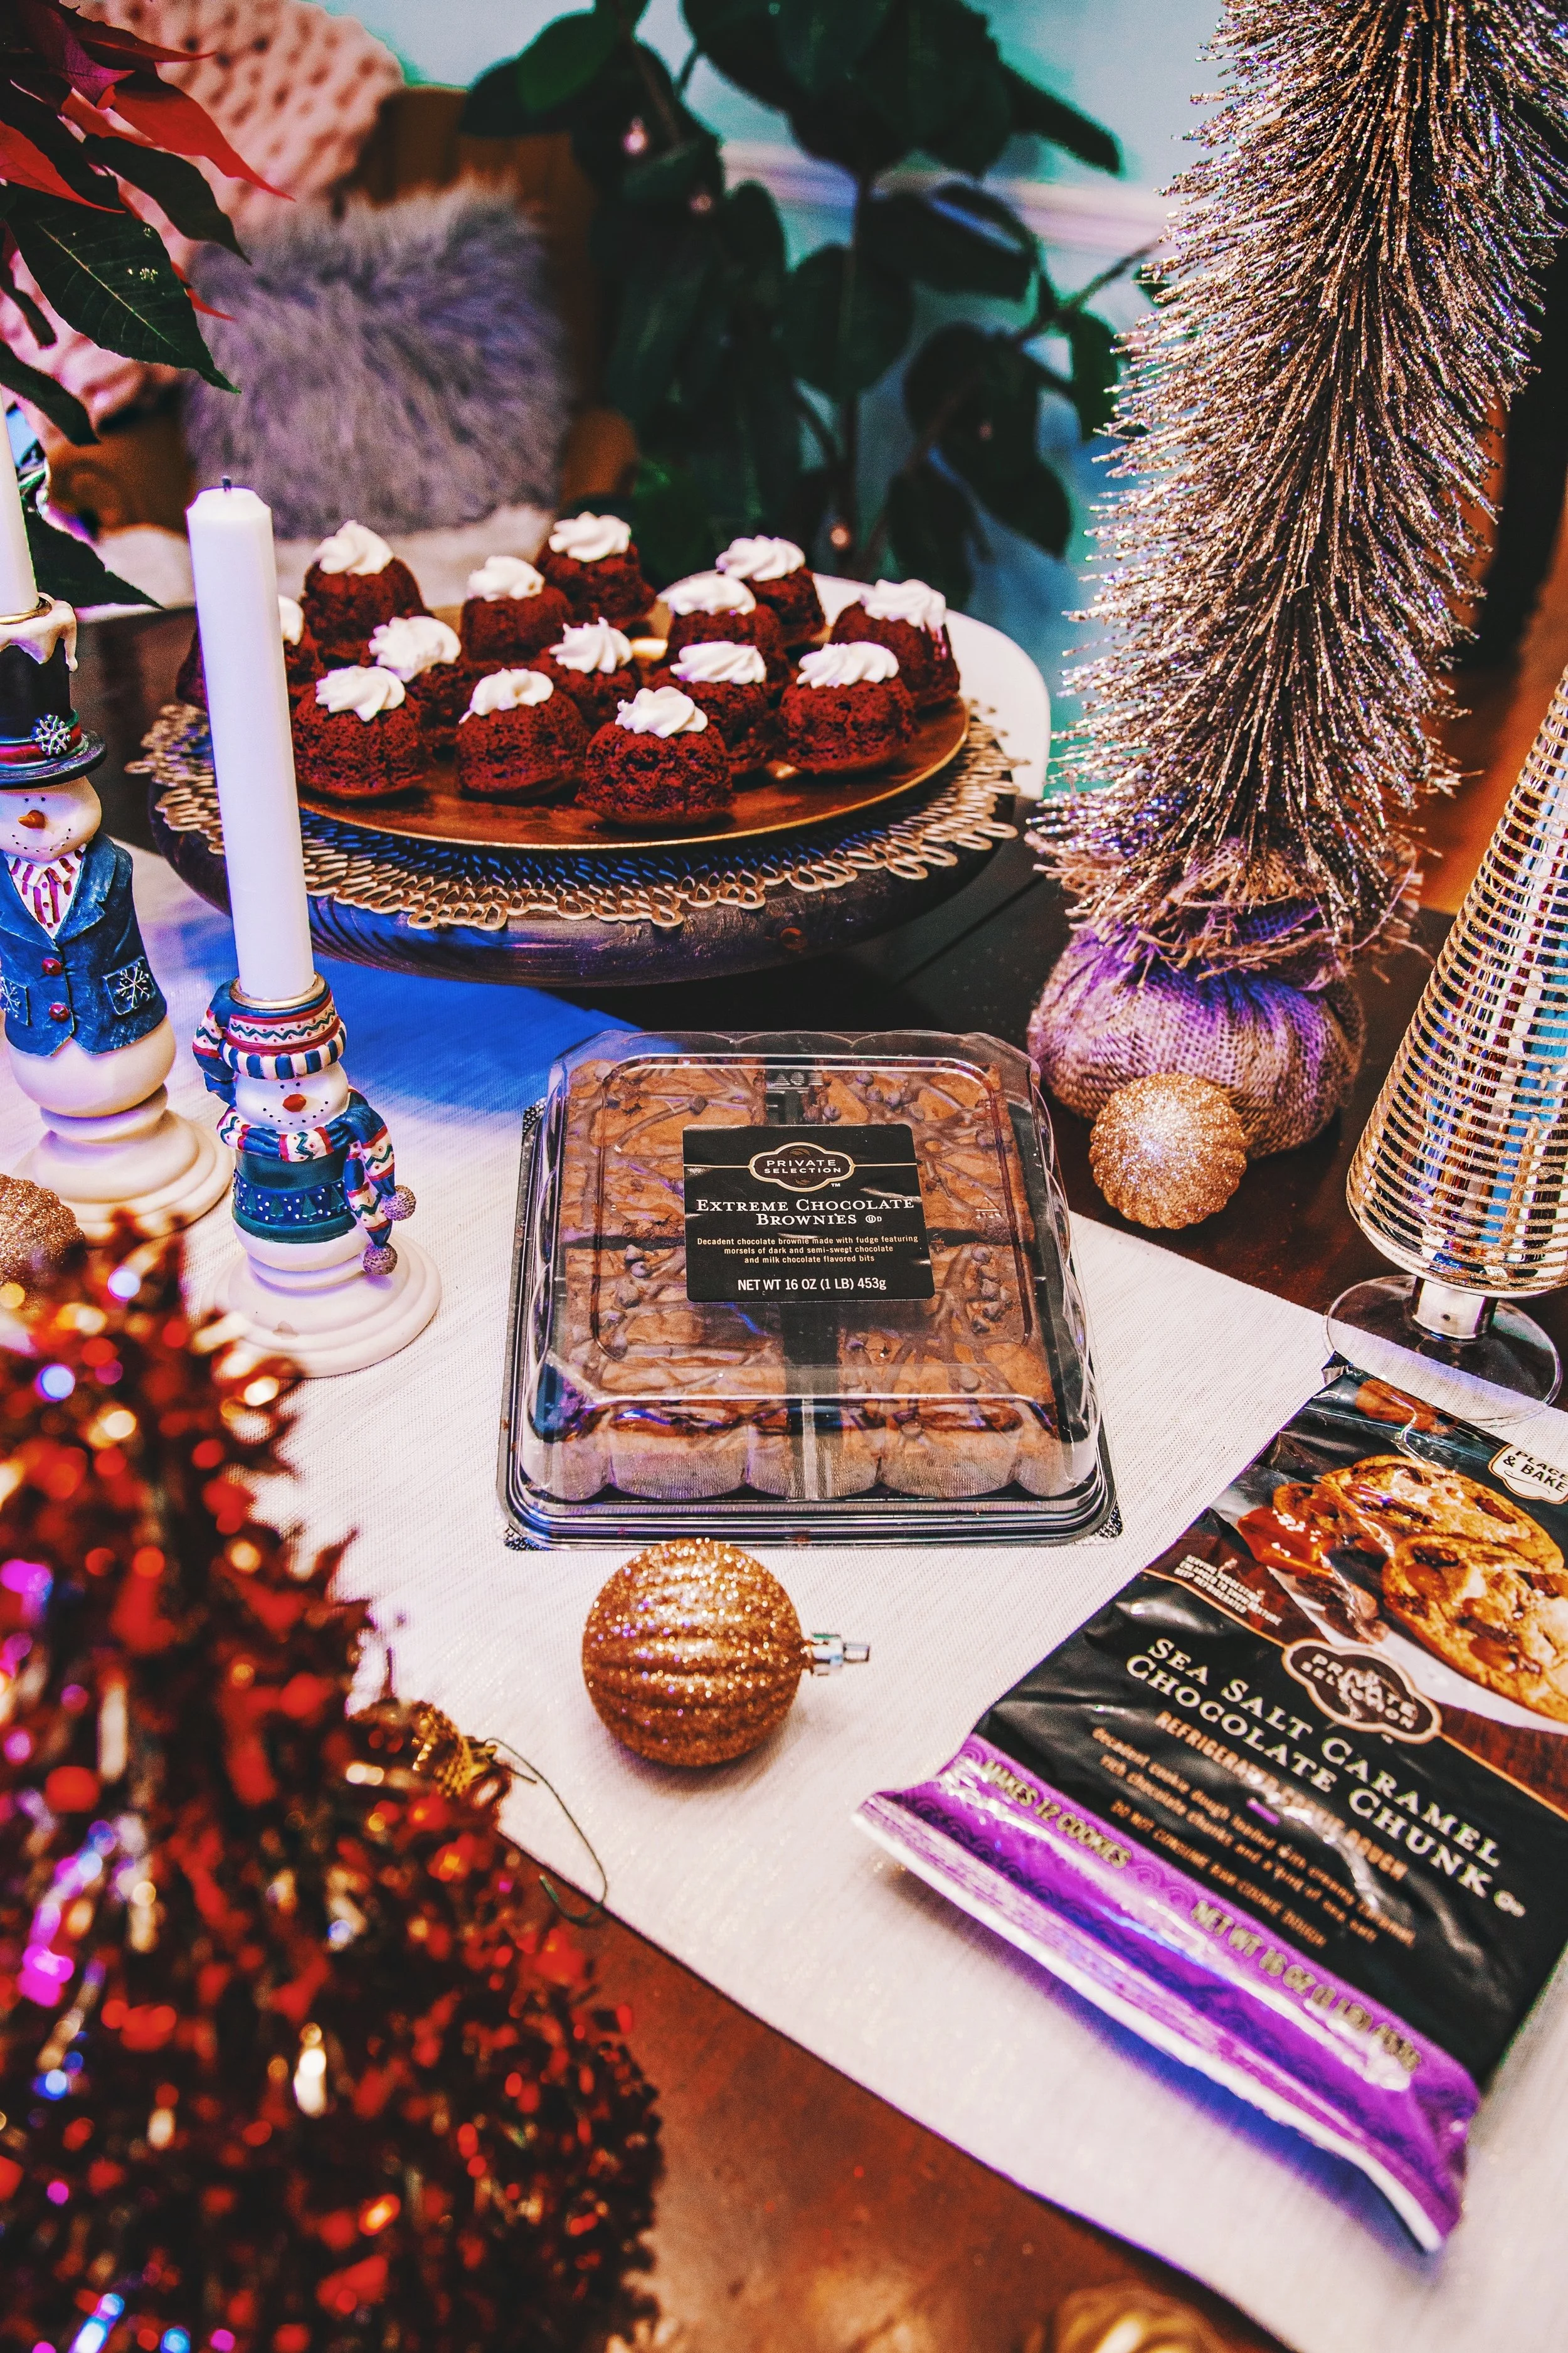
all pre-made desserts like Private Selection brownies, red velvet bundt cakes, and Private Selection Sea Salt Caramel Cookies. I cut them up and served everything on nice plates and topped with Christmas sprinkles so you couldn’t tell, hehe.
* although we didn’t ask anyone to bring anything we did have some guests bring a cheese plate (HUGE HIT), bruschetta, and a vegan cake!


Do you ever host parties? If so, do you theme them? I’d love to hear more below!

Vegan Thanksgiving Recipes
Vegan Thanksgiving Recipes

Hey guys! Today I’m going to share with you two Thanksgiving recipes that are vegan. Before my meat-lovers click off, these two have been approved by myself and three other non-vegans. They are good, trust me - I wouldn’t share them if they weren’t. Take my absolute failure attempt at vegan sweet potato casserole for example. I just scraped that baby into the trash can and pretended that soupy goup never happened.
Story time: If you don’t know, my fiancé Zach is vegan, but I’m not and neither are our families, so that makes cooking and eating out really fun 🙃. When holidays roll around it gets even more complex. You end up around buttery, cheesy, and chicken broth recipes GALORE. I’ve learned that SO many dishes could easily be “vegan,” but since everyone cooks with butter and chicken stock, for example, Zach typically can’t eat anything, not even the veggies. Don’t get me wrong, we both have families who try to accommodate, but it doesn’t always work out. People often forget or don’t really understand what being vegan means and they say “we made this for you and it’s vegan.” He’s like, “great! So no butter, egg, chicken broth or cheese?” (the usual suspects) and you just see their defeated face go “oh, yeah, I forgot I used (insert whatever non-vegan ingredient here). 9/10 if you’ve invited us to an event or dinner, we have stopped by Subway on the way for Zach, haha. LUCKILY, earlier this year Zach got into cooking and has made some pretty incredible food these past few months. When I got contacted by Kroger to work with them on a Thanksgiving campaign over on my Instagram account, we took this as the PERFECT opportunity to trial some vegan Thanksgiving recipes. Below are two dishes that have passed the test! Enjoy!
Vegan Green Bean Casserole
INGREDIENTS
1 lb. green beans, trimmed
6 tbsp. extra-virgin olive oil, divided
2 medium shallots, finely chopped
8 oz. sliced mushrooms
Kosher salt
Freshly ground black pepper
2 cloves garlic, minced
1/4 c. all-purpose flour
3 c. Unsweetened almond milk (make sure it’s NOT vanilla as well)
6oz container of French fried onions
DIRECTIONS
Preheat oven to 375°.
Prepare an ice bath. In a large pot of boiling water, add green beans and cook until bright green, about 6 minutes. With a slotted spoon or tongs, quickly transfer green beans to ice bath to cool, then drain and transfer to a large bowl.
In a large ovenproof skillet over medium heat, heat 2 tablespoons olive oil. Add shallots and cook, stirring occasionally until tender, about 5 minutes. Add mushrooms and season with salt and pepper. Cook, stirring often, until mushrooms are golden, about 5 minutes more. Stir in garlic then transfer mixture to the bowl with the green beans.
Heat remaining 4 tablespoons of olive oil in the same skillet over medium heat. Whisk in flour and cook until golden, about 2 minutes. Gradually whisk in almond milk and bring to a simmer. Cook until thickened, about 4 minutes (prob longer). Remove from heat then add green bean mixture and toss until even combined. Transfer mixture to a medium casserole dish.
Bake until warmed through and bubbling around the edges, about 20 minutes. (If it isn’t thickening up enough, keep cooking it - we had this happen). Top with fried onions and bake 5 minutes more.
Enjoy!
*Recipe was modified from the Delish website.

Image by Vegan Green Bean Casserole via Delish.com
This next recipe is courtesy of Jackie from Vegan Yack Attack. I’m going to tell you right now, I didn’t eat the “mac and cheese” with the sweet potato like it says in her original recipe (so I didn’t include it below), but Zach and our friends did and loved it. I can say though 100% that the “mac and cheese” on it’s own is pretty incredible. HOWEVER, it does not taste like your standard Velveeta Shells and Cheese so get that out of your head or you’ll be disappointed. As a meat-eater who enjoys delicious vegan food as well, I have this theory that some vegan dishes need another name. BECAUSE, although it’s incredible tasty, I have found that if you try to call a vegan recipe the same name as it’s cheesy counterpart you just let people down when it doesn’t taste identical. SO, let’s call this one “Smokey Pasta.”
Smokey Pasta
INGREDIENTS
1/2 C . Vegetable Broth
1/3 C . Raw Cashews soaked for 1-2 hours or for 20 minutes in boiling water
1 Clove of Garlic
1/2 T . Lemon Juice
1/2 tsp . Dijon Mustard
1/2 tsp . Chipotle Flakes (we couldn’t find flakes so we used Chipotle Chile Powder)
1/2 tsp . Smoked Paprika
1/2 tsp . Sea Salt
1 C . Packed Kale Chopped with Stems Removed
3/4 C . Tomato Diced
1/3 C . Yellow Corn Kernels (we just used canned corn)
1/4 C . Green Onion Diced (plus more for garnish, which is optional)
DIRECTIONS
Start cooking the pasta by following the directions as the package describes (cooking times are different on most).
To make sauce: Take the pumpkin, cashews, veggie broth, nutritional yeast, garlic, lemon juice, mustard, chipotle powder, paprika, liquid smoke, sea salt and turmeric in a blender or food processor and puree until completely smooth.
Once the pasta is done cooking, drain and rinse with cold water. Place the pot back on the stove, over low-medium heat.
Pour the sauce into the pot, and add the kale, tomato, corn and green onion.
Stir it all together and cook for 3-5 minutes, or until the kale is wilted. Add salt and pepper to taste, if desired.
Serve up that “Smokey Pasta” to your friends and family!
*Recipe was modified from the Vegan Yack Attack website.

Image by Jackie Sobon via Vegan Yack Attack

Oh look! There is me eating a bowl of mashed potatoes!
Anyways! If you guys try out these recipes let me know! Also, huge thanks to Kroger for working with me on a Thanksgiving campaign over on my Instagram. If you haven’t seen the photo already (click here), I’d love some support by liking, commenting, and sharing it with others! Thanks guys!