THRIFT FLIP - Google Home
A Simple DIY Frame Hack
Want to make your Google Home look more stylish? With just a few simple tweaks, you can transform it into a framed piece of art!
What You’ll Need:
🖼️ A 3 1/2” x 5 1/2'“ picture frame (I thrifted mine for just $1!)
🔪 X-Acto knife & pliers
🛠️ Velcro Command Strips
Step 1: Prepare the Frame
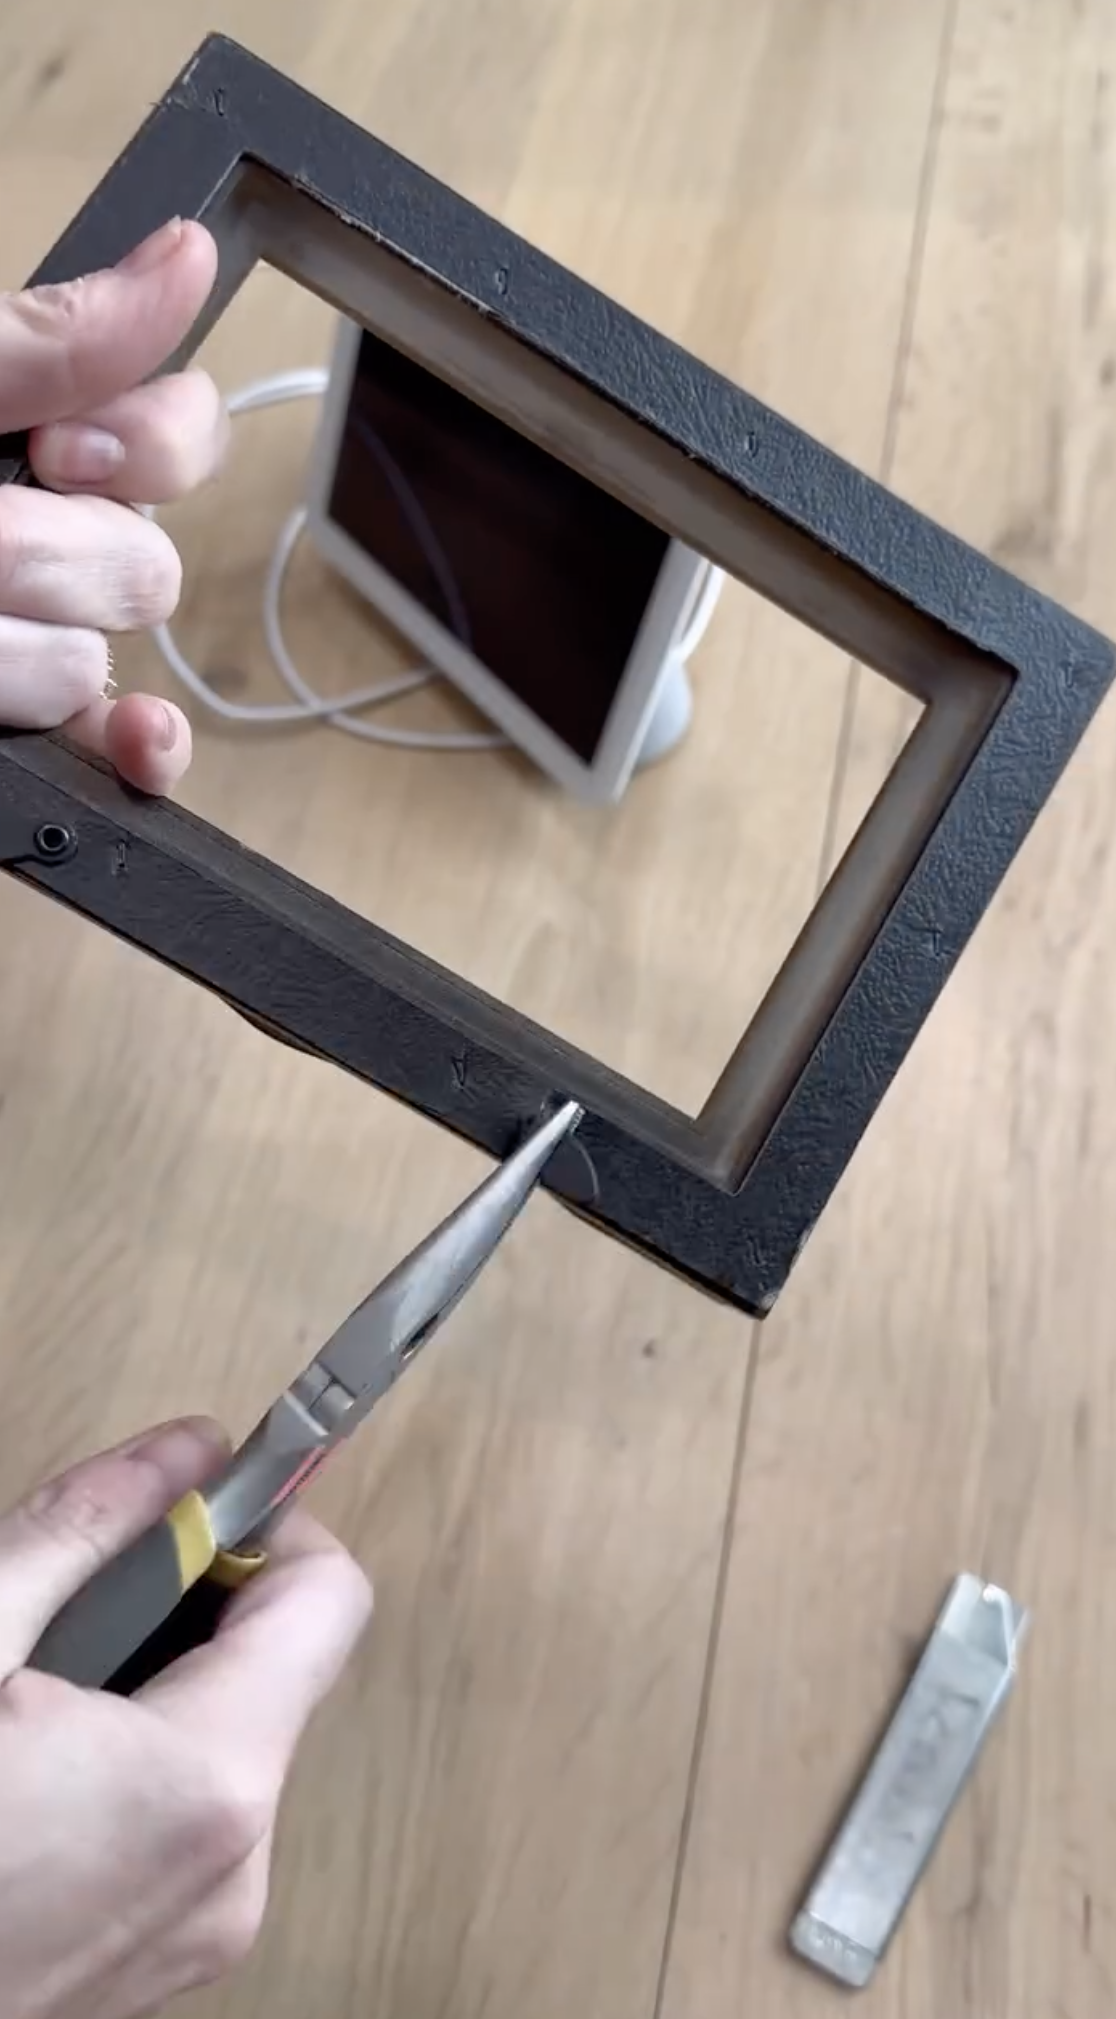
Start by removing the backing board of your frame. If it’s glued in, use an X-Acto knife to carefully cut along the edges and pop it out. Next, take pliers to remove any metal hanging hardware or turn clips—this ensures the frame sits flush against your Google Home.

Step 2: Attach the adhesive
I originally used velcro Command strips (seen below), but decided to switch them to these velcro mounting squares and it holds the frame much better. Attach them to the sides of the frame and make sure they’re evenly placed so the frame sticks securely. If your frame is heavier, consider using extra pieces for added hold.


Step 3: Frame Your Google Home
Peel off the adhesive backing from the mounting squares and carefully press the frame onto your Google Home. Hold it in place for a few seconds to ensure a strong bond. Adjust as needed, and step back to admire your upgraded, art-like smart speaker!


✨ And just like that, your Google Home blends beautifully into your decor!
Would you try this hack? Let me know in the comments!
IF YOU ENJOYED THIS POST, YOU MIGHT BE INTERESTED IN my Estate sale tips.
FOLLOW ME ON MY SOCIALS!

DIY Fringe Backdrop

Ready for a super easy and super cheap DIY that will take FOREVER?! haha! This is definitely one of those show stopper pieces for a party, but you will spend many nights tying lots and lots of knots!
SUPPLIES:
$1 plastic table cloths. I got mine from the Dollar Tree and Walmart.
Cutting mat and rotary cutter with extra blades (you can use scissors, but wow it will take a lot longer)
Optional : something to hang the backdrop on until you’re ready to install it. I used an old backdrop stand, but I would assume you could work directly on the wall using Command Hooks.
DIRECTIONS
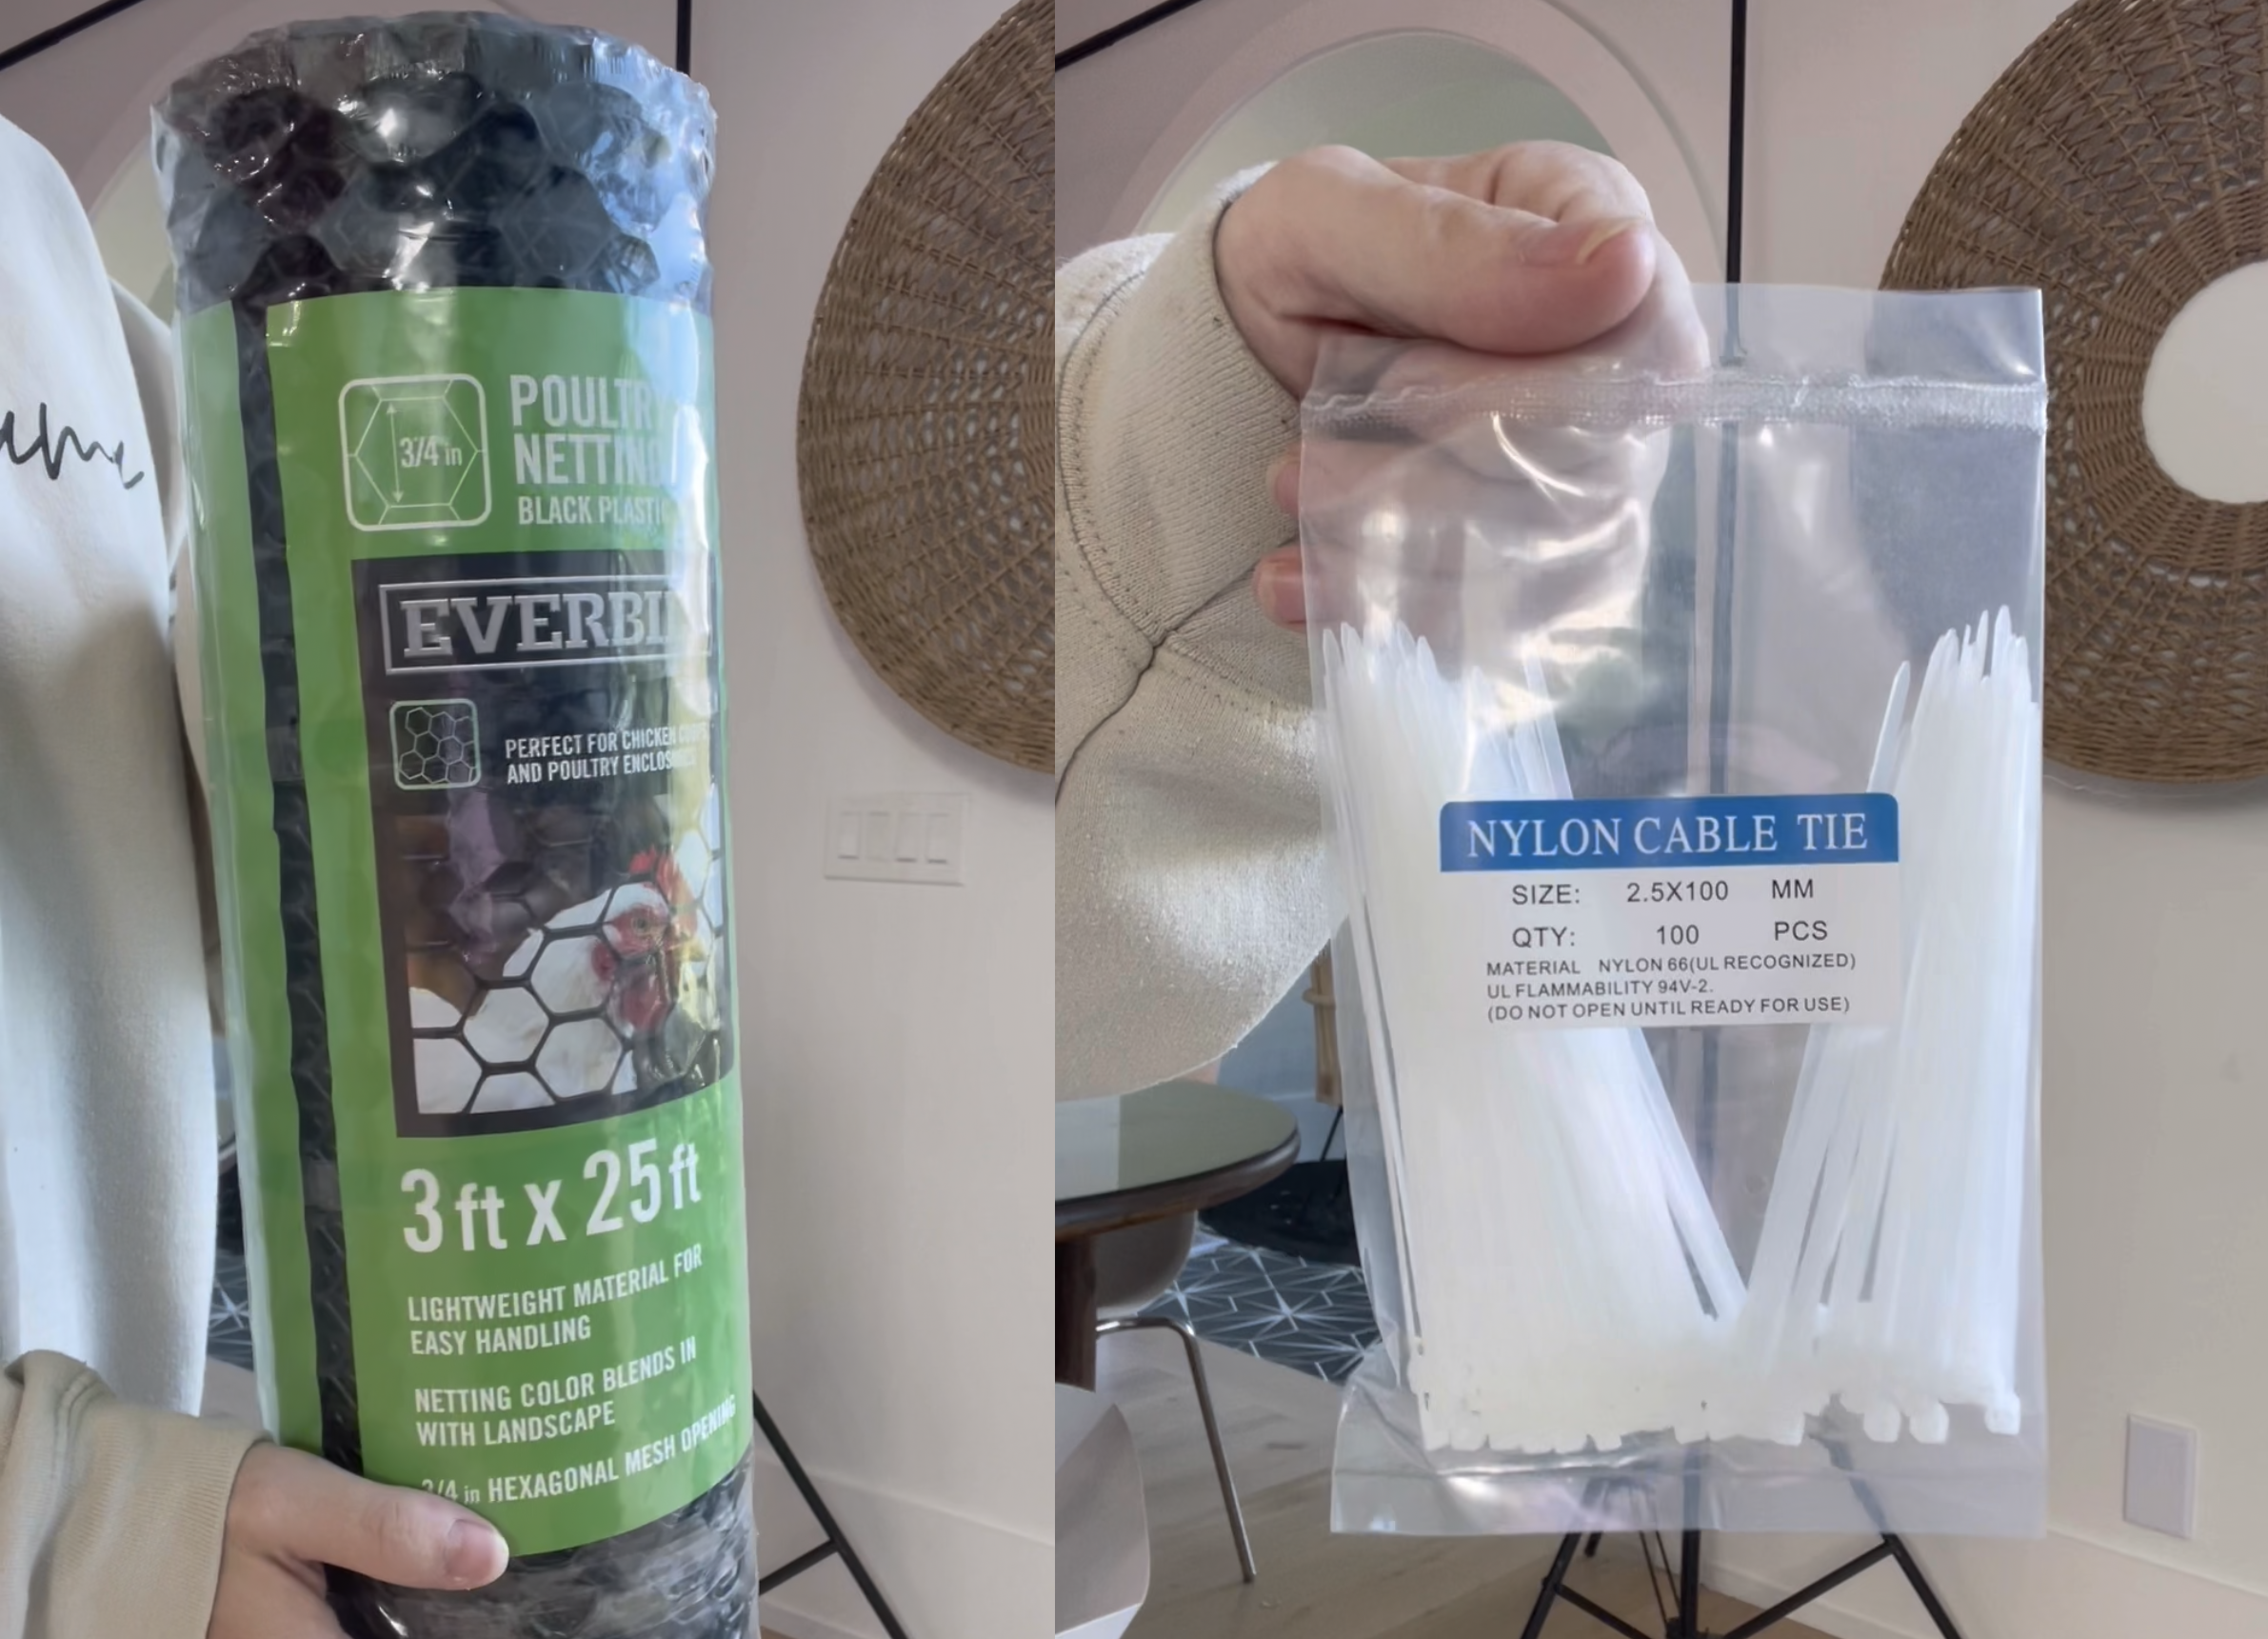
Decide how big you want your backdrop to be. I cut the poultry netting into large pieces and fastened them together with zip ties. I also zip-tied the poultry netting to an old backdrop stand.
Cut roughly 1-2” strips of plastic table cloths. No need to measure or unfold them. You can literally just use a rotary cutter and cut strips very quickly.
Unfold each individual strip until you have A LOT. I would recruit someone to help you.
Tie one strip at a time to the poultry netting by folding the strip in half and feeling the tail end through the loop. (example below)
Continue until you achieve the desired look you want.
Trim any pieces as necessary.
Use several 5lbs command hooks to install the backdrop to the wall.
TA-DA! Admire your work!
FAQ:
How big is your backdrop? Mine is roughly 8x8ft
How many tablecloths did you use? I didn’t count but I estimated that I used about 60.
How long did this take? Roughly 10 hours for one person.
Can I use scissors instead of a rotary cutter? Yes! It will just take a little longer.