DIY Flower Bar
How to Create a DIY Flower Bar for Your Next Event
A flower bar is a fun and interactive way to let guests create their own bouquets to take home as a party favor. It’s a beautiful addition to any event, from birthdays to bridal showers. Here's a step-by-step tutorial, complete with a price breakdown, to help you set up your own flower bar with ease.

Materials Needed for 20 guests
Fresh flowers/greenery in a cohesive color palette (purchased from Trader Joe’s)
Buckets and/or vases for flowers (we used the free buckets from Trader Joe’s and several clear vases)

Step 1: Buying the Flowers
I purchased my flowers from Trader Joe’s at opening the day before the event. There was already a line of people, all there for flowers, and the best selections go fast! I highly recommend arriving at opening to get the best options.
Since I had 20 guests RSVP, I calculated how many flowers I needed based on the recommended 8-10 stems per person including a “thriller, some filler, and a spiller of greenery” guideline. This ensured I had enough for everyone while preventing guests from taking too many stems and leaving others without enough options. Planning this way made budgeting easier and kept the flower bar fair for all attendees. I also recommend using a cohesive color palette so no matter what each guest chooses or what is left towards the end of the event, all of the flowers are usable together.
I would also recommend buying more “thriller” flowers than I did, as people will gravitate to them first.
Flower Selection & Cost (Spring 2024):
Premium Assorted Greens – $3.99 each (bought 7) → $27.93
Eucalyptus – $3.99 each (bought 3) → $11.97
Raffine Dianthus – $4.99
Tulips (Seasonal, Big Bunch) – $9.99 each (bought 2) → $19.98
Rose DZ Yellow/Orange – $9.99
Chrysanthemums (Big Bunch) – $4.99
Carnation Mini Novelty – $4.99
Rose DZ Pink/Purple/Bicolor – $9.99
Baby’s Breath (Gypsophila) – 4 @ $3.99 → $15.96
Jumbo Mum Balls – $4.99 each (bought 2) → $9.98
Lily Calla Mini – $5.99 each (bought 2) → $11.98
Total flower cost: $131.75


Step 2: Setting Up the Flower Bar
Prep the Flowers – Trim the stems at an angle and place them in buckets of water to keep them fresh.
Organizing the Table – Arrange the flowers in separate vases or buckets, grouping them by type to make selection easy.
Precut Materials – Cut kraft paper and twine in advance to make wrapping easy.
Display & Signage – I purchased a themed sign from Etsy to guide guests. The sign suggested:
Choose 8-10 stems, including a thriller, some filler, and a spiller of greenery.
Wrap in paper and tie your bouquet up.
Take it home to enjoy!
Wrapping Station – Set up a space with kraft paper, twine, and scissors so guests can wrap their bouquets.
Again, I loved that the 8-10 stem recommendation on the sign helped guide people on how many to take, preventing anyone from making oversized bouquets and ensuring there were enough flowers for everyone to enjoy.


Step 3: Assembling Bouquets
Guests can mix and match stems, following the signage suggestion for how many stems to take.
Suggested Bouquet Formula :
2-3 focal flowers (like roses or peonies)
2-3 filler flowers (like daisies or carnations)
3-4 greenery stems (like eucalyptus or ferns)
After picking their flowers, guests can wrap them in kraft paper and secure them with twine or ribbon
Final Tips
Buy flowers a day in advance and keep them in water overnight.
Use an Etsy sign to guide guests on the amount of flowers to use.
Have plenty of scissors and twine so multiple guests can wrap their bouquets at once.
Buy more “thriller” flowers and less greenery than I did. No matter what your sign says, people gravitate to the prettiest flowers first.


This DIY flower bar was such a hit at my event and added a special touch. Have you ever tried a flower bar? Let me know in the comments!
IF YOU ENJOYED THIS POST, YOU MIGHT BE INTERESTED IN my Dining room refresh post.
FOLLOW ME ON MY SOCIALS!

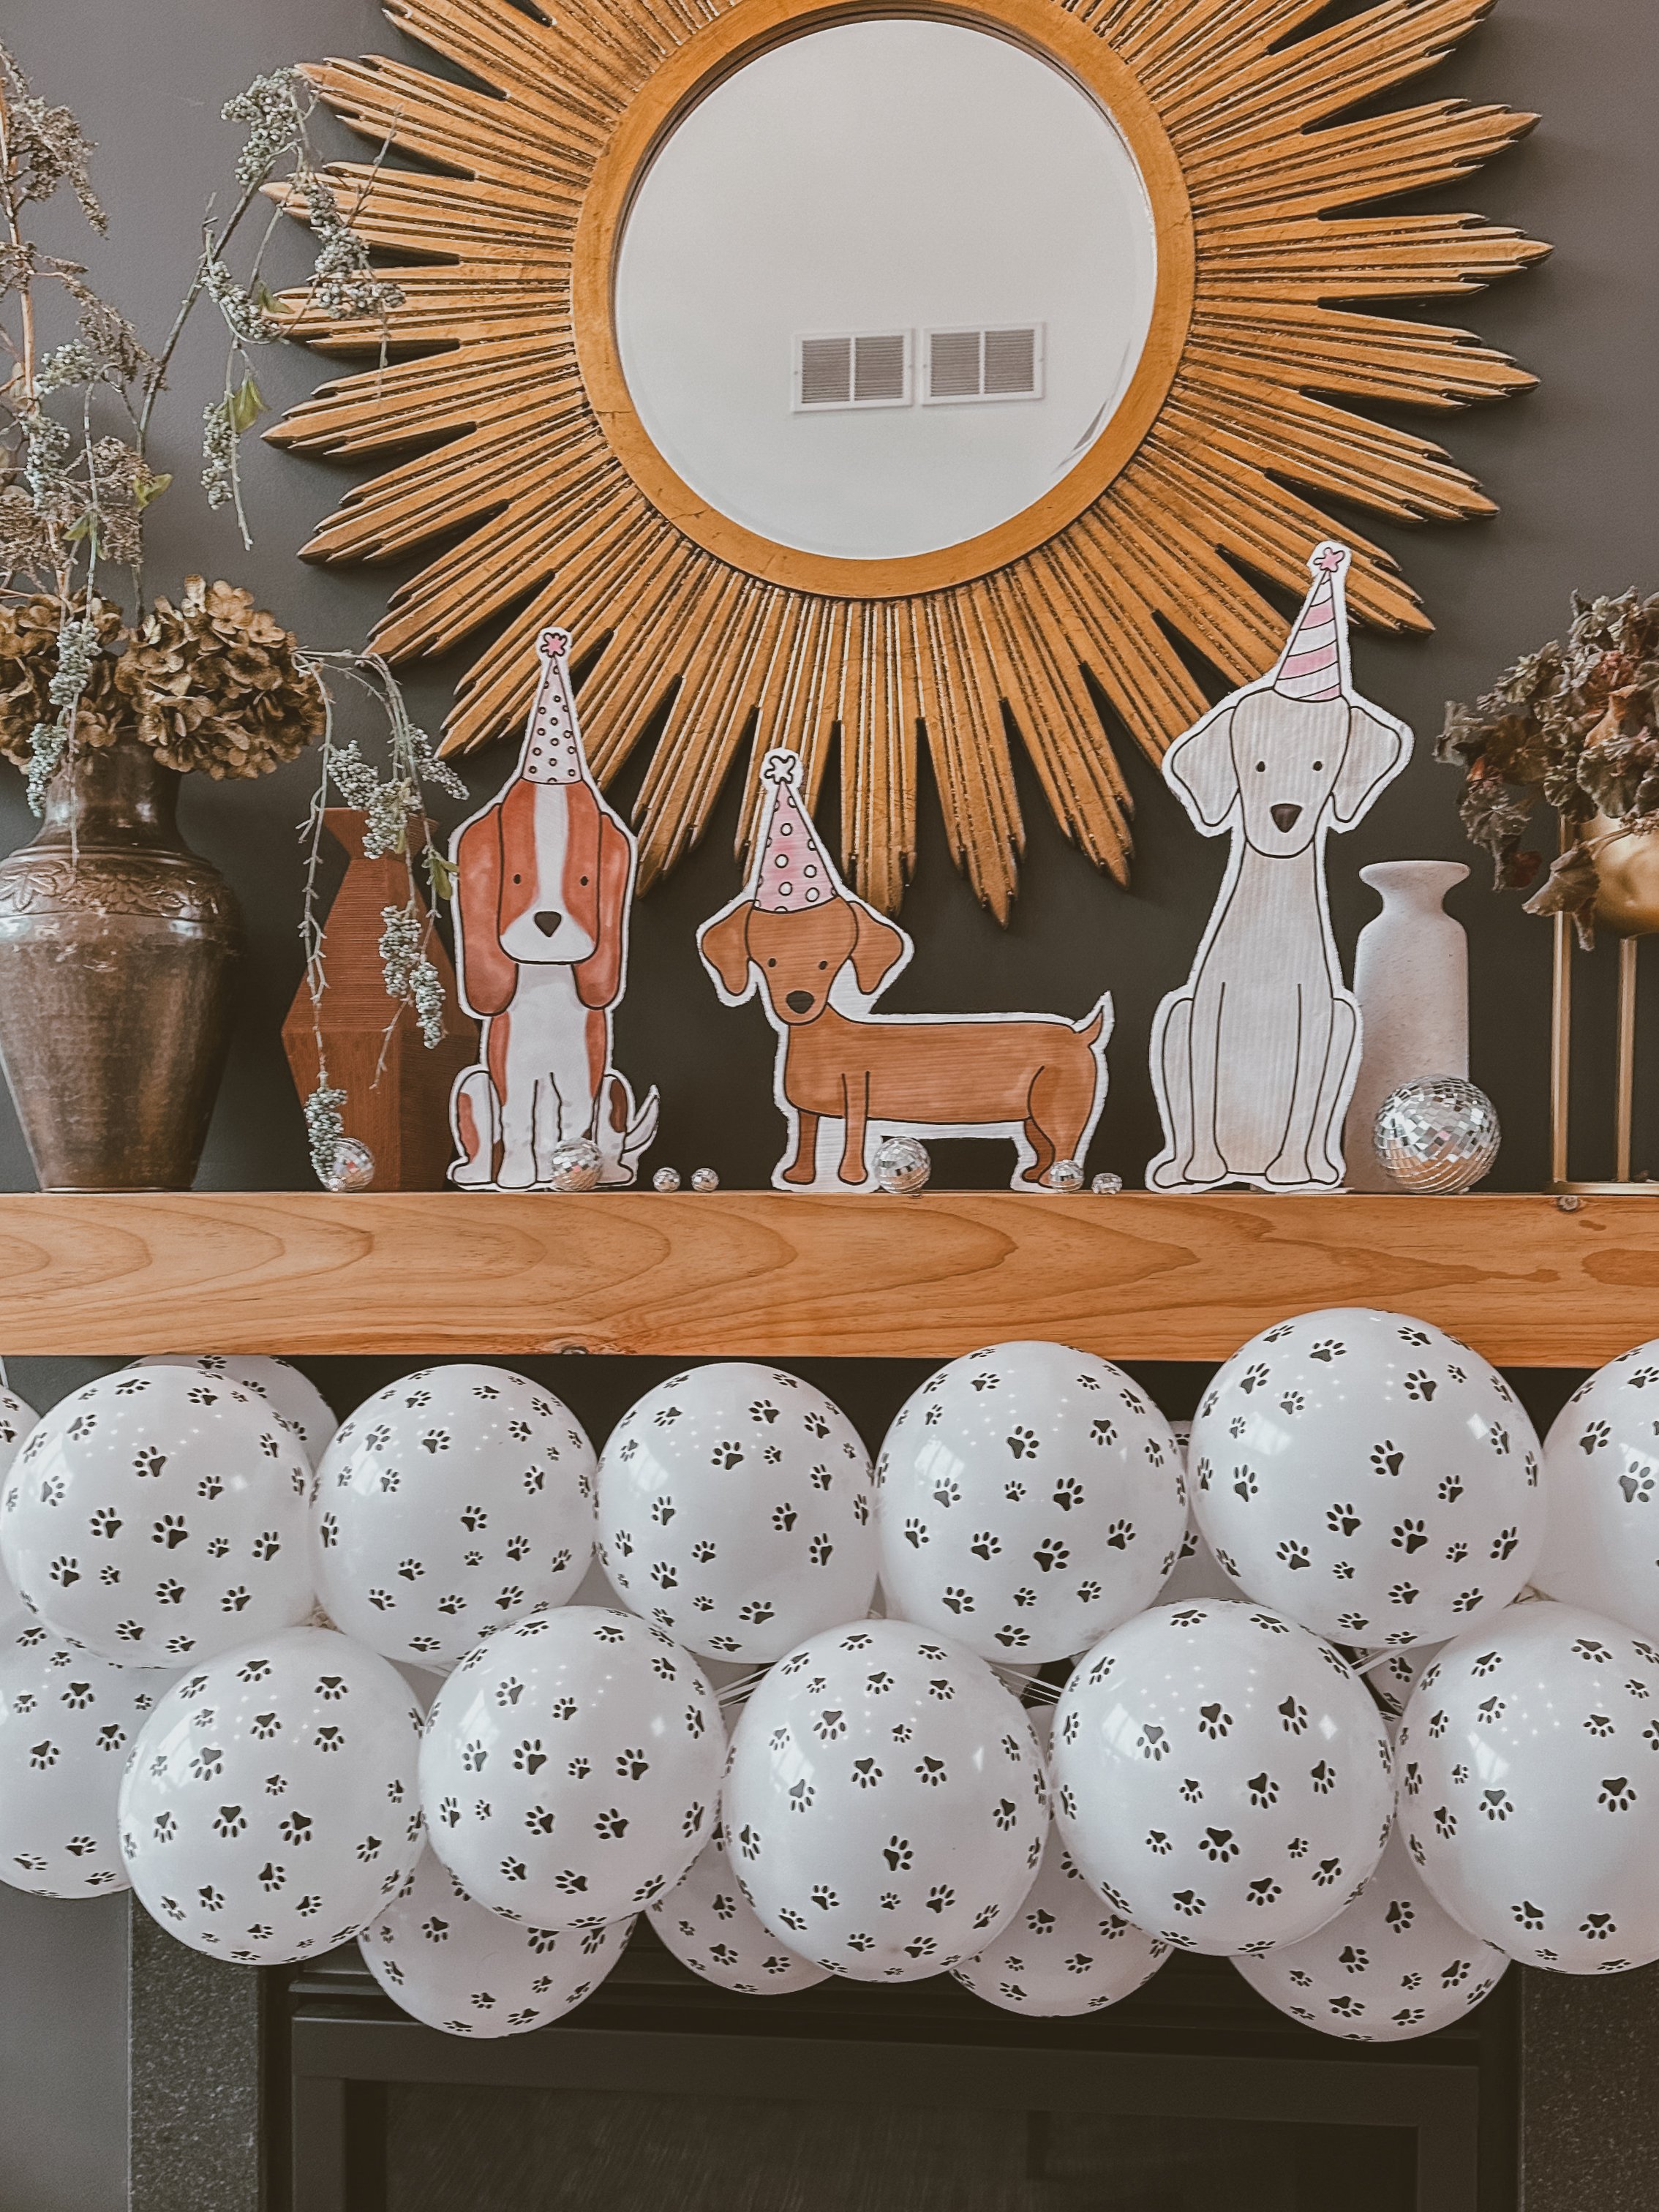
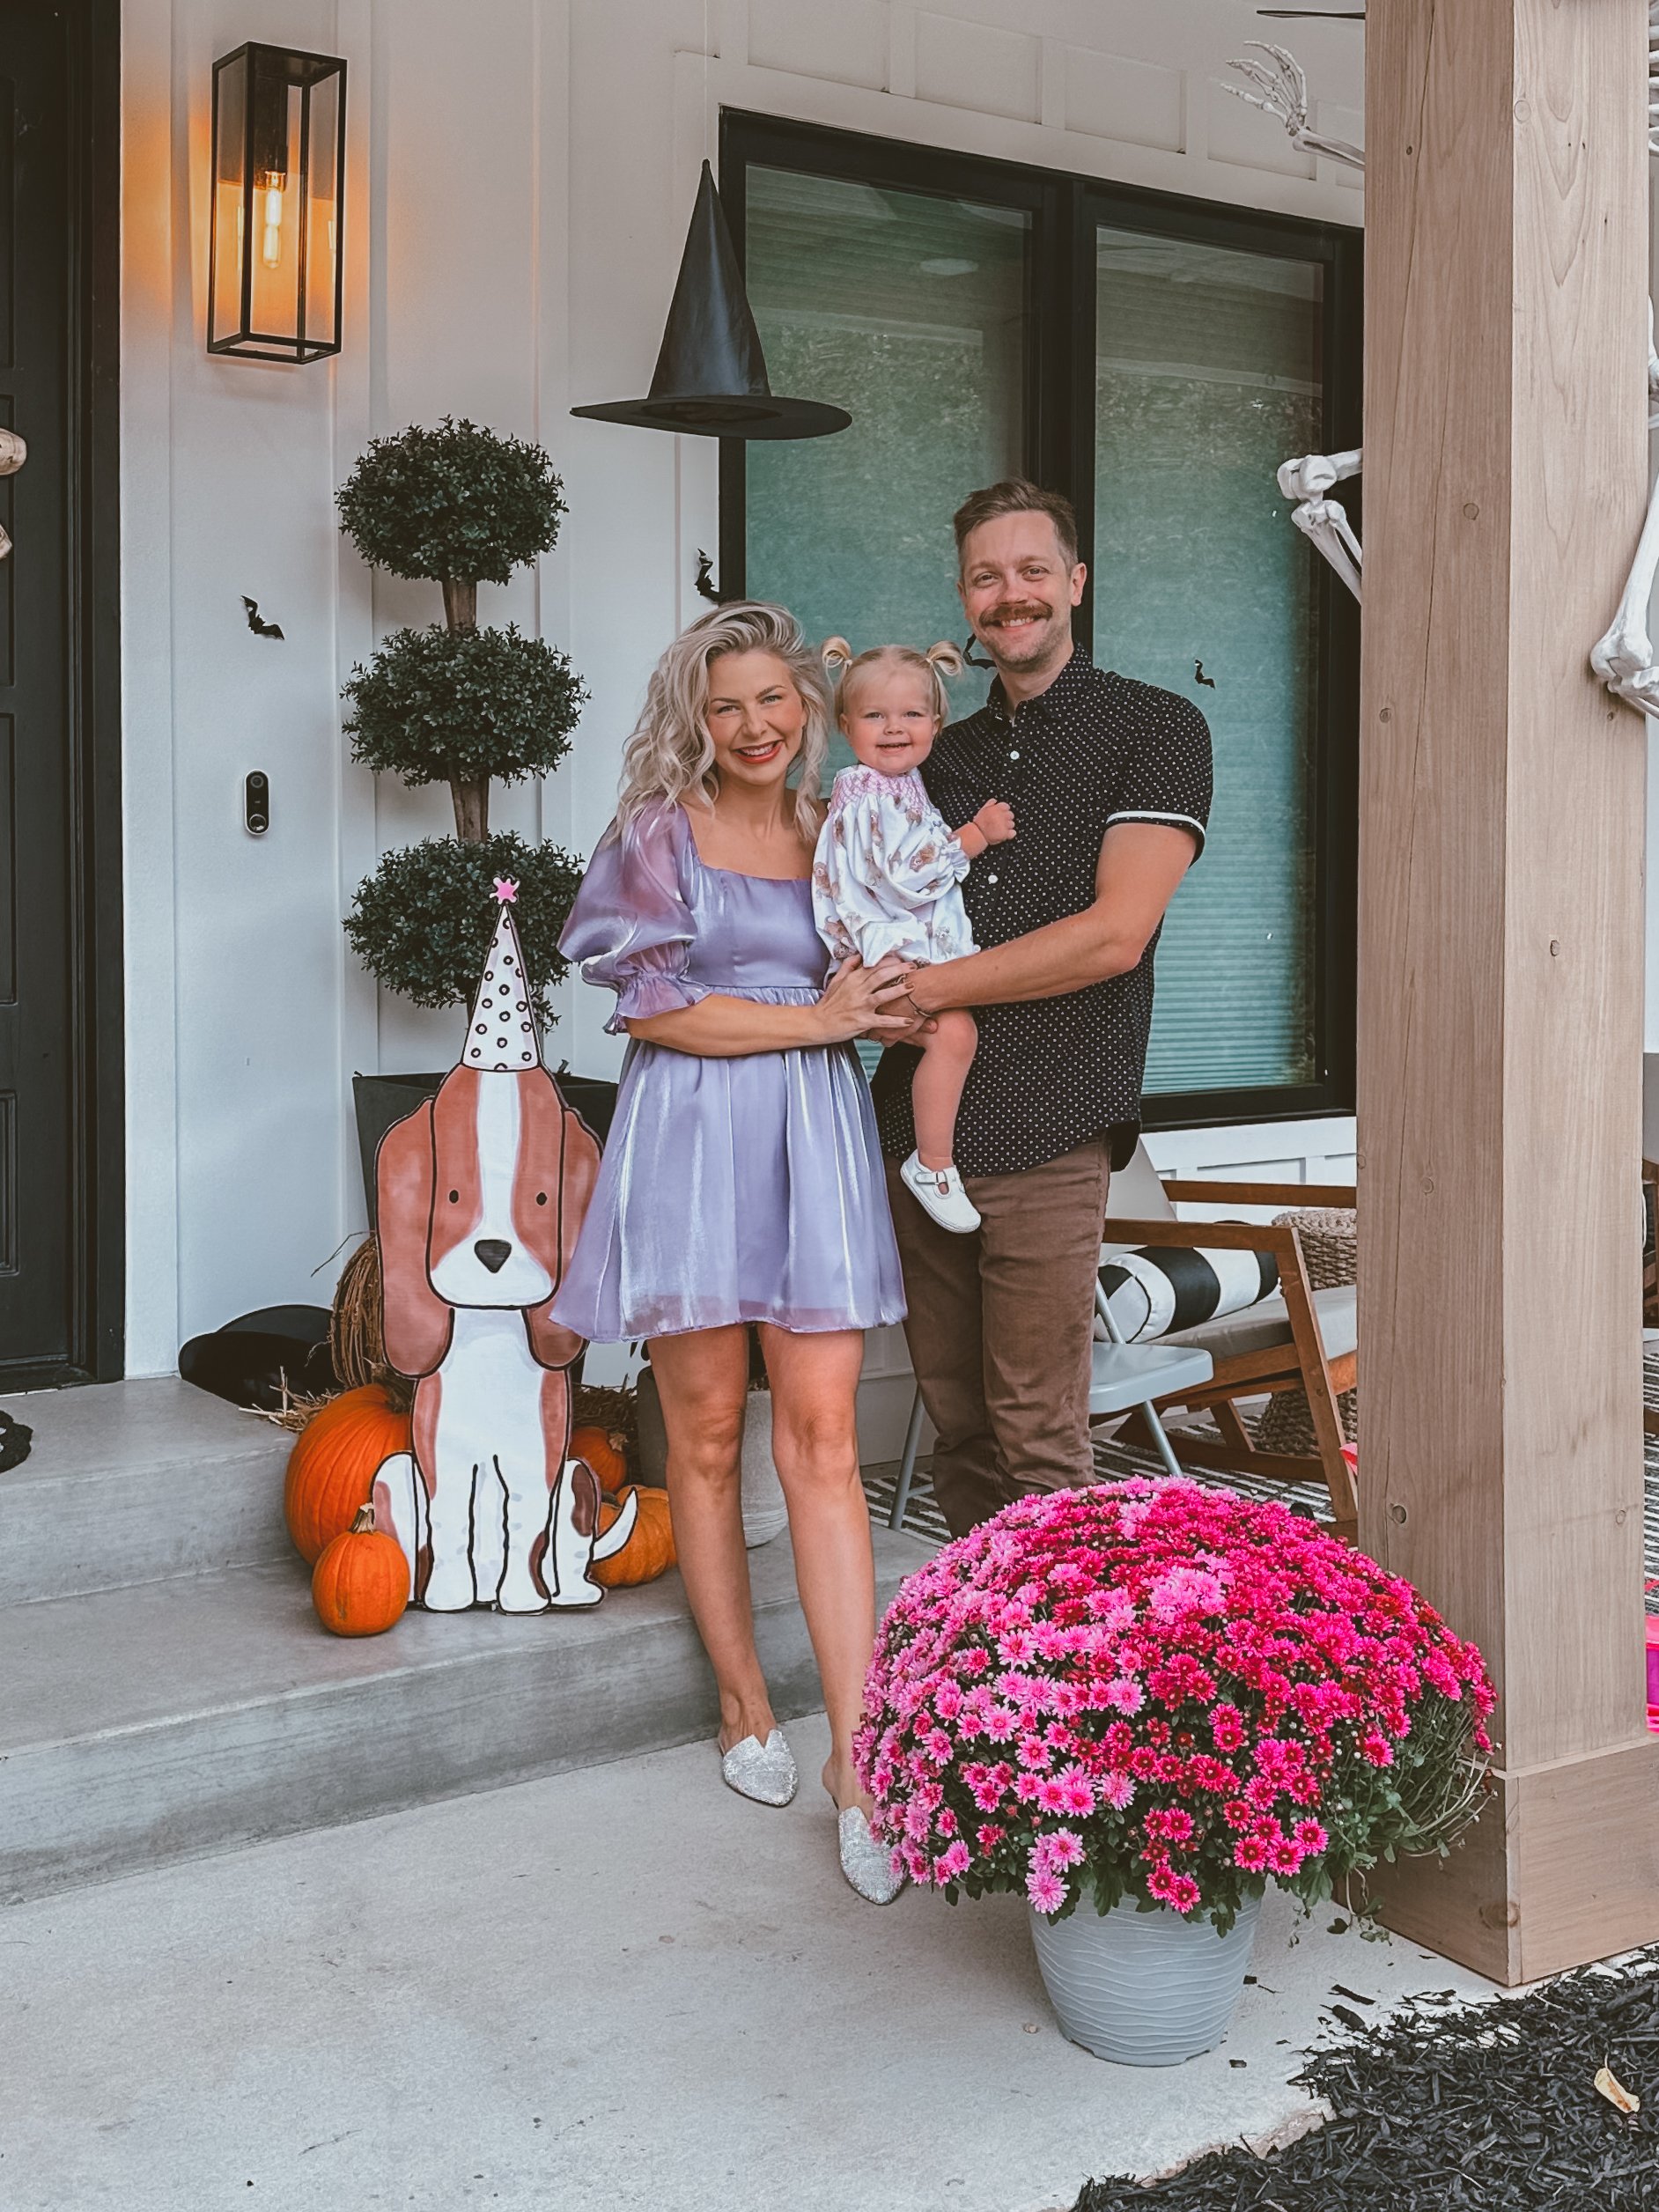
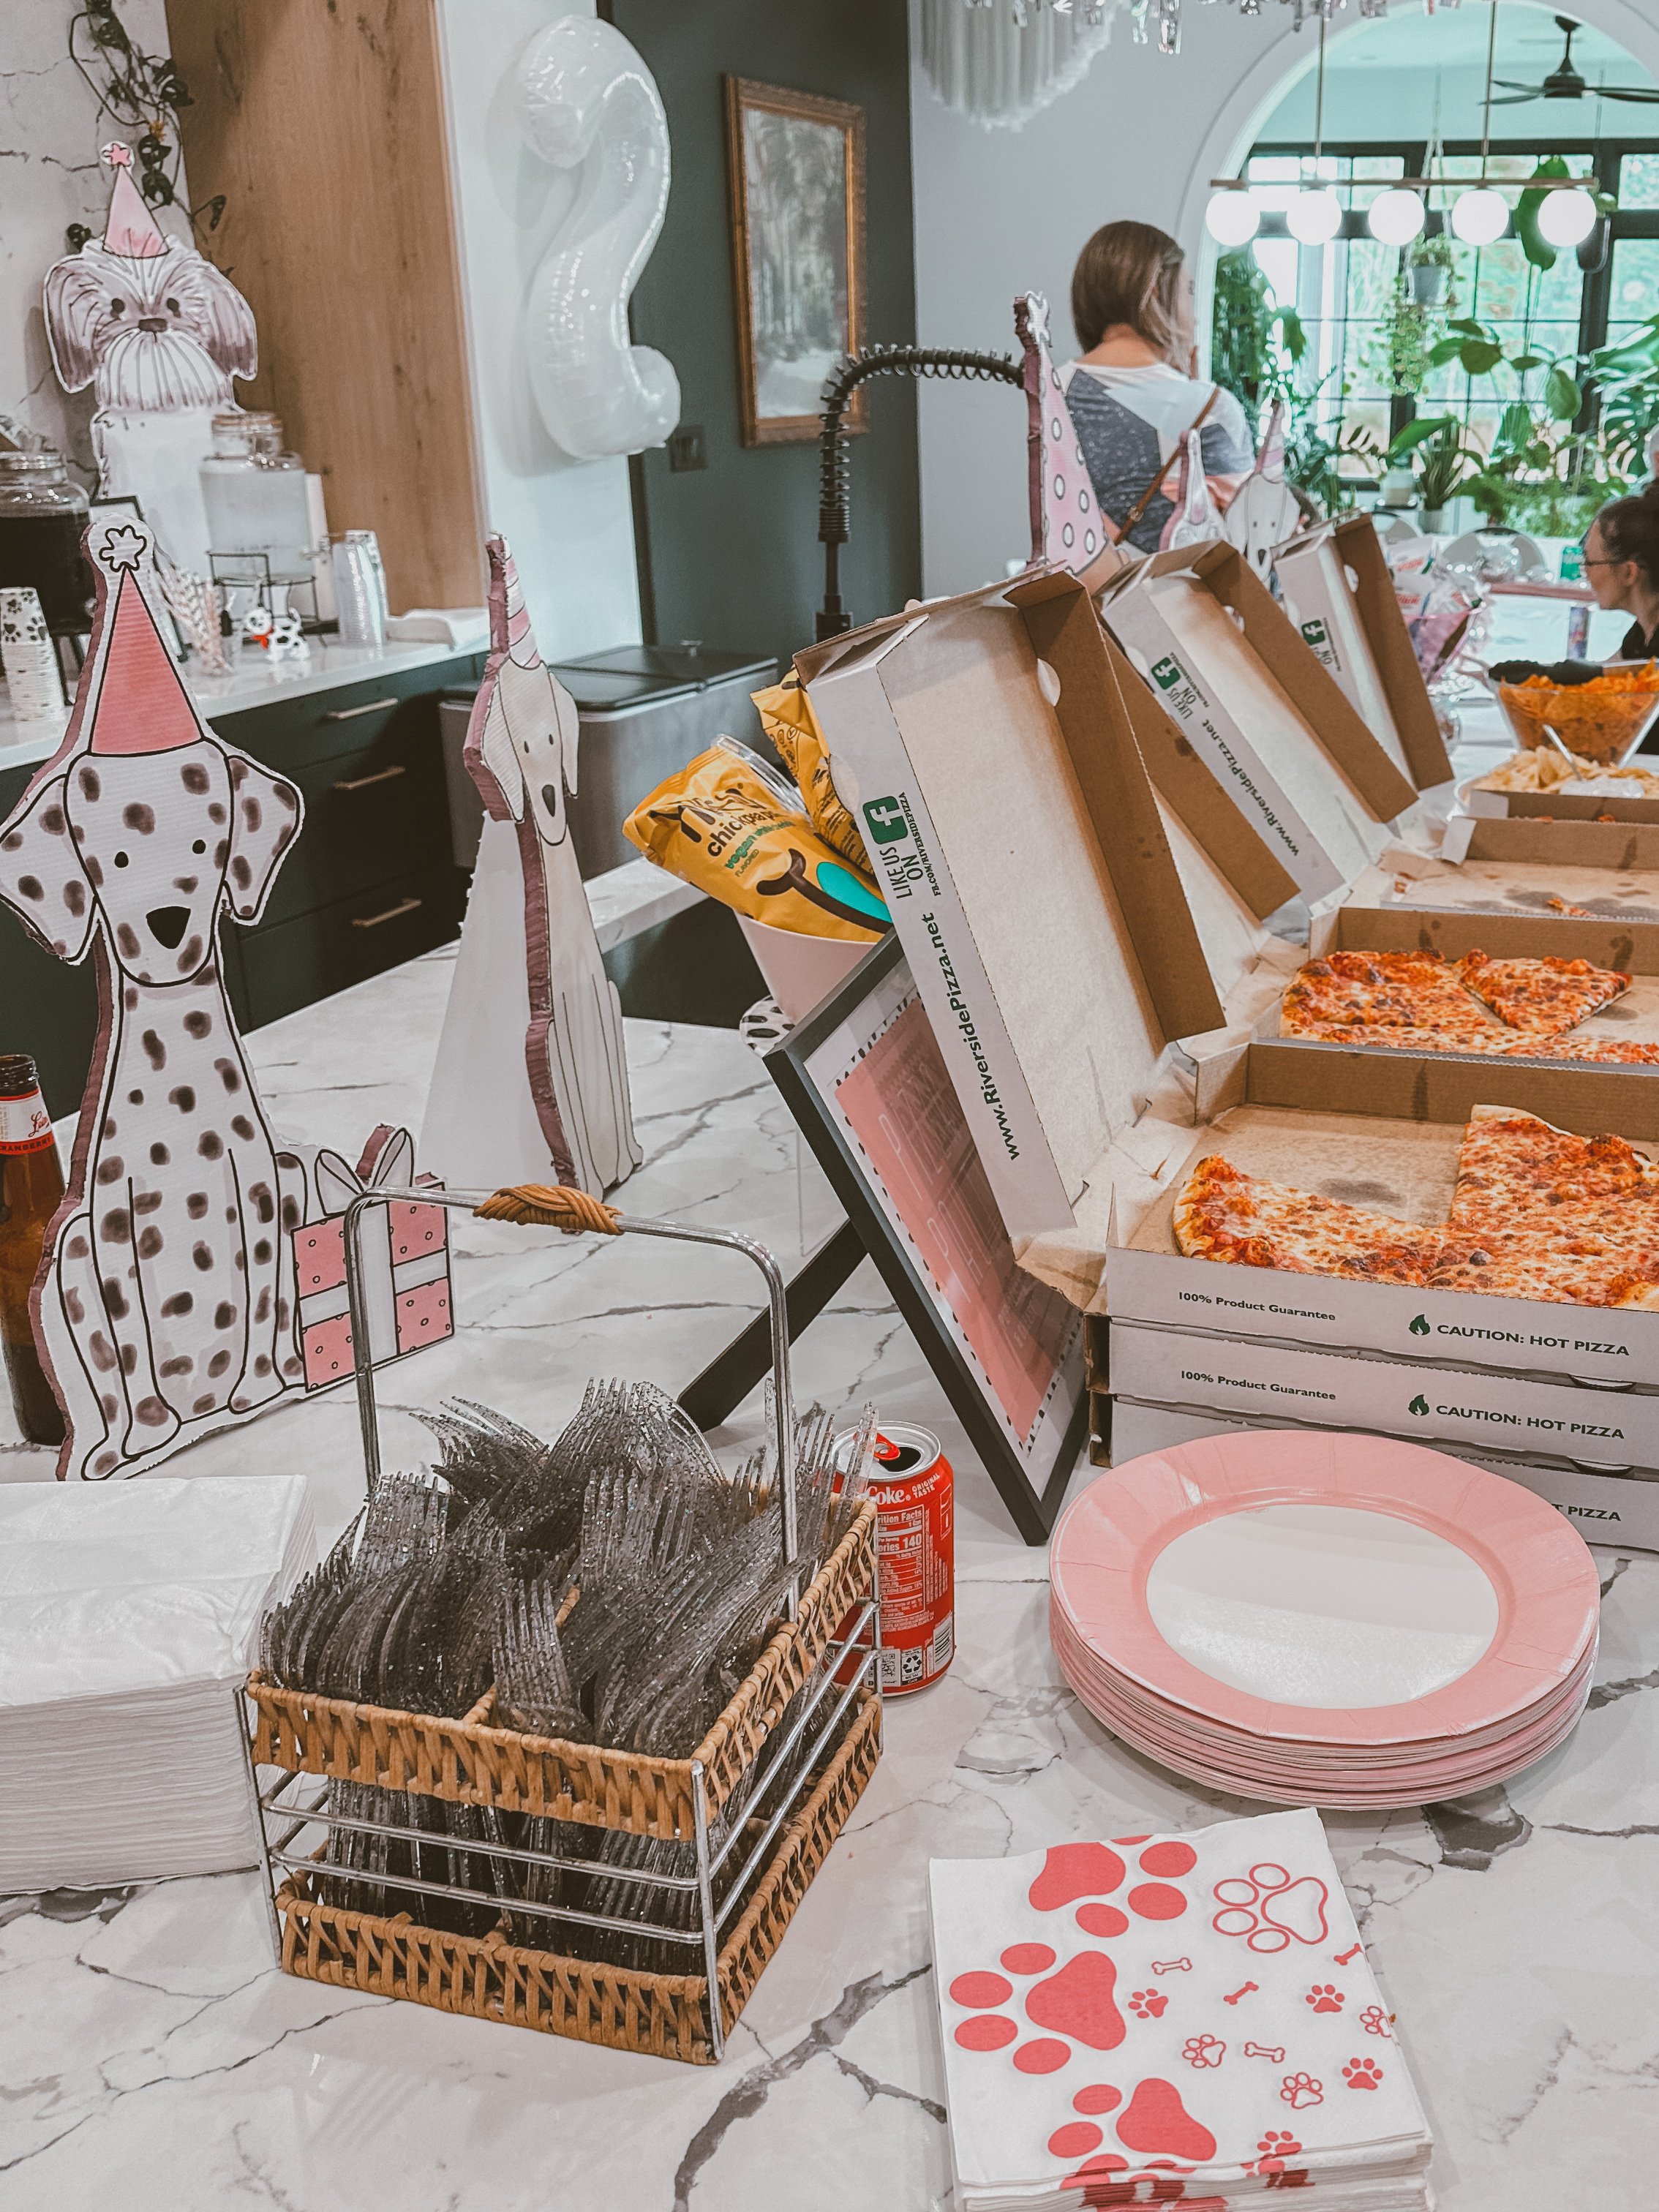
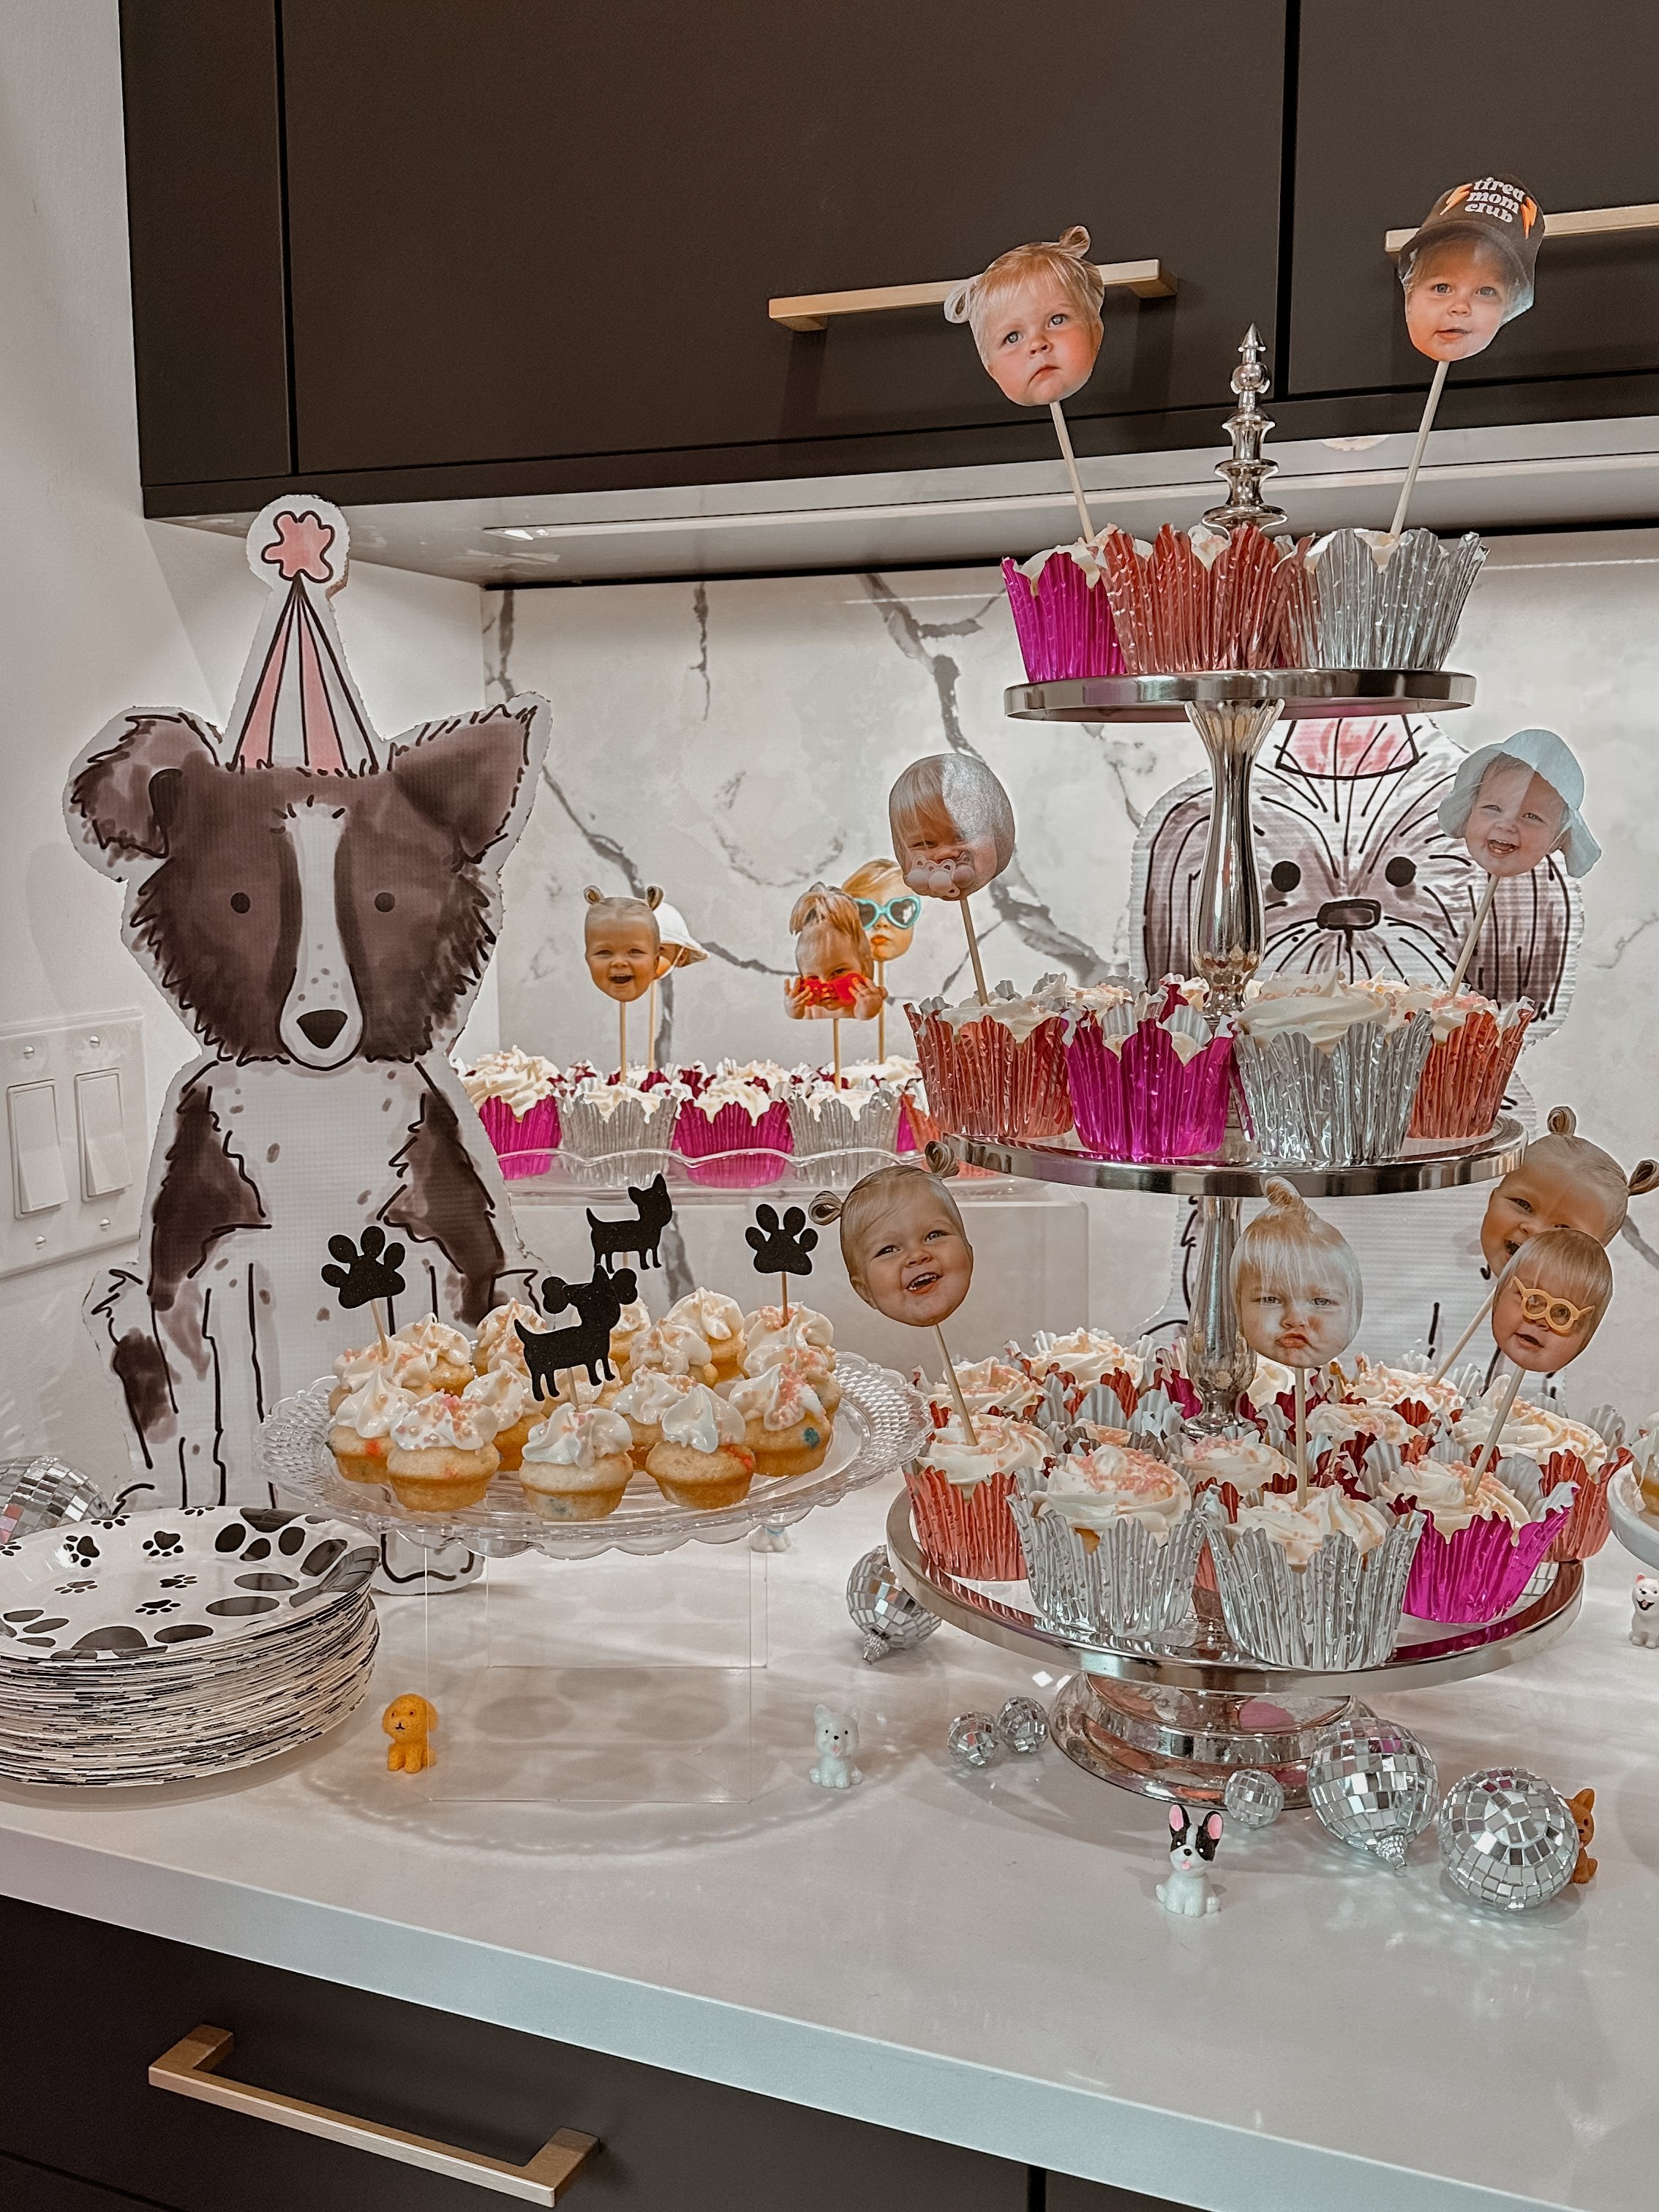
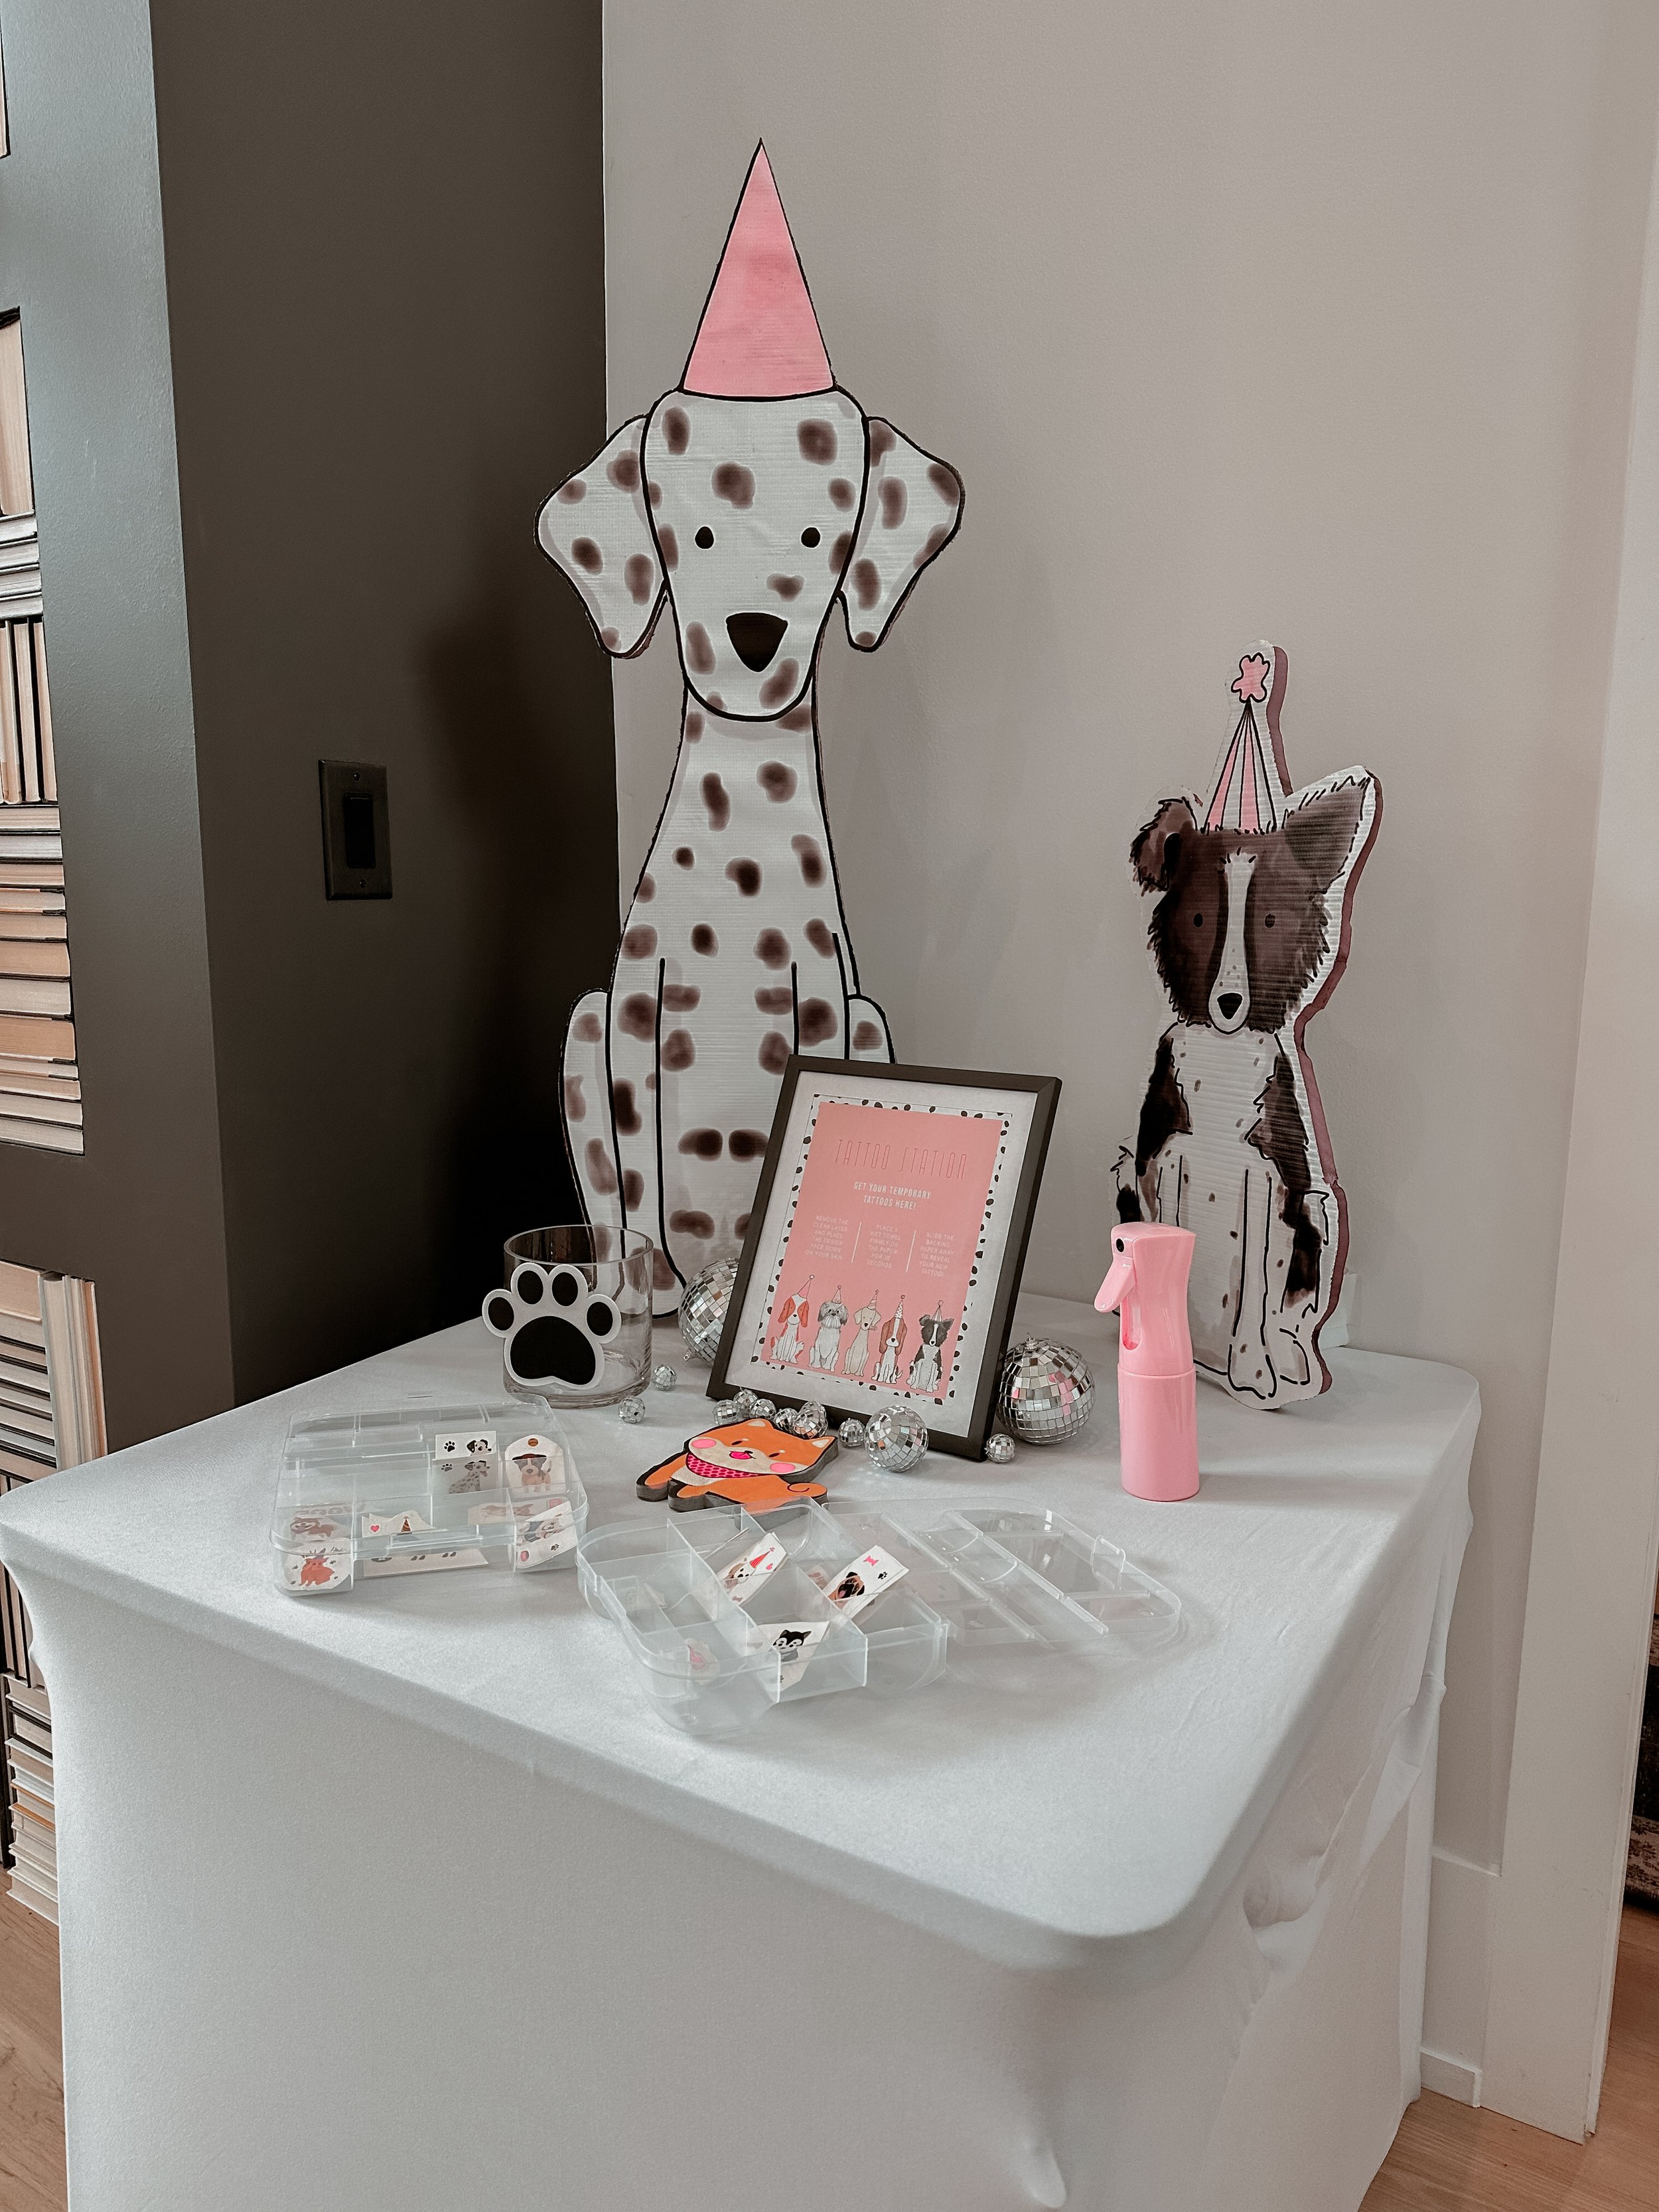
DIY dog cutouts

I custom made dog cut outs for my daughters 2nd Puppy Pawty! Here is the tutorial on how I did it.
SUPPLIES:
8’ x 8’ vinyl banner
2x pieces of 4’ x 8’ insulation board
Foam hot knife and replacement blades
regular white foam board from Dollar Tree
INSTRUCTIONS:
Purchased artwork from Etsy and changed the blue hats to pink in Photoshop. I’m sure for a small fee the seller could do this as well.
Created an 8’ x 8’ TIFF file in photoshop and arranged the dog graphics to fit as many as I needed and in various sizes. TIP: don’t make any small ones or anything that has a lot of detail. The larger ones were MUCH easier to cut out. The biggest dogs are roughly 40” x 18” and they were the easiest and the smaller dogs are roughly 10” x 20” and they were a pain.

3. Ordered an 8’ x 8’ step and repeat banner from https://www.stickersbanners.com/8x8-step-and-repeat.html with no hem, no grommets, no stand, and no carpet. I did local pickup because I live near one of their locations but they also ship.
4. Purchased (2) panels of insulation board that were 4’ x 8’ each and glued the banner to the insulation board using spray adhesive.

5. Cut out the dogs with a foam hot knife. You’ll need to wear a mask because these fumes are so intense and so toxic.


6. Attached a triangular piece of regular foam board from the Dollar Tree to the back of the dogs using white duct tape so that they stand upright on their own.


Here is how they looked at the party!